Reclaimed Teddy Bear
This recycled teddy bear project started from a beautiful but slightly damaged teddy bear that we bought at a craft store sidewalk sale in our neighborhood. The bear was a little dusty but nothing a little soap and water couldn’t remedy. The only thing wrong with this bear was that the eyes were ripped out and needed some kind of patches or replacement eyes. So I decided to start my next project with this bear because it had a nice color and the body joints were flexible. I was inspired to make a dress for the bear from an old deep pink polka-dot dress of mine that I had wanted to recycle for a future doll project. The bear was the perfect size and shape for this reclaimed fabric.
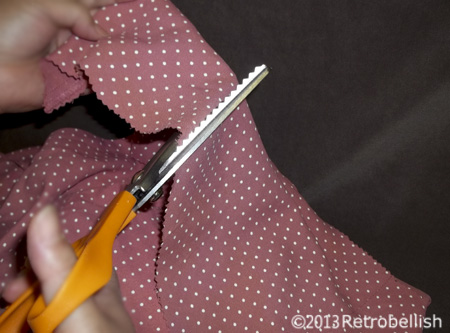
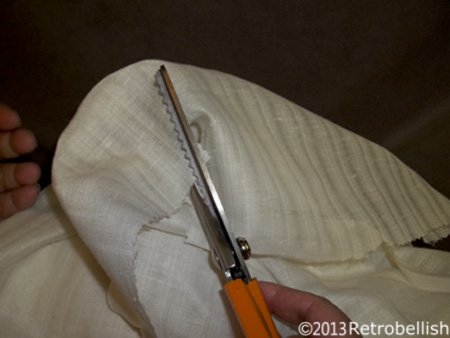
The bear washed nicely and after drying it thoroughly for several days, I laid the bear flat on craft paper that was larger than the bear. I took a pencil and traced an outline around the bear and marked the paper at the shoulders and legs (to determine the length of the dress). I then cut out the pattern, placed it against the different sections of the old dress to decide the best possible area to cut.
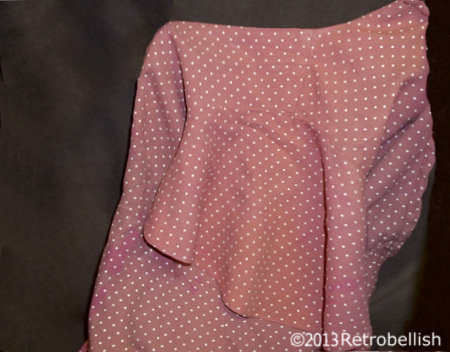
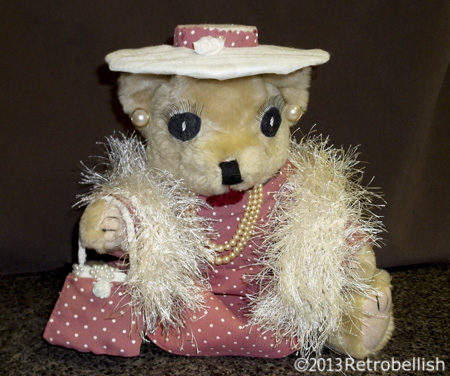
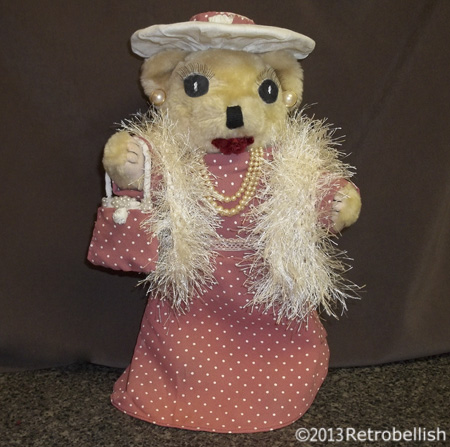
The old dress zipped on the center back and after placing the bear around different areas, I decided to try placing the actual bear inside the shoulder/sleeve section of the dress and found that the slight curve of the dress’s neck fit snugly around the curve of the bear’s neck and the dress’ floppy sleeve hung loosely around the bear’s wide belly like a skirt. There was plenty of fabric to fit all the way around the bear and more than enough dress fabric left over to make sleeves and a small purse. I designed a little purse and hat on paper.
I carefully cut the bear’s dress from the shoulder/neck section of the dress, made a few minor alterations and hand sewed the fabric to complete the back of the bear’s dress. I then traced out sleeve patterns, cut them out on the dress fabric and sewed the little sleeves to the bear’s dress. I then put the dress back on the bear and it fit very nicely. From my box of beads, I found many pearl beads I had left over from another project. I sewed a few pearl beads onto each sleeve cuff.
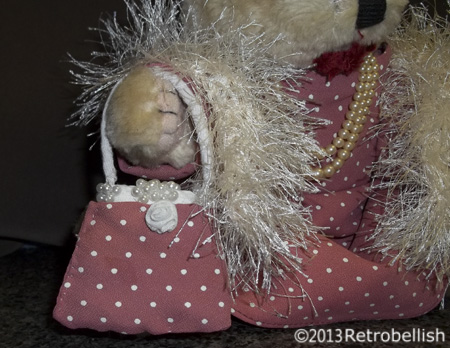
Next I traced the purse shape onto a thick piece of chip board and cut out more little cotton pieces from the cream colored blouse to cushion the little purse shape, then cut the dress fabric out for the little purse. For the purse strap, I cut a strip of cream colored cotton making sure to measure the strip length by wrapping it around the bear’s paw. I rolled up the strip and hand sewed the strap ends, one to each inside corner of the purse. I then covered the purse with the dress fabric and sewed the seam to one side of the purse. I placed a bit of cream colored fabric in the top center opening (and over the chip board insert) of the little purse and sewed more pearl beads onto the top and corner sections of the little purse.
Using matching tan colored thread, I sewed close each eye opening where the button eyes had been ripped out. In my remnant box of fabrics I used the same cream colored cotton blouse that I used to make purse parts. This particular blouse had a wide thick cotton band around the top and bottom edges. I cut out two circles on paper and held them up to the bear. After trial and error I found the perfect size eyes. I then traced the paper circles onto the blouse’s wide band and cut out two thick cotton circles. I sewed on the eyes and used a black dye fabric marker to color in the eyes. I then used white fabric paint to dot the center of each eye. The eyelashes I used were leftover from Halloween and I used fabric glue to affix them over each eye.
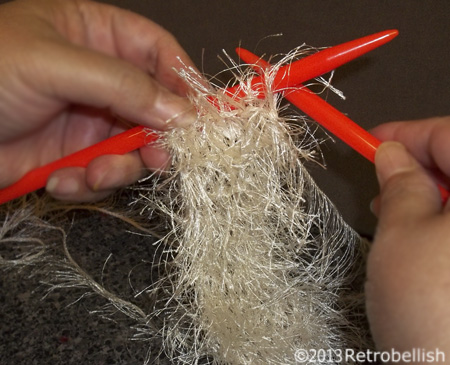
I found an old pearl necklace and pierced earrings, which I used to adorn the bear. I decided a cream colored shawl would look nice against the cream colored polka-dots, so I knitted a shawl using cream colored fun fur and size 11 knitting needles. I cast on 7 stitches and kept knitting until the shawl reached the length I liked on the bear. I also made the deep red lips on the bear by hand sewing a small length of deep red chenille yarn to the bear’s mouth area.

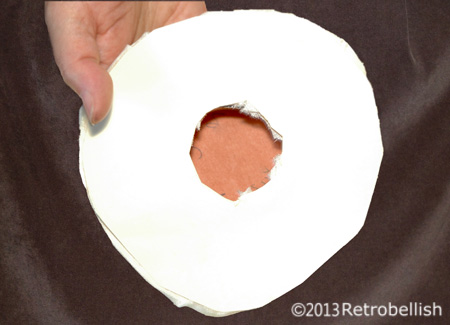
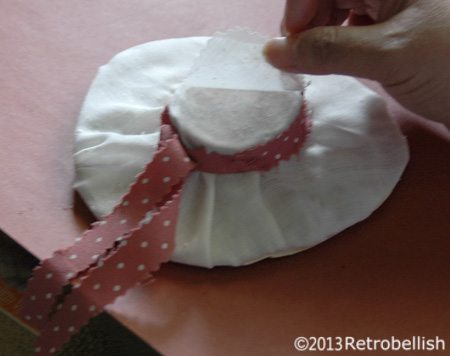
The hat was made from part of a recycled brown (thick cardboard) accordian pocket folder. Again, I measured and cut a big circle out from craft paper, put the cut paper circle on the bear’s head as this would measure the brim of the hat. I then made a couple of adjustments to the paper circle, traced it on cardboard and cut it out on the thicker cardboard. I cut the center of the circle in the center of the hat, rolled a smaller strip of the thick cardboard slightly inside the edge of the open hole (used glue along the edges), cut the a circle from the same chip board to complete the crown of the hat (also using glue to attach the circle to the crown). Next I used a remnant piece of cream colored fabric to cover the hat. I used a small strip of the polka-dot fabric to make a band around the rim of the hat.
Although I used this damaged bear to work on this project, you can always use one of your own bears or an old doll. Just remember to have fun creating your own piece of art.