Reclaimed Fabric Appliques
One of the fastest and easiest ways to give a plain piece of clothing a new look is the use of fabric appliques. I’ve been collecting appliques for decades. I’ve bought appliques now and then at good clearance sales, and have even reclaimed some from sweaters, jackets and dresses I’ve bought at garage sales or vintage shops. I tend to buy black appliques more than any other color, but I do have several appliques in white and beige.
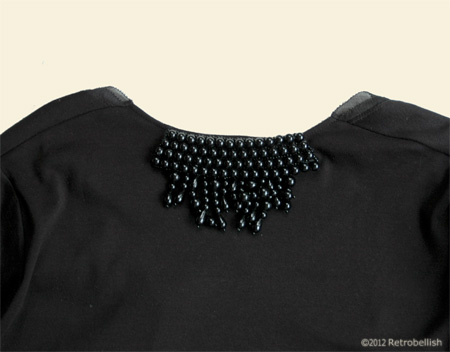
Occasionally, I’ve come across an unusual collar, like the large black beaded collar piece pictured here. This beaded collar is from a sweater I bought at a vintage shop. I sewed the beaded collar piece onto a black blouse I have and wear it with a black/brown print jacket. Appliques are very easy to sew and tack onto any piece of clothing. You can use a matching color thread and depending on the thickness of the fabric, use a heavy duty thread for heavy fabrics (like denim), or a lighter thread for delicate fabrics (like silk). Another great advantage of enhancing any article of clothing with an applique is that it’s not permanent, so if you should ever find a more beautiful applique, you can always remove it and sew on the new one in its place.
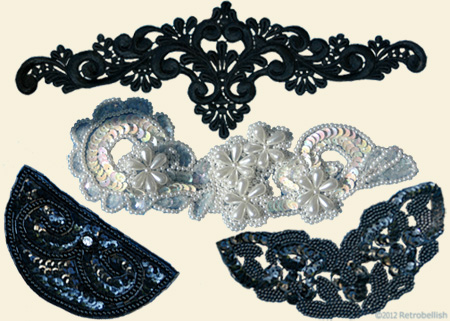
Sometimes you may come across a damaged dress or blouse that is very ornate with beautiful features, but it’s bottom edge is ripped or mangled. Well you can still reclaim the dress or what have you by cutting out the ornate applique features and using those cut pieces as appliques on your own article of clothing. Appliques are easy to sew onto any blouse, sweater, dress, jacket or even a purse because they are already affixed to a sturdy mesh backing. Most appliques are so beautiful that you can also use them in an art project. So the uses for these appliques are limited only to your imagination.
Plastic Bottle Trash Art Flowers
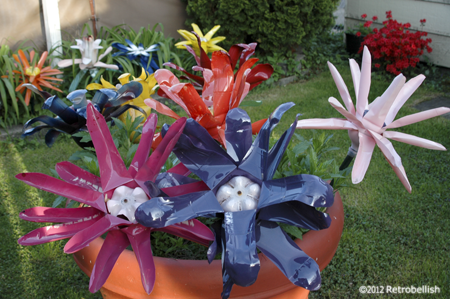
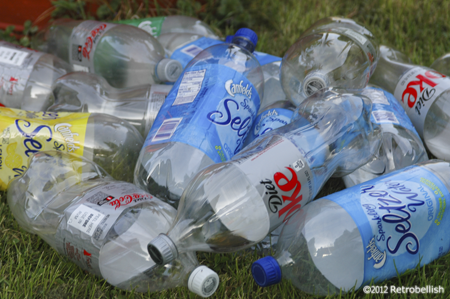
One of the most important elements of crafting for us is to recycle as much as we can. The house is a great place to start recycling projects because it is easy to see what objects we tend to throw out the most in our trash. Whether it’s plastic, paper, glass or metal, it is a challenge to find creative ways to incorporate the trash materials into our arts and crafts. One way we thought of adding color to our yard all year round here in Chicago was to make some kind of art with plastic pieces. And what better medium to reclaim than 50 plastic soda bottles for flowers we had in mind. We started to cut the plastic bottles in different strip cuts to imitate flower pedals.
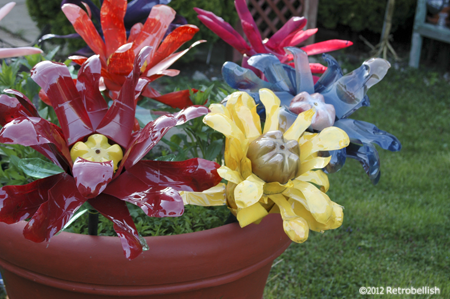
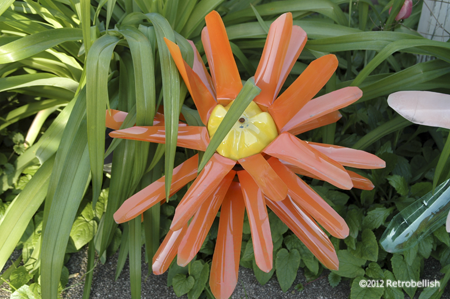
After we cut the pedals in different dimensions to create different style flower pedals, we painted the back of the pedals with vibrant enamel colors. Next, we let them dry and took an 18 inch long dowel rod that we had recycled from old VHS racks we had taken apart. We hand painted the dowel rods with a green indoor- outdoor acrylic paint. When we cut out the initial pedals, we cut out the bottom of the bottles all the way around and these are what make the center of each flower. We next painted the flower centers in complimentary colors to the flower colors. We then placed the painted bottom (used as the center of the flower) over one end of the dowel rod and drilled a screw right in the middle of the center and into the dowel rod.
This creates the middle center of the flower. Next we took three of the bottles we had painted and flipped them upwards. We then took a green bottle to create the leaves and placed this first on the dowel rod. Next we placed one of the flower pedals and pushed it up tightly onto the dowel rod. Then we drilled a screw under the edge of the last bottle/flower pedals to hold them in place. You can rotate each row of bottles/pedals to align the flower pedals to look any way that you’d like. The flower pedals can be painted in any color combination that you’d like. We left our flowers outside throughout the entire winter and they looked beautiful against the white snow. These recycled plastic bottle flowers allow you to have a beautiful colorful garden all year round.
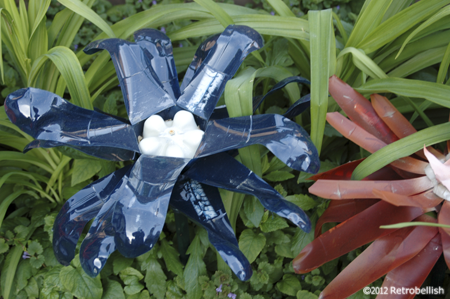
Not only is recycling great for our environment, but it is also a fun way to craft with family and friends.
Reclaimed Wood Abstract Doll
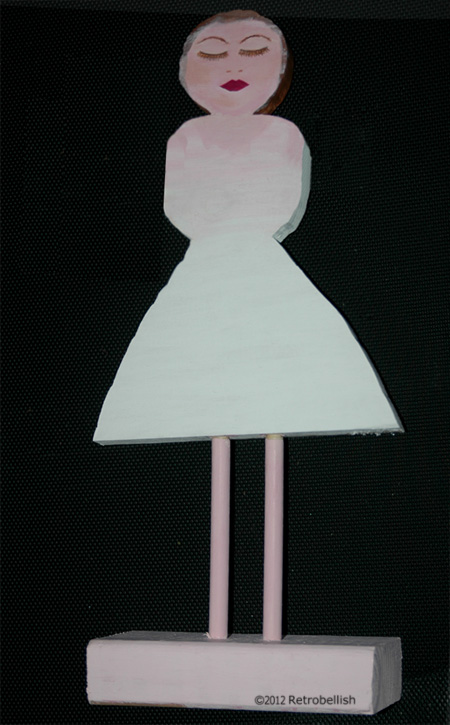
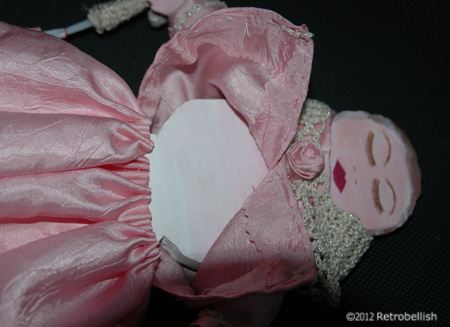
I’ve always wanted to try making an abstract doll of some kind, but had no idea where to even start. Four months ago, I experimented and drew a simple shape on a piece of scrap wood I found in our basement and asked my husband to cut out the drawn shape. Although the shape was simple, it was also a bit crude as the shape had a round head (no neck), a squarish torso and a bell shaped skirt bottom for the lower body. The doll measures 17 inches tall (including the base on which she is perched) and 11-1/2 inches wide (at its widest point of the wood skirt/body).
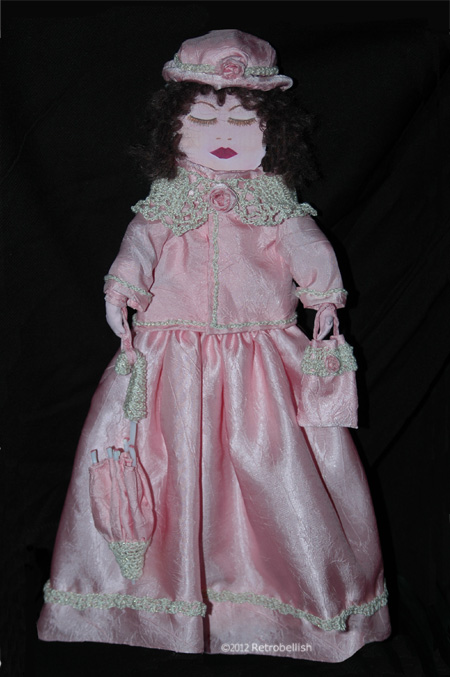
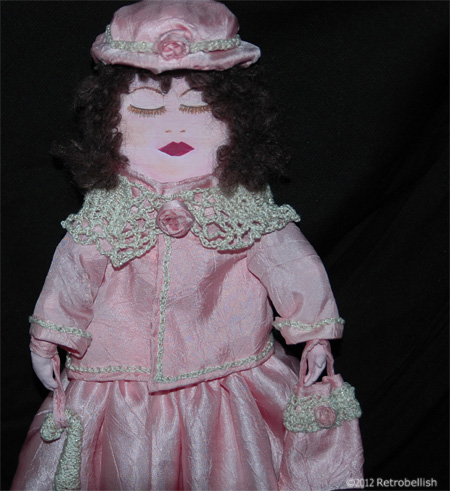
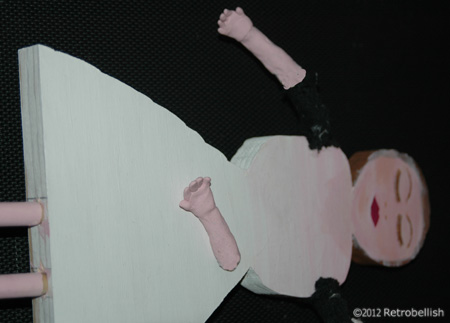
I thought I’d make the doll’s arms with wire and envisioned bending her wired arms, attaching a small bouquet of flowers to her hands and her (wire arms) holding them up near her face as if to smell them. That’s when I thought of painting her face with closed eyes as if she was taking in the fragrance of the flowers. I did paint the doll’s face with her eyes closed, but the plan to use wire arms did not work out, so I ended up leaving the doll’s face painted with her eyes closed.
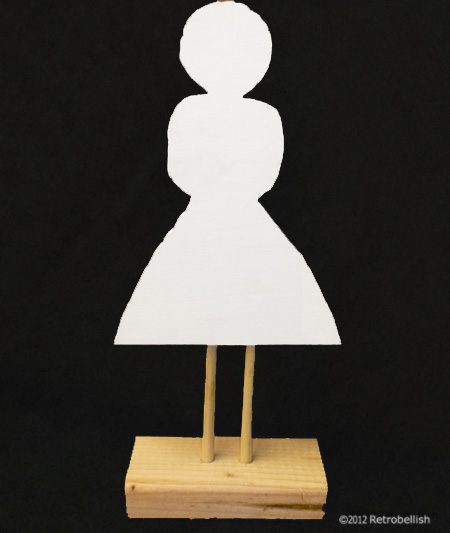
I wanted to make some kind of outfit for the doll using as much of my reclaimed fabrics as possible. Looking through my old fabrics, I found a very pretty light pink (polyester) fabric that was perfect because I had so much of this fabric that if I made any mistakes on any part of the outfit, I could start all over again without worries of running out of fabric.
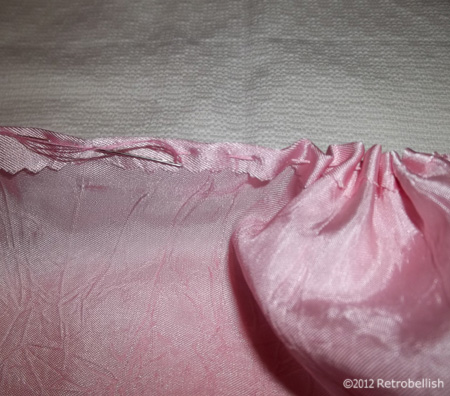
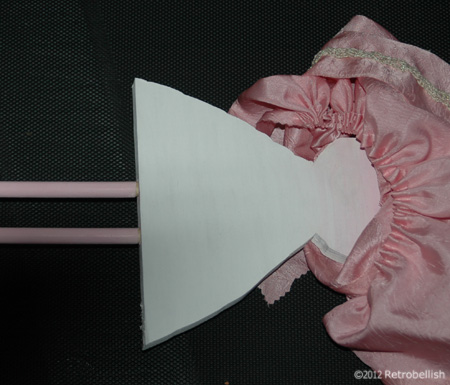
I held the fabric up to the doll’s waist, pinned the fabric a half inch longer for the hem allowance at both ends, cut the fabric and held the fabric against the doll, roughly gathering it to get an idea of how full/wide to make the full length skirt. I tripled the width and then cut the fabric. I made a simple running stitch hem at the waistline and ran a bigger basting stitch at the top edge of the waistline so I could pull the fabric, gathering it at the waist. The skirt began to fully gather and take a beautiful shape. Once the fabric was more or less evenly gathered around the waist, I knotted the thread to hold that tension. For a closure at the waist I sewed a very small snap (base), then sewed the other snap (top half) to the other end at the waist. I left a two inch opening at the waist below the snap closure, hand sewed a quarter inch hem straight down to seal both open fabric panels at the back of the skirt and then sewed them together to complete the skirt. I ironed the entire skirt and surprisingly the fabric turned out very nice and full ,considering I did not use a petticoat underneath.
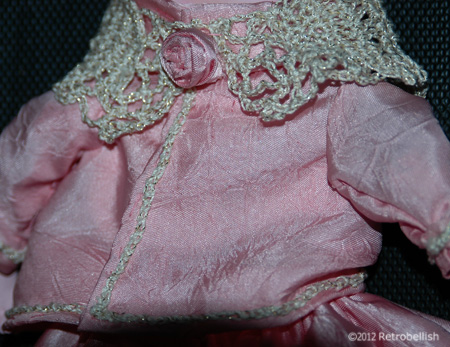
Because the skirt was so plain, I decided to crochet a pretty beige trim about an inch from the bottom edge of the skirt and continued crocheting all the way around. I used a 00 size crochet needle and crocheted the trim with three double-crochet stitches. I pinned the crochet trim to the skirt as I continued to crochet the trim all the way around the base of the skirt. I removed one pin at a time and hand sewed the trim to the skirt with matching beige thread.
I ended up making the doll arms from two square pieces I cut from my old black sweatshirt. I rolled up the squares, pulling on the stretchy fabric and hand sewing them into a rough arm shape. Since the doll had no shoulders, I hot glued (and tacked down) each of the arms to an approximate place where they looked best on either side of doll’s torso. I made the little hands from polymer clay and pierced a hole in the top part of the clay wrists before baking them so that I could later sew (attach) them onto the (sweatshirt) arms.
The jacket was made from two squares of the same pink fabric. I measured the two squares by eye, cut and then sewed them together, cutting the front square down the middle so the jacket would be open in front. I left two holes on either side near the top of the squares so I could sew on sleeves. The sleeves were also squarish in shape and very loosely made so that I could put the doll arms into the sleeves. I later crocheted the shawl around the doll to make it look like she had shoulders and to cover the loose fitting clothes.
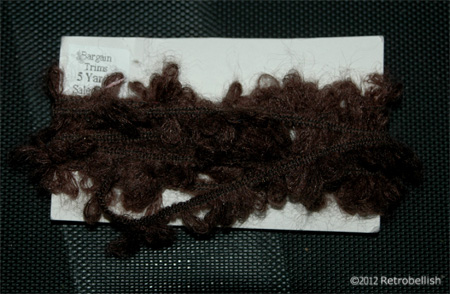
For the doll hair, I used a roll of brown woolly trim that I found in my yarn box. I cut six 4″ long pieces, and with needle and matching brown thread loosely sewed the six pieces together to form a head cover that resembled hair. The furry wool is so wild, it really looked like hair, and I painted the doll’s wood head in a matching brown color so you can’t really notice the open spaces throughout the sewed hair piece.
The Accessories
The hat is made from a scrap piece of thick interfacing leftover from a purse project. I had several jar lids, and placed them on the doll’s head to find the right hat width for the doll’s head. With a pencil, I traced around the lid onto the interfacing, cut the round shape and then by eye, another round hole in the center to rest on the doll’s head. For the crown, I cut a rectangular strip of interfacing and hot glued it from one edge of the center hole to the other edge of the hole. I covered the entire hat with the same pink fabric, and hot glued it to the interfacing. I also crocheted a trim for the hat (sewed it onto the hat) and embellished the hat with a little rosette (from the same pink fabric) and hot glued the rosette to the center front of the hat.
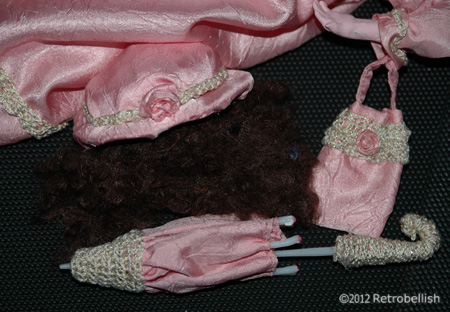
The little purse measures 1-3/4″ wide by 2″ long and is made of the same pink fabric folded into a little rectangle and then hand sewn to shape. I also cut and sewed a small narrow piece of the same pink fabric for a tiny purse strap. Later, I also crocheted a matching trim near the top of the purse and added a tiny rosette.
The parasol measures 7″ long by 2″ wide and is made from plastic skewers that I had saved from a gift fruit arrangement. I used one skewer as the main center post, tightly wrapped a rubberband (wound around many times) near the skewer bottom end, took six more skewers and tucked them into one strand of the wound rubber band, spacing them evenly around the main center skewer. I was surprised that this worked and the six skewers remained in place evenly around the center skewer. Using wire cutters, I trimmed the six skewers shorter than the main center skewer. I then measured and wrapped the same pink fabric around the length of the skewers and added four inches to the total fabric width. I then hot glued the bottom (folded) edge of the pink fabric to the skewers one at a time making sure to pull extra fabric in between the skewers so it would mimic the look of a semi-folded umbrella. I repeated the same process to the top end of the parasol.
To make the parasol handle, I used three plastic hook-shaped pieces (saved from the top of three packets of socks) and hot glued them together. I also hot glued the main skewer to the hook handle. I later wrapped the handle with the crochet thread to make it look like one uniform piece and repeated that process around the bottom end of the parasol.
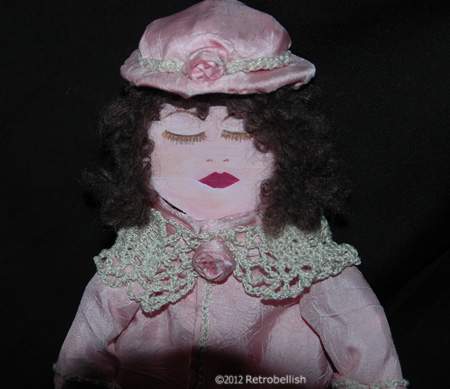
Making this doll was a very challenging experience, but very rewarding upon completing all of the accessories. And the most fun part of making this doll was that there were no rules because this was an abstract doll that I made from scrap wood and leftover reclaimed materials.
Scrap Wood Flower Box
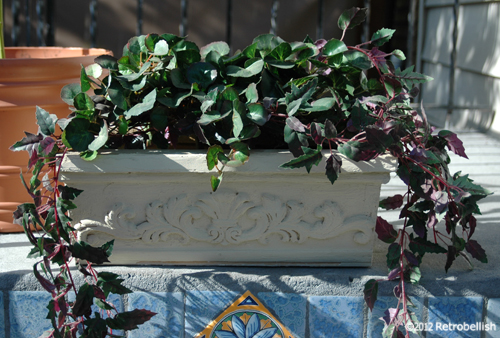
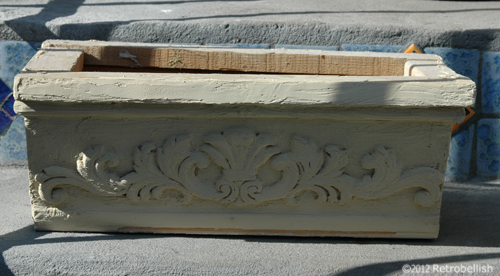
This wood flower box started out as pieces of scrap wood that we had left over after one of our rehab projects. I originally wanted save the scrap wood pieces to paint folk art farm scenes. I painted on the smaller scrap wood pieces, which at the time I was selling at our local craft shows. My husband reused some of the drywall screws that were left over to put the box together. He also used some pieces of scrap moldings and an old wood applique we had reclaimed. We then spread drywall compound on the outside of the box with an old dried out paint brush to give it a rustic look we were looking for and once the drywall compound thoroughly dried, we painted the box with a cream colored latex paint. I added some silk vines I had lying around in my basement, and the final project turned out exceptionally well. Although I decided to use silk vines in mine, if one wanted to use a real plant, you could use any plastic bag or liner in the box and drill two holes at the bottom for drainage. So don’t hesitate to play around with scrap wood pieces. See what you can create and just have fun.
