Upcycled Blue and White Floral Jacket
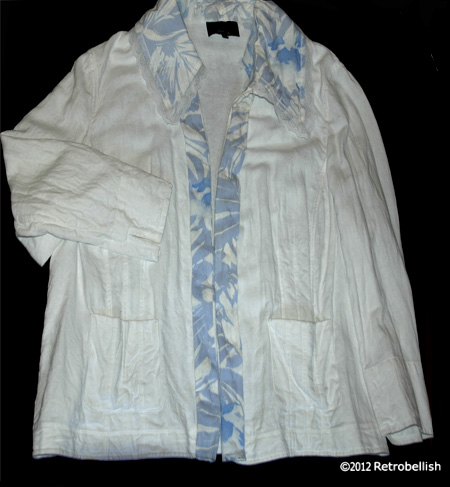
This project started out with two thrift store finds. One was a beautiful blue and white floral cotton dress with a great looking lace edged collar. The other was a plain white cotton jacket. The idea I had was to take the collar from the dress (since it was a size that didn’t fit me), and add it to the jacket. The beautiful floral pattern dress had a lot of potential and lent itself to many other projects because of the extra full fabric bottom.
I started out by carefully cutting out the collar from the dress and leaving about an inch of extra fabric all the way around the collar edge. This would help me position the collar more evenly with the jacket collar and have extra fabric on which to sew it more securely to the jacket. I then started pinning the dress collar to the jacket neckline area and decided to cut away some of the jacket collar to remove bulk. Once the collar was evenly positioned I started pinning it to the jacket so I could begin to sew the two together. This worked out well and looked very nice when completed.
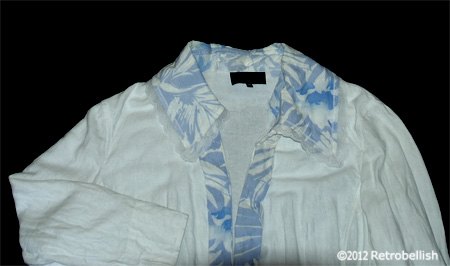
Next, I measured the length of the full skirt-part of the dress (from the waist to the bottom edge) and then measured the jacket from under the left front collar center opening (down the center) to the bottom edge. I then repeated the same process on the right side center jacket opening. I thought that a two inch wide strip of floral fabric would look good adorning each open edge of the jacket. I cut a six inch strip from the dress doing my best (by eye) to pick the same floral pattern on the dress for each side of the jacket. I folded each floral strip (by eye) to a width that looked nicely balanced when placed on the jacket edge, and then I pinned it down. Then I measured the strip and ironed it, which made it so much easier to make the second matching strip for the other jacket edge. I loved how the blue and white floral fabric strips looked on the jacket. It turned out rather well and can be worn with a pair of white shorts, pants, light blue shorts or even jeans.
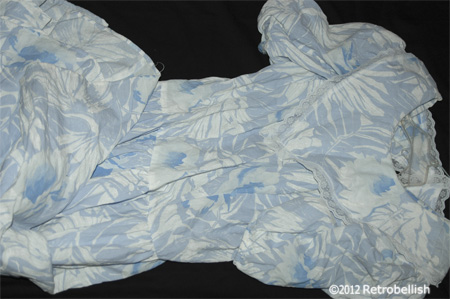
Because I have so much of the blue and white floral fabric left over, I think I will try making a camisole to wear with the jacket. I might even take one of my white camisoles and make a floral strip to add to the top edge of the camisole (definitely a future post). One could also take fabric strips and glue them to a belt to make an accent piece with a jacket. In the past, I’ve even used fabrics I liked on old shoes. So have fun and don’t hesitate to take two of your old pieces and by combining them, see how you can recreate a new piece of your very own. Nothing perfect here, no exact science, just have fun and be yourself.
Blue Beaded Knitted Bracelet
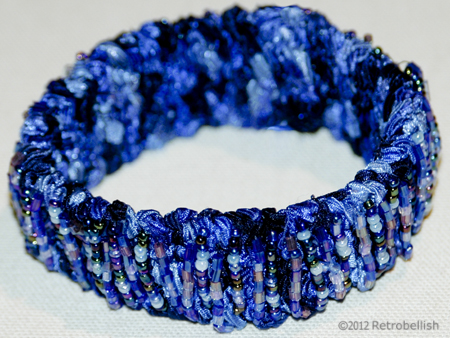
This project started out as a crazy idea I had about making a blue beaded knitted bracelet. While on one of my many trips to the craft store, I came across a great sale on small glass round and hexagon bugle beads that just caught my eye. The beautiful shades of blue and purple really sparked my imagination about making my knitted beaded bracelet. I started out by using my ribbon yarn made especially for knitting and crocheting. I had bought several skeins of this variated blue ribbon yarn because it was beautiful and I thought I could make something nice with it one day–and because it was on clearance.
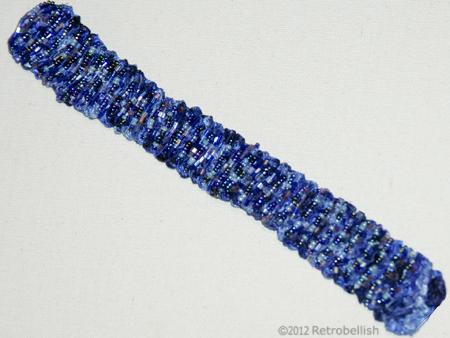
This ribbon yarn lent itself to this project because it was very easy to knit with on size 4 knitting needles, and also had a lot of beautiful texture and sheen once it was knitted. I knitted 7 stitches across and approximately 70 rows, which I arrived at by measuring it on my wrist as I went along. So after knitting many rows, I’d stop and hold it around my wrist until I reached the desired length (about 9 inches in length). I also knew that I would be overlapping the edges a little (one end over the other end) so that I could place Velcro dots (underneath one end and on the top side of the other end) as the bracelet’s closure.
Once I finished knitting the bracelet, I started sewing on the beads using a flat nylon thread made especially for beading on fabric. I used a very thin beading needle to thread the beads on and made sure to knot the end of each row. I then alternated every other row using round beads and hexagon bugle beads to create a simple pattern.
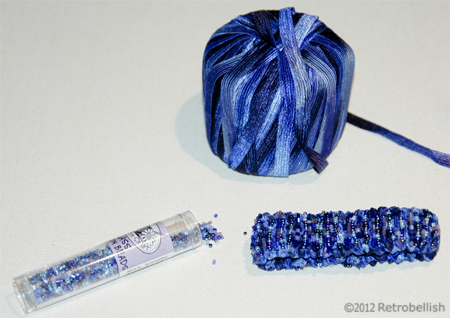
Although I used this beautiful blue ribbon yarn, you can use blue denim, or any leftover fabric you love. I have even used upholstery fabric to create another bracelet project similar to this one. So just have fun and let your imagination create your own little piece of wearable art.
Reclaimed Silk Flower Topiary
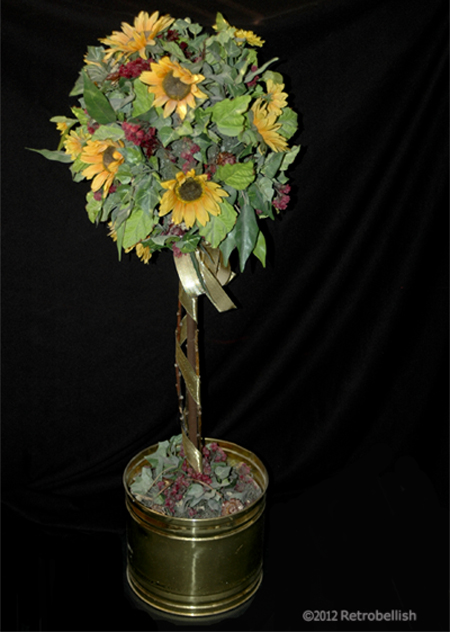
This reclaimed silk flower topiary started out as an idea I had after making some miniature topiary center pieces for a bridal shower. For the miniature topiary base I used some shot glasses that I purchased at a local thrift store. As I looked through my craft box, I found I had all the materials needed to make a big topiary from leftover craft materials I had collected over the years. I found a large shabby Styrofoam ball, a dowel rod, a variety of silk flowers and leaves left over from my many previous floral craft projects. I had an old planter in the basement that I cleaned up and decided to use for the base.
I first painted the dowel rod with a brown craft acrylic paint so that it would resemble a tree branch. Once the painted dried, I inserted the brown dowel rod into the center of the Styrofoam ball. The Styrofoam ball was kind of beat up, but it didn’t matter because it was going to be covered with the flowers and leaves.
I had many large yellow sunflowers, purple little blossoms, and many leaves in various shapes, sizes and shades of green, so I decided these were the materials I would use to make the topiary. I then separated all of the leaf varieties and chose the ones I would use to cover the background surface of the Styrofoam ball. I started by cutting the flower stems and leafy branches to a uniform length, leaving the stems long enough to insert into the Styrofoam ball. On a table, I laid out the flowers and leaves to get an idea of how to evenly distribute them over the surface of the Styrofoam ball. I then started inserting the flowers and leaves in a small area, and continued until I found a very nice pattern, which I continued until I covered the entire surface of the Styrofoam ball.
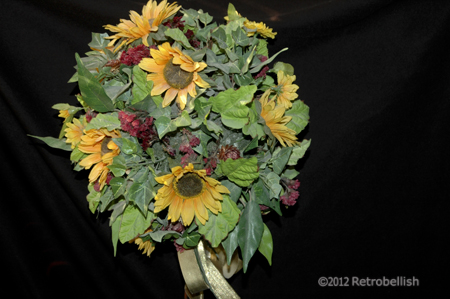
Once I finished covering the surface with the flowers and leaves, the topiary looked very nice and full, but then the dowel rod looked kind of thin in comparison to the volume of the topiary, so I went to my backyard and found a couple of small tree branches that I thought might look good tied to the dowel rod for extra dimension. It worked, because after using some gold ribbon to tie the branches to the dowel rod, the branches definitely added more bulk, but also made the dowel rod look like a branch as well.
For weight, I mixed some Plaster of Paris and poured it into the planter and held the dowel rod in the center until the plaster dried enough to let go. I let the plaster dry for a few hours before touching up the flowers. I added a few remnant leaves and flowers at the base of the topiary to hide the smoothness and white color of the plaster base. And although I used Plaster of Paris, other items such as rocks, dirt, cement and reused Styrofoam can also be used to weigh down the topiary. So have fun looking through your craft supplies and maybe you’ll be surprised to find that you have a lot of fun materials to make your own topiary in any size, shape and color.