Upcycled Polka-Dot Scarf
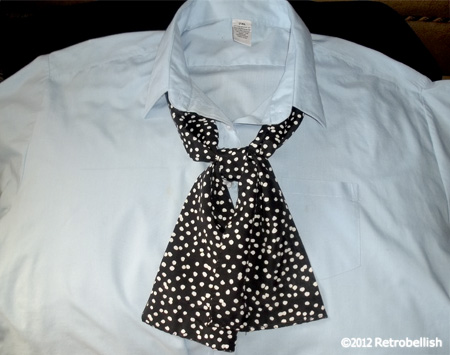
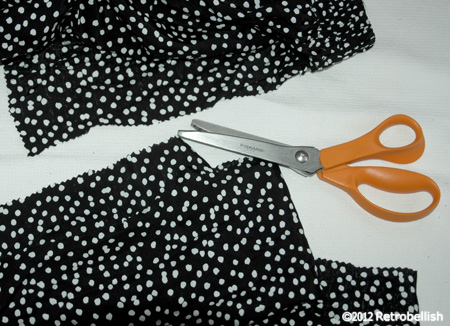
This simple project started out with an old black and white polka-dot pattern skirt that had outlived its used in my closet. I’m a big fan of anything polka-dot so I knew I just had to reuse this wonderful fabric in some of my future projects. I studied the skirt and realized that the fabric was still very silky, vibrant in color and had a great draping quality. These qualities made it the perfect fabric to make a beautiful scarf. The scarf style that I had in mind was a narrow and long scarf that would tie in a simple knot at the chest, or one that could be worn draped with a loose flipped-over knot at the chest.
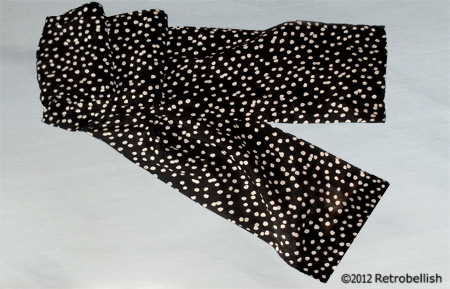
I used one of my favorite scarfs that was similar in style. length and width as a template to see if I had the length and width needed for this project. I laid the old scarf over the longest length of the skirt to see if I had enough fabric to fashion the scarf. Once I determined that I had enough fabric on the skirt to cut out two long rectangles, I knew that sewing the two halves together at the half-mark would make one long beautiful scarf. I figured that the sewn seam at the half-mark would not be very noticeable because of the fabric’s pattern, and also because the scarf would be worn as a tie-style scarf which means the seam would always be (hidden) tucked under the collar of any blouse I’d wear.

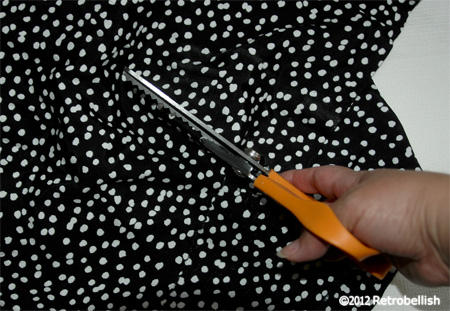
I measured, then cut out two long wide rectangles from each edge of the skirt, folded the rectangles in half at the seams, ironed them smooth and sewed the open (opposite side) edges together. Then (wrong sides out) I sewed close one bottom edge and left the edge (at the neckline) open and then turned it inside out (gently pushing out the little corners with a knitting needle). This completed one long rectangle, thus making one-half of the scarf. Then I repeated these entire steps for the second-half of the scarf. I then joined both halves at the center and sewed the two halves together and ironed the whole scarf again. I was very happy with the results and was so glad to see that the fabric did drape beautifully.
And although I used an old polka-dot skirt from my closet for this project, you could use any fabric or style to make it your own. Another great project is to use fabric with a holiday theme print, they make a great personal gift for family and friends. So just have fun and make your own reclaimed fabric designer scarf.
A Look Back At Retrobellish™
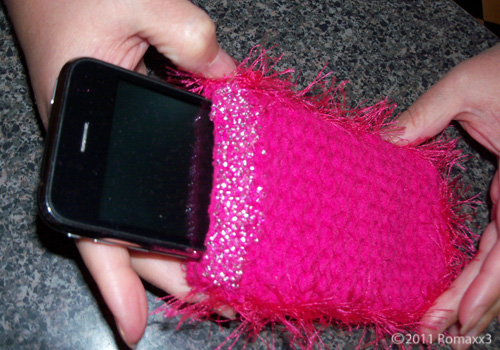
Hello everyone, Retrobellish™ turns ONE and I can’t believe how fast this year has gone by. With my hectic work schedule, making time to post new projects on Retrobellish blog is very challenging. I would like to take this time to thank everyone for all the support you have given Retrobellish™, a simple blog that I started at the request of my husband David. It’s been a fun, challenging and rewarding experience for us. In this post we are featuring our first post from a year ago, How To Make A Knitted Crocheted Fabric Case for Your Cell Phone. So no matter what your passion for crafting may be, always have fun with your creations. Again, Thank You For A Wonderful Year.
Upcycled Blue and White Floral Jacket
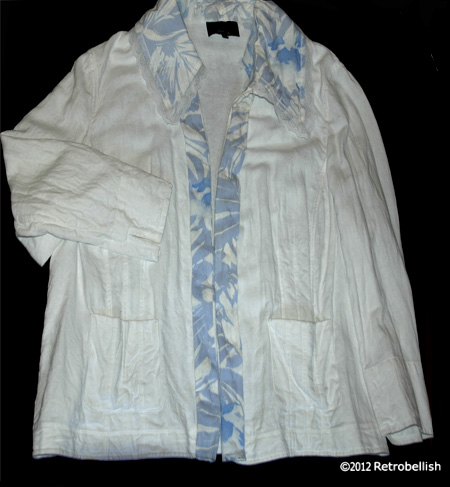
This project started out with two thrift store finds. One was a beautiful blue and white floral cotton dress with a great looking lace edged collar. The other was a plain white cotton jacket. The idea I had was to take the collar from the dress (since it was a size that didn’t fit me), and add it to the jacket. The beautiful floral pattern dress had a lot of potential and lent itself to many other projects because of the extra full fabric bottom.
I started out by carefully cutting out the collar from the dress and leaving about an inch of extra fabric all the way around the collar edge. This would help me position the collar more evenly with the jacket collar and have extra fabric on which to sew it more securely to the jacket. I then started pinning the dress collar to the jacket neckline area and decided to cut away some of the jacket collar to remove bulk. Once the collar was evenly positioned I started pinning it to the jacket so I could begin to sew the two together. This worked out well and looked very nice when completed.
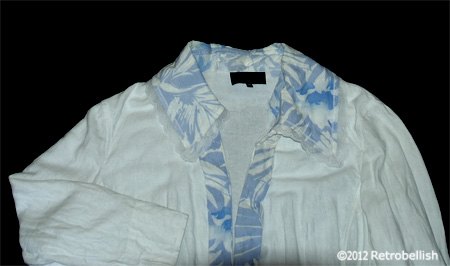
Next, I measured the length of the full skirt-part of the dress (from the waist to the bottom edge) and then measured the jacket from under the left front collar center opening (down the center) to the bottom edge. I then repeated the same process on the right side center jacket opening. I thought that a two inch wide strip of floral fabric would look good adorning each open edge of the jacket. I cut a six inch strip from the dress doing my best (by eye) to pick the same floral pattern on the dress for each side of the jacket. I folded each floral strip (by eye) to a width that looked nicely balanced when placed on the jacket edge, and then I pinned it down. Then I measured the strip and ironed it, which made it so much easier to make the second matching strip for the other jacket edge. I loved how the blue and white floral fabric strips looked on the jacket. It turned out rather well and can be worn with a pair of white shorts, pants, light blue shorts or even jeans.
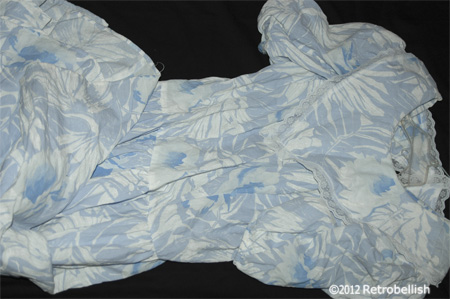
Because I have so much of the blue and white floral fabric left over, I think I will try making a camisole to wear with the jacket. I might even take one of my white camisoles and make a floral strip to add to the top edge of the camisole (definitely a future post). One could also take fabric strips and glue them to a belt to make an accent piece with a jacket. In the past, I’ve even used fabrics I liked on old shoes. So have fun and don’t hesitate to take two of your old pieces and by combining them, see how you can recreate a new piece of your very own. Nothing perfect here, no exact science, just have fun and be yourself.
Reclaimed Wood Abstract Doll
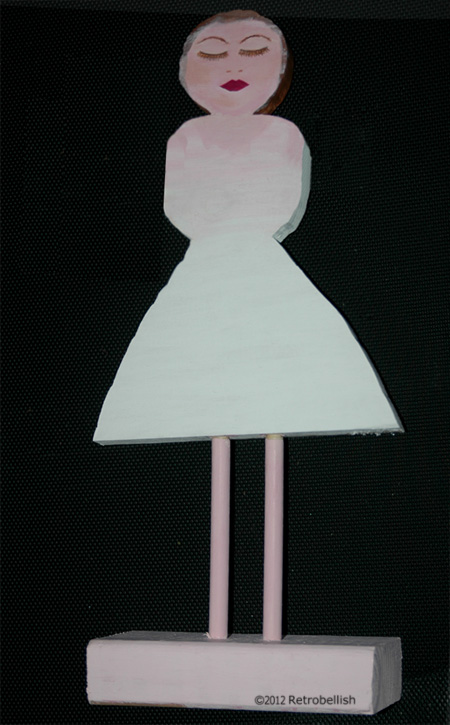
I’ve always wanted to try making an abstract doll of some kind, but had no idea where to even start. Four months ago, I experimented and drew a simple shape on a piece of scrap wood I found in our basement and asked my husband to cut out the drawn shape. Although the shape was simple, it was also a bit crude as the shape had a round head (no neck), a squarish torso and a bell shaped skirt bottom for the lower body. The doll measures 17 inches tall (including the base on which she is perched) and 11-1/2 inches wide (at its widest point of the wood skirt/body).
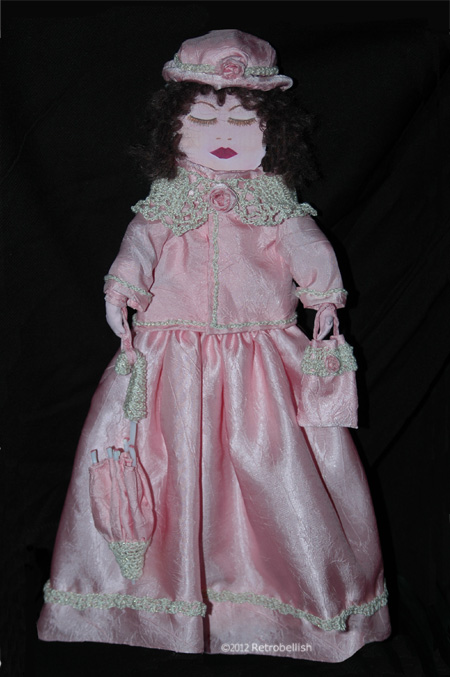
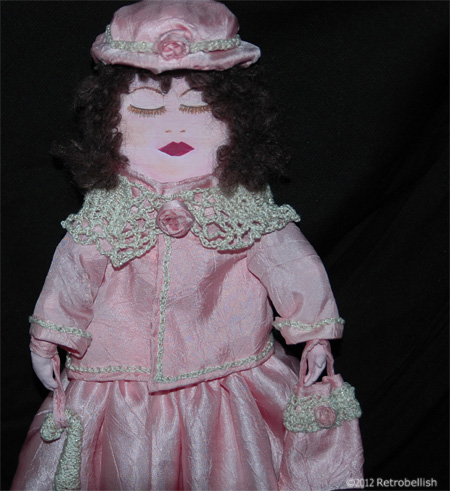
I thought I’d make the doll’s arms with wire and envisioned bending her wired arms, attaching a small bouquet of flowers to her hands and her (wire arms) holding them up near her face as if to smell them. That’s when I thought of painting her face with closed eyes as if she was taking in the fragrance of the flowers. I did paint the doll’s face with her eyes closed, but the plan to use wire arms did not work out, so I ended up leaving the doll’s face painted with her eyes closed.
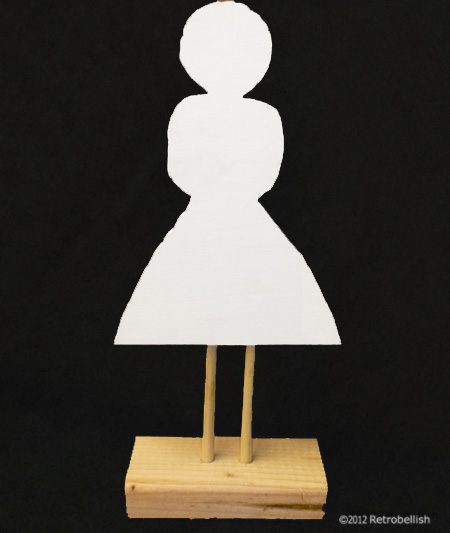
I wanted to make some kind of outfit for the doll using as much of my reclaimed fabrics as possible. Looking through my old fabrics, I found a very pretty light pink (polyester) fabric that was perfect because I had so much of this fabric that if I made any mistakes on any part of the outfit, I could start all over again without worries of running out of fabric.
I held the fabric up to the doll’s waist, pinned the fabric a half inch longer for the hem allowance at both ends, cut the fabric and held the fabric against the doll, roughly gathering it to get an idea of how full/wide to make the full length skirt. I tripled the width and then cut the fabric. I made a simple running stitch hem at the waistline and ran a bigger basting stitch at the top edge of the waistline so I could pull the fabric, gathering it at the waist. The skirt began to fully gather and take a beautiful shape. Once the fabric was more or less evenly gathered around the waist, I knotted the thread to hold that tension. For a closure at the waist I sewed a very small snap (base), then sewed the other snap (top half) to the other end at the waist. I left a two inch opening at the waist below the snap closure, hand sewed a quarter inch hem straight down to seal both open fabric panels at the back of the skirt and then sewed them together to complete the skirt. I ironed the entire skirt and surprisingly the fabric turned out very nice and full ,considering I did not use a petticoat underneath.
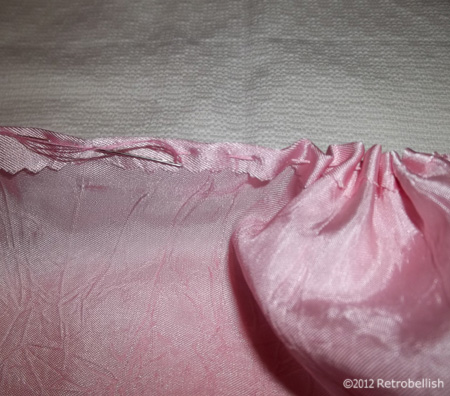
Because the skirt was so plain, I decided to crochet a pretty beige trim about an inch from the bottom edge of the skirt and continued crocheting all the way around. I used a 00 size crochet needle and crocheted the trim with three double-crochet stitches. I pinned the crochet trim to the skirt as I continued to crochet the trim all the way around the base of the skirt. I removed one pin at a time and hand sewed the trim to the skirt with matching beige thread.
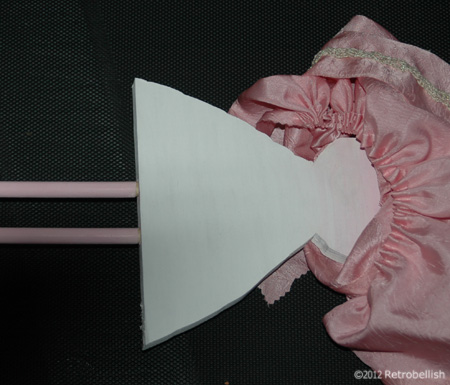
I ended up making the doll arms from two square pieces I cut from my old black sweatshirt. I rolled up the squares, pulling on the stretchy fabric and hand sewing them into a rough arm shape. Since the doll had no shoulders, I hot glued (and tacked down) each of the arms to an approximate place where they looked best on either side of doll’s torso. I made the little hands from polymer clay and pierced a hole in the top part of the clay wrists before baking them so that I could later sew (attach) them onto the (sweatshirt) arms.
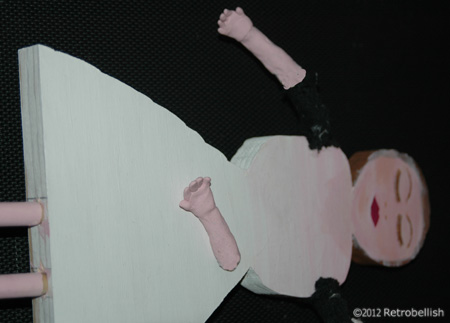
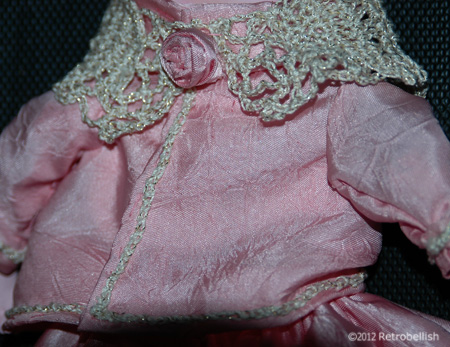
The jacket was made from two squares of the same pink fabric. I measured the two squares by eye, cut and then sewed them together, cutting the front square down the middle so the jacket would be open in front. I left two holes on either side near the top of the squares so I could sew on sleeves. The sleeves were also squarish in shape and very loosely made so that I could put the doll arms into the sleeves. I later crocheted the shawl around the doll to make it look like she had shoulders and to cover the loose fitting clothes.
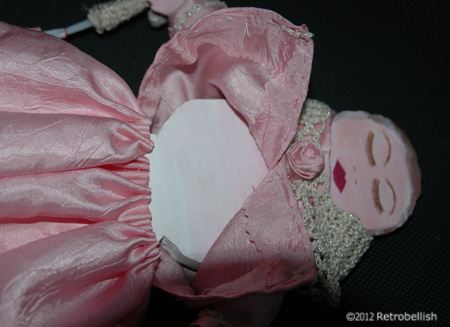
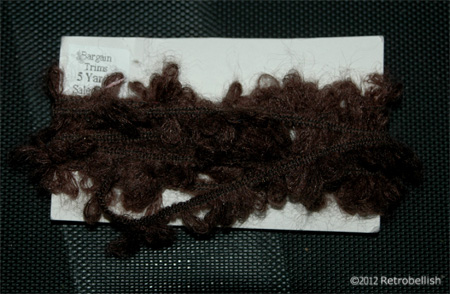
For the doll hair, I used a roll of brown woolly trim that I found in my yarn box. I cut six 4″ long pieces, and with needle and matching brown thread loosely sewed the six pieces together to form a head cover that resembled hair. The furry wool is so wild, it really looked like hair, and I painted the doll’s wood head in a matching brown color so you can’t really notice the open spaces throughout the sewed hair piece.
The Accessories
The hat is made from a scrap piece of thick interfacing leftover from a purse project. I had several jar lids, and placed them on the doll’s head to find the right hat width for the doll’s head. With a pencil, I traced around the lid onto the interfacing, cut the round shape and then by eye, another round hole in the center to rest on the doll’s head. For the crown, I cut a rectangular strip of interfacing and hot glued it from one edge of the center hole to the other edge of the hole. I covered the entire hat with the same pink fabric, and hot glued it to the interfacing. I also crocheted a trim for the hat (sewed it onto the hat) and embellished the hat with a little rosette (from the same pink fabric) and hot glued the rosette to the center front of the hat.
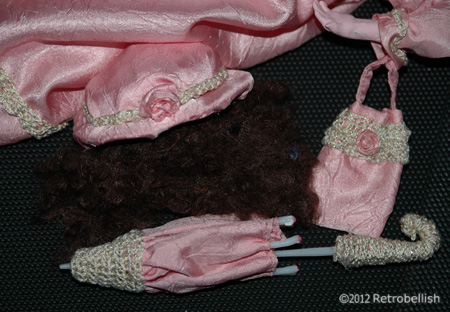
The little purse measures 1-3/4″ wide by 2″ long and is made of the same pink fabric folded into a little rectangle and then hand sewn to shape. I also cut and sewed a small narrow piece of the same pink fabric for a tiny purse strap. Later, I also crocheted a matching trim near the top of the purse and added a tiny rosette.
The parasol measures 7″ long by 2″ wide and is made from plastic skewers that I had saved from a gift fruit arrangement. I used one skewer as the main center post, tightly wrapped a rubberband (wound around many times) near the skewer bottom end, took six more skewers and tucked them into one strand of the wound rubber band, spacing them evenly around the main center skewer. I was surprised that this worked and the six skewers remained in place evenly around the center skewer. Using wire cutters, I trimmed the six skewers shorter than the main center skewer. I then measured and wrapped the same pink fabric around the length of the skewers and added four inches to the total fabric width. I then hot glued the bottom (folded) edge of the pink fabric to the skewers one at a time making sure to pull extra fabric in between the skewers so it would mimic the look of a semi-folded umbrella. I repeated the same process to the top end of the parasol.
To make the parasol handle, I used three plastic hook-shaped pieces (saved from the top of three packets of socks) and hot glued them together. I also hot glued the main skewer to the hook handle. I later wrapped the handle with the crochet thread to make it look like one uniform piece and repeated that process around the bottom end of the parasol.
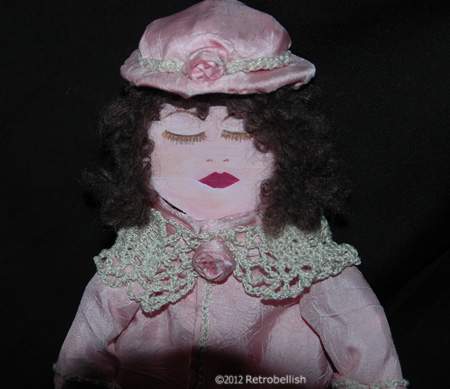
Making this doll was a very challenging experience, but very rewarding upon completing all of the accessories. And the most fun part of making this doll was that there were no rules because this was an abstract doll that I made from scrap wood and leftover reclaimed materials.
Retro Pink Pearl Pin
I’ve always loved hats and living in the midwest gives me the opportunity to pull out my winter hats every year. The problem is that a lot of the hats made today have lost a lot of embellishment touches that they had in the past. My problem is that I go for warmth instead of style and a lot of the winter hats are just plain, and some even ugly, but boy are they toasty when the weather outside hits 10 below zero. One of the things that works for me as a crafter, is to embellish my hats with things I love like a crocheted flower, or pin, or knitted piece that I’ve made. This pearled fabric flower pin is very versatile because I chose to use a hat pin instead of a permanent attachment on the hat shown here. This way I can also pin it onto a purse, jacket, coat or other hat.
I used some vintage fabric, an old broken necklace for the pearls and leftover lace from another project to make this flower pin, and one of my old hats. I cut a two inch wide by 12 inch long strip of pink fabric and gently twisted the fabric while forming a circle. Then as I formed the center I started hand sewing the pearls onto the fabric. Next I continued gently twisting the fabric strip until the flower reached a size that I liked. Then I tucked the end under and stitched a knot there to complete the flower. I started hand sewing the lace trim onto the underside of the flower slightly gathering the lace as I sewed it on until it reached all the way around.
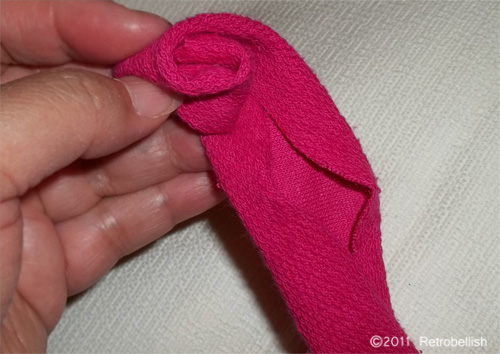
Starting the Pink Pearl Flower
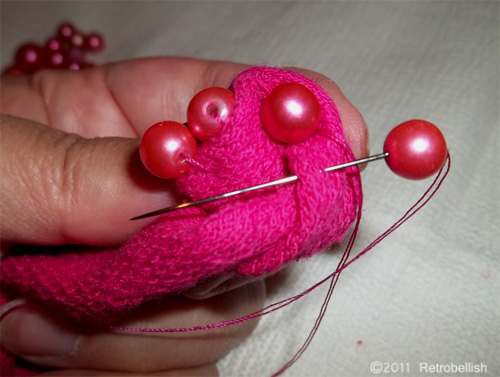
Adding the Pink Pearls
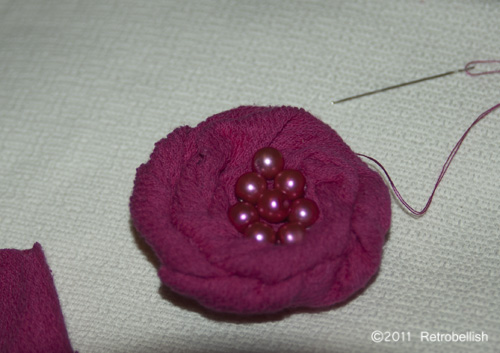
Pink Pearl Pin Flower
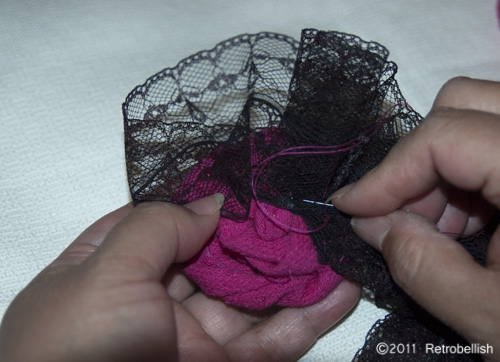
Adding Black Lace to Flower
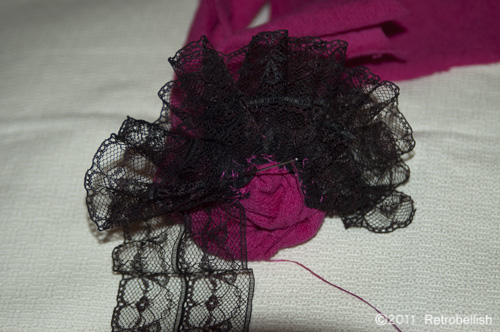
Sewing Lace on the Back of the Flower
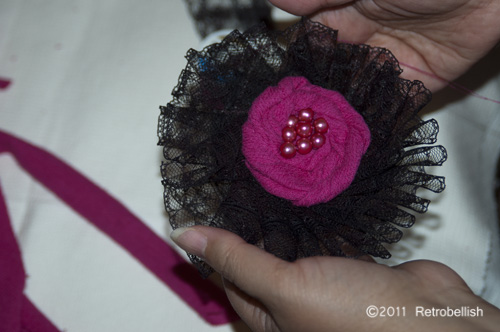
The Finished Pink Flower Pin
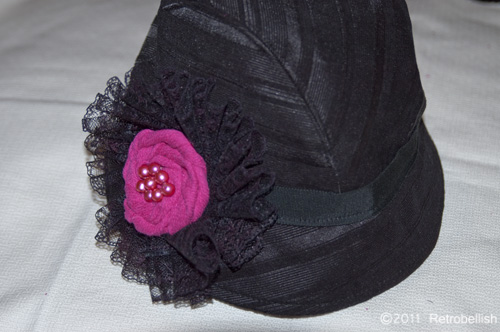
Finished Flower Pin on Black Retro Hat
