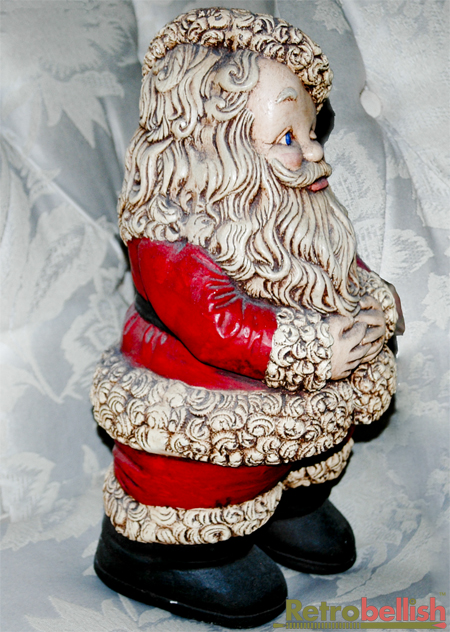
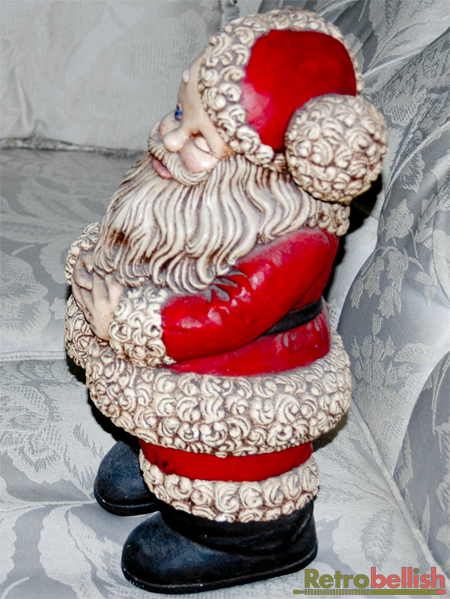
Rustic Plaster Santa
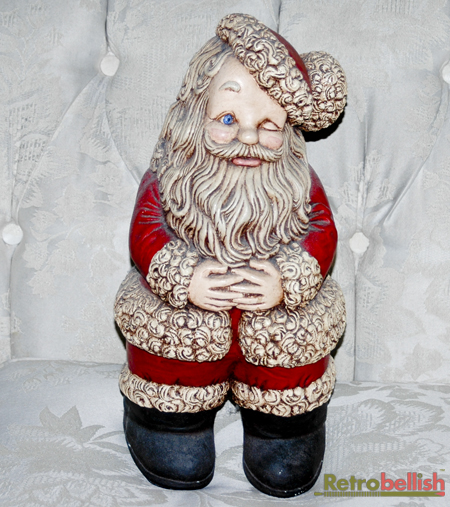
This whimsical winking Santa Claus came to us as a white-ware piece about 20 years ago. We painted the plaster piece with bright red, black and white acrylic enamels. We then gave it an antique medium wash which we then rubbed of with a soft towel to create the effect seen in the photo. So have fun and keep creating.
From our family to yours Merry Christmas and Happy Holidays! Diana Romaxx
Grapevine Holiday Wreath
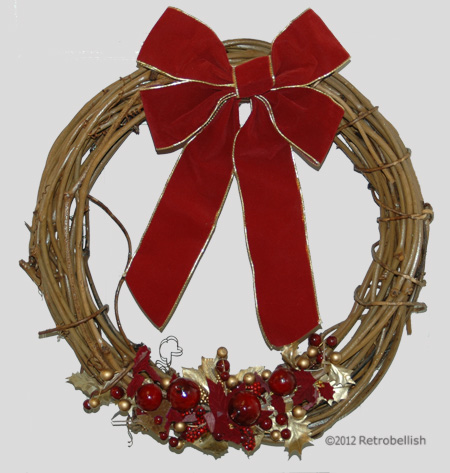
The holiday season is a fun time of the year to get creative with decorations for your home. This grapevine holiday wreath is very simple to make and could easily be updated every year with different ornaments of your choice. I had a very plain grapevine wreath at home that I wanted to decorate with some type of ornaments, but nothing too big that would hide the beauty of the vines. Previously Published 11/13 See Here
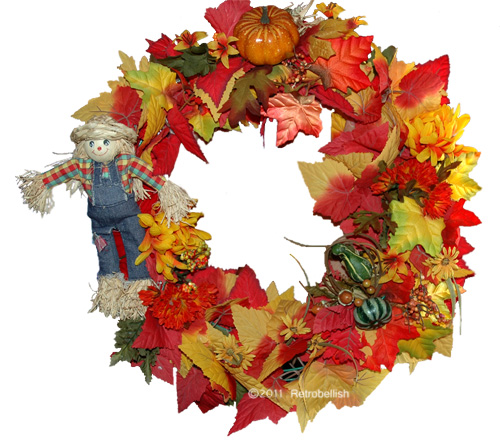
Fall Holiday Wreath
This wreath started out as a round, green wire bare frame I bought at a craft store. Along with the wreath, I also bought numerous springs of beautiful silk maple leaves and some floral wire. I cut the leaves off of the spring and wired individual leaves onto the wreath. The warm festive fall colors are very cheerful and versatile because they can be displayed from mid-September to Thanksgiving day (US). Click Here For Full Post
Published November 9, 2011 By Diana Romaxx
Fall Colors Holiday Leaf Reef
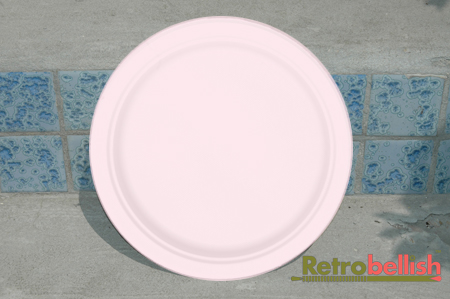
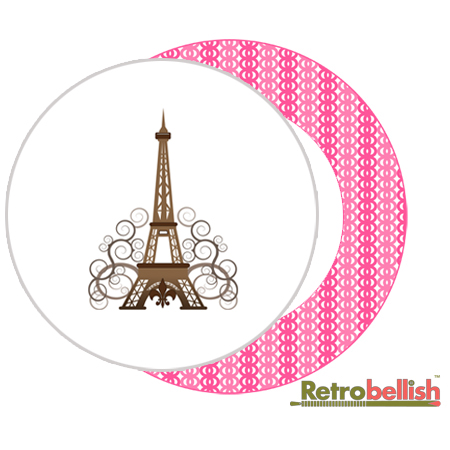
Paris Theme Paper Plates
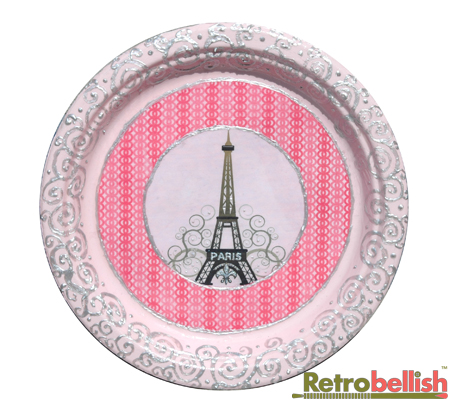
This beautiful Paris theme plate started with one of our original graphic designs of the Eiffel Tower surrounded with swirls against a light pink background and framed within a dark pink circular pattern. I had several large pink paper plates that were left over from a party and thought our Eiffel Tower design would look great in the center of one of these large plates. Because it was computer designed, it was easy to re-size the design to fit perfectly in the center of the plate. I then cut out the round design, glued it to the center of the pink paper plate using white craft glue, and let it dry.
Next, I used a small tube of silver fabric paint to trace the round edges of the circular design. I then used the same silver fabric paint to draw a freehand swirl design in the outer areas of the plate. For this part of the project, I only painted the swirls in about one-half of the plate’s outer area because it is difficult to hold the plate while drawing the swirls without smudging the fabric paint. To avoid smudging the fabric paint, I let the fabric paint dry overnight, and then continued painting the other half of the plate the next day. This project turned out so well in pink, I decided to create another one in blue.
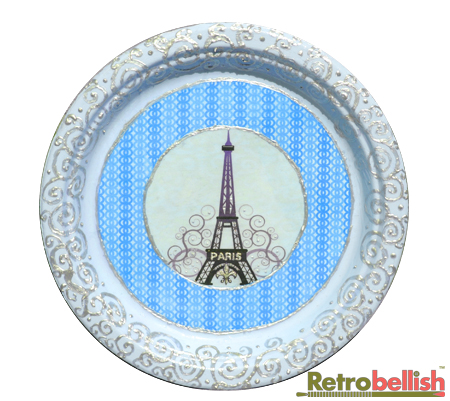
The next step is entirely optional, but once the fabric paint on the plate is completely dry, I would suggest you seal the entire plate with a glossy or matte Mod Podge or any similar product. I coated the entire surface of the plate with glossy Mod Podge. As always, just because we created this one in paper, don’t be afraid to create your very own project. You could also use a clear glass plate, plastic plate, styrofoam plate even a round circular piece of wood, so don’t be afraid of the medium and just create your very own project – you will truly enjoy it. Thank you for your visit. Diana Romaxx
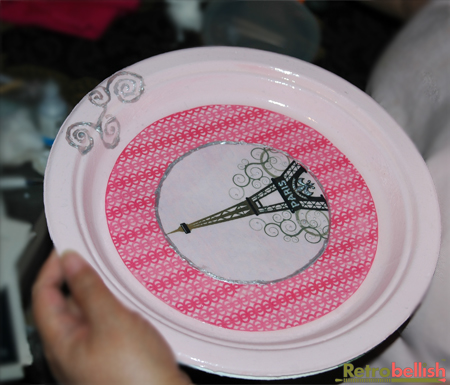
Back View Of Paper Plate
Our Two Graphic Designs
Recycled Cardboard Plaster Reliefs
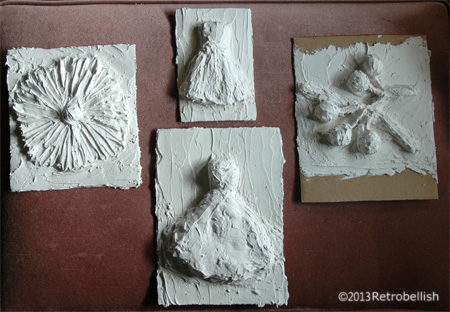
These small plaster reliefs started out from a cardboard and paper recycling project. I had saved several boxes from our favorite wheat crackers because they’re made of a very nice grade of cardboard that was sturdy yet flexible. I had fun thinking of different mediums I could try on these cardboard pieces and remembered a past project where I had used plaster on Styrofoam and wood. I wondered if I could try making a similar craft using these recycled cardboard pieces.

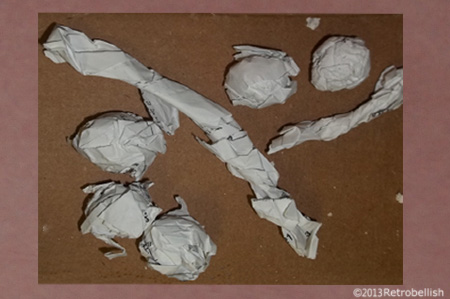
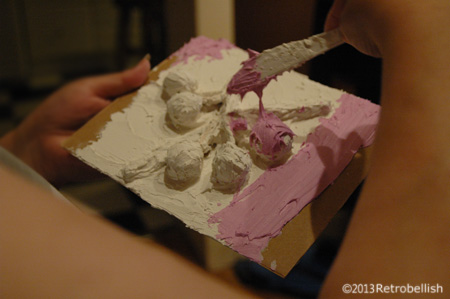
I decided to make a few little abstract dresses and other pieces. I took some newspapers we were recycling, tore some pages into medium sized pieces, crumpled and twisted them up into medium chunky pieces. I used several of the 4″ x 6″ cardboard pieces as the base for the dresses. I dabbed a little fabric glue onto the center areas and placed the bulky crumpled pieces of newspaper onto these dabs of glue so they could remain stationary for the next step. I decided to use a wall repair plaster that is pink and soft (like frosting) in it’s original form, but hardens and dries white in color. Once the chunky paper dried on the glue, I used a plastic knife to spread the plaster over the paper and smoothed it over the chunky paper.
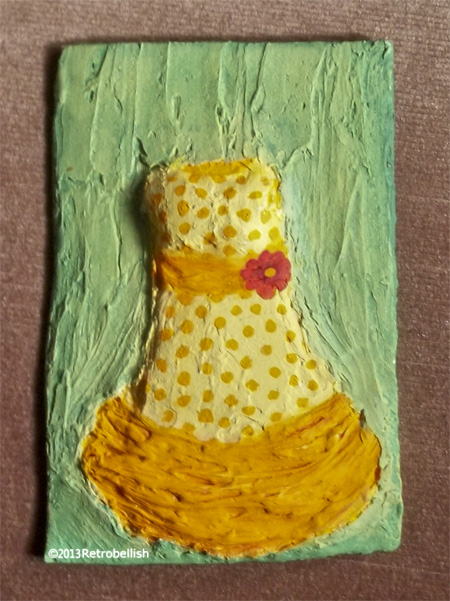
It takes a little while to get used to this medium, but its easier to work with if you let the first layer dry overnight. It is then easier to work the plaster, shape it into a simple dress form and smooth out uneven areas. Once the entire piece was thoroughly dry, I painted it with gesso and let that thoroughly dry. I then painted the dress using yellow and orange acrylic craft paints. Once the paint dried, I spread plaster mixture onto the background to give it texture as well. When the background dried, I repeated with gesso and painted it a light green.
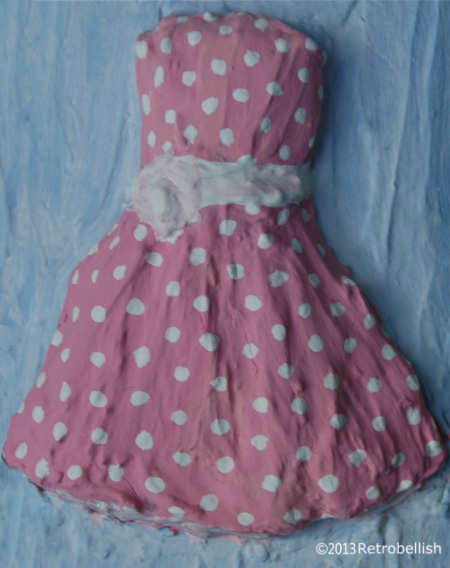
When I made the second dress (pink polka-dot dress), I made sure to use plaster mixture on the background after the dress form dried (something I didn’t do with the first yellow and orange polka-dot dress). After the second dress dried, I painted the entire piece with gesso and let it dry. I next painted the dress, and then painted the background. I painted the polka-dots on each of the dresses after their base solid colors were completely dry.
And again, although I had fun making these abstract pieces you see here (dresses, fruit, and flowers) don’t be afraid to try your hand at anything theme you like. Just have fun creating your own pieces of art.