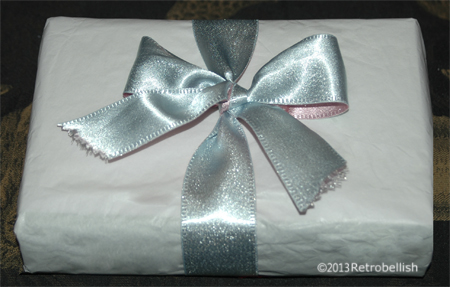
Reclaimed Fabric Gift Wrapping
This project is one that I personally have made for many years. The use of reclaimed fabric is one that lends itself for many reclaimed craft projects. In this project I used this soft light flannel as gift wrapping for a Baby Shower, then I used a beautiful pink and blue satin ribbon from a roll that I found in a clearance bin. In the past, I have also used a receiving blanket as wrapping paper around a small gift, making sure that all the ends are gathered on the top center of the gift, then pulled the gathered blanket ends through a rubber band and spread them out through the rubber band to resemble a flower. For even smaller gifts, a cloth diaper or small baby bath towel can be used as well. So just have fun and find some fun fabric to wrap your next baby shower gift.
Pears On Branch Paper Relief
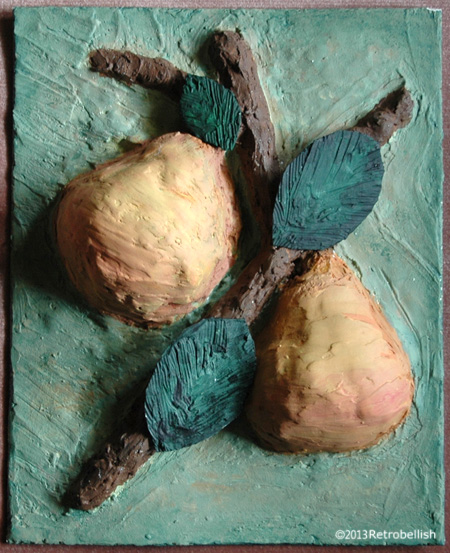
This whimsical relief of pears on a branch is made of scrap paper, recycled cardboard and plaster. About ten years ago, I had bought a similar relief of pears on a branch in solid plaster that I keep on display in my kitchen and which was the inspiration for this project.
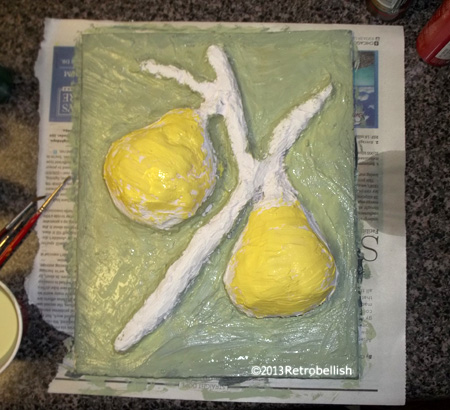
I started out by useing a recycled heavy piece of cardboard as a base. To make the pear shapes, I crumbled paper scraps into tight pear-shape balls and glued them to the cardboard shape. I then rolled more paper scraps into long narrow shapes to form the branches and glued them around the pear shapes.
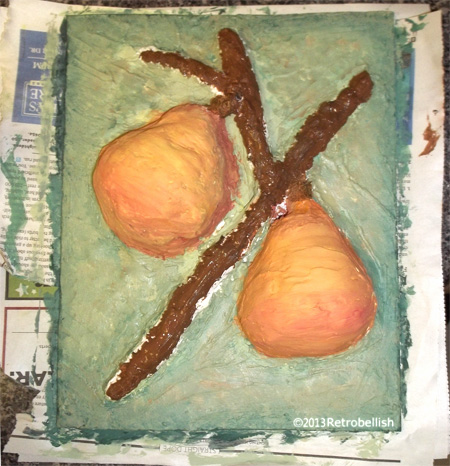
Once all of the paper shapes were glued in place, I used a plastic knife to apply a thin coat of plaster over all of the paper shapes and the cardboard base. Once the first plaster layer dried, I smoothed out a few rough spots with sandpaper, then applied another layer of plaster. Once the plaster completely dried, I started painting the relief with acrylic paints.
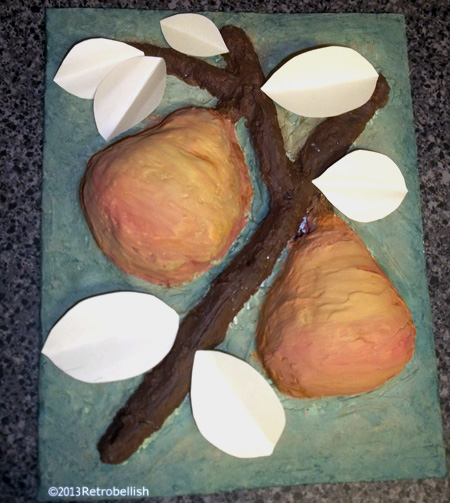
Last but not least, I cut leaf shapes from thin cardboard and applied a thin coat of plaster over each leaf. Once the light coat of plaster completely dried, I painted each leaf using the same acrylic paints.
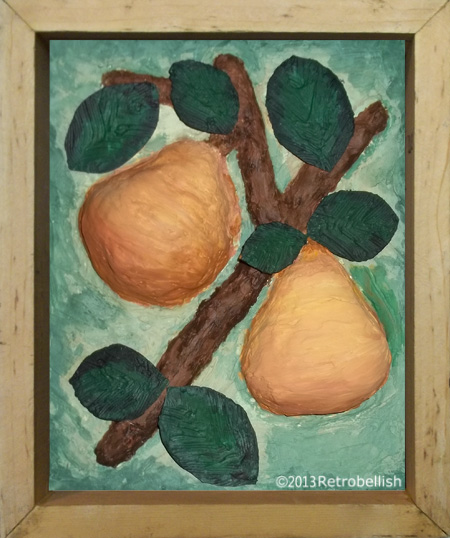
I used a wood frame for the relief that we made from scrap wood pieces that we cut and mitered to the size of the Pears On Branch Paper Relief. And although I used pears as a subject on this relief one could make one out of your favorite fruits or vegetables. So just have fun and create your very own piece of art.
Reclaimed Grill Top Planter
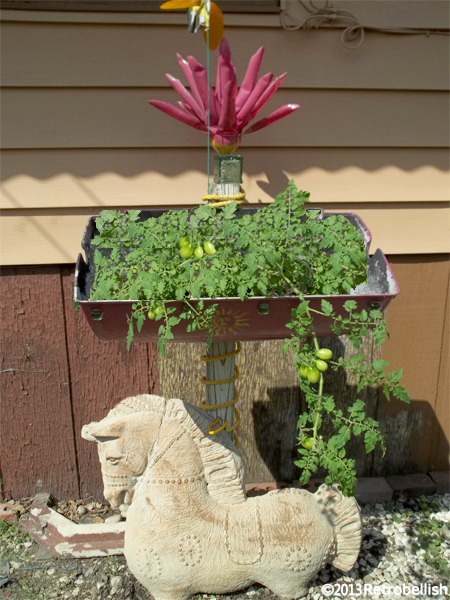
This reclaimed grill top planter was the second part to another grill project. The grill top was from another grill project. In that project we used the bottom of the grill
We first cleaned the grill top inside and out with a steel brush. Then we drilled four drain holes directly into the bottom for drainage. We drilled two holes on the higher part of the lid to mount onto the wood post using two galvanized screws (before the grill top was mounted, we painted the outside of it with a purple paint). Glass embellishments were glued around the front and sides of the grill. Our favorite sun design was painted on the front of the grill top using a stencil. The large wood base was a piece reclaimed from an old wood fence. The nylon roping around the wood post was reclaimed from a construction project done on our local street. We added some rocks to the bottom for easier drainage, then added two bags of organic potting soil. We then planted a Roma tomato plant that we purchased this year, and we’ll use some of these tomato seeds to plant next year. So always have fun recycling and reclaiming things that you can use to create whimsical and functional pieces for your yard.
The plastic soda bottle flower on top is made from a previous project Found Here The little green glass square vase used was chipped, but worked perfectly for this project as it has a sun face design on all four sides. We decided to place this cement horse underneath the planter to complete the piece. The cement horse had a broken head that we repaired many years ago and is still holding up perfectly.
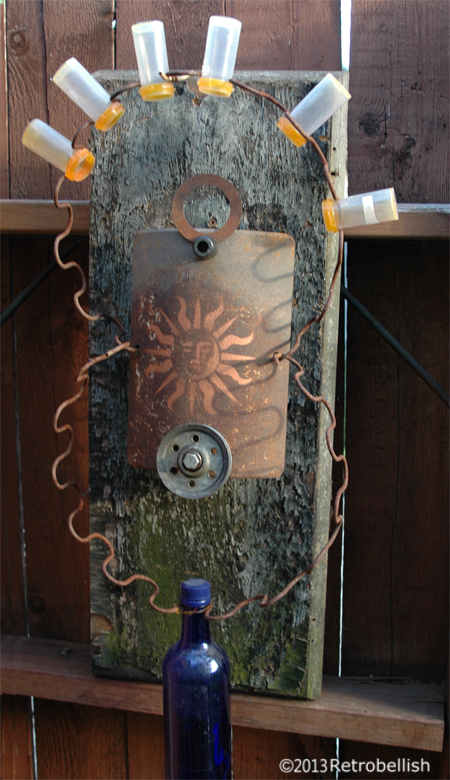
Trash Art Collage
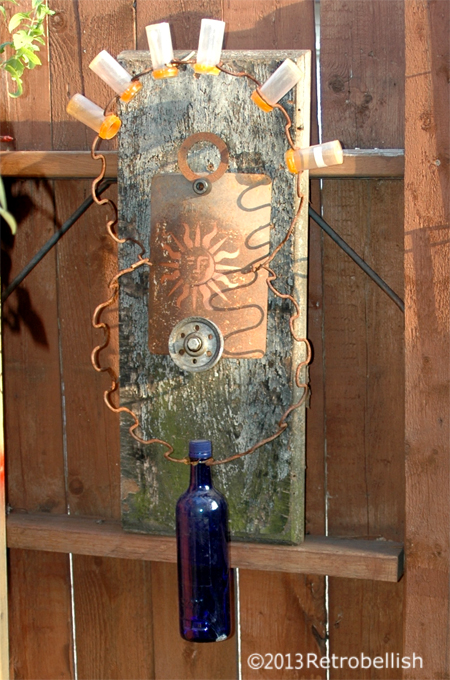
This Trash Art Collage is the work of artist David Romaxx. The piece started out with a rounded steel remnant found on the street (and had four bored holes). A stencil of a sun was painted on the steel piece. The steel piece was mounted onto an old weathered wood cabinet door by a screw through one end of a rubber bushing (from a patio table). The open end of a sofa spring was affixed to the steel piece through the center side holes and bottom sofa spring was then looped through the ends of the top sofa spring leaving it loose to swing freely.
The steel piece was then anchored at the bottom with a bolt through the center of a pulley (from a garage door repair). Plastic little bottles (recycled medicine containers) were inserted through the rings of the sofa spring loops to symbolize the rays of the sun. A beautiful blue glass bottle was also inserted into one of the loops of the bottom sofa spring, which hangs loosely and moves when the wind blows. Natural movement is one of the artist’s favorite features in all of his trash art pieces.
It’s amazing what you can make from the smallest of trash items we tend to throw away.
Recycled Cardboard Plaster Reliefs
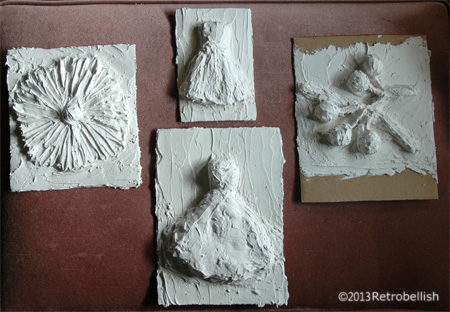
These small plaster reliefs started out from a cardboard and paper recycling project. I had saved several boxes from our favorite wheat crackers because they’re made of a very nice grade of cardboard that was sturdy yet flexible. I had fun thinking of different mediums I could try on these cardboard pieces and remembered a past project where I had used plaster on Styrofoam and wood. I wondered if I could try making a similar craft using these recycled cardboard pieces.

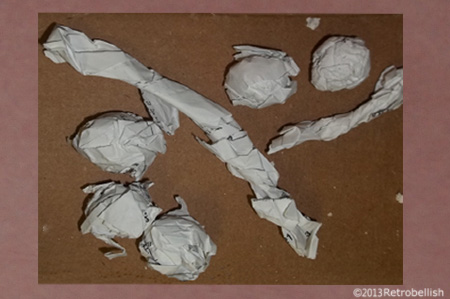
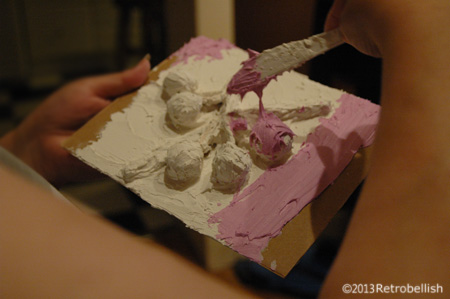
I decided to make a few little abstract dresses and other pieces. I took some newspapers we were recycling, tore some pages into medium sized pieces, crumpled and twisted them up into medium chunky pieces. I used several of the 4″ x 6″ cardboard pieces as the base for the dresses. I dabbed a little fabric glue onto the center areas and placed the bulky crumpled pieces of newspaper onto these dabs of glue so they could remain stationary for the next step. I decided to use a wall repair plaster that is pink and soft (like frosting) in it’s original form, but hardens and dries white in color. Once the chunky paper dried on the glue, I used a plastic knife to spread the plaster over the paper and smoothed it over the chunky paper.
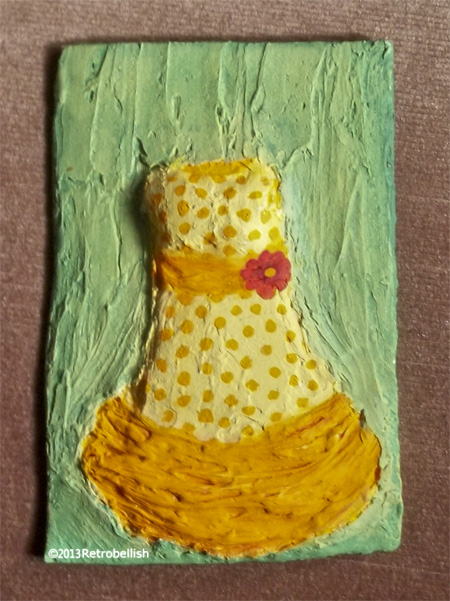
It takes a little while to get used to this medium, but its easier to work with if you let the first layer dry overnight. It is then easier to work the plaster, shape it into a simple dress form and smooth out uneven areas. Once the entire piece was thoroughly dry, I painted it with gesso and let that thoroughly dry. I then painted the dress using yellow and orange acrylic craft paints. Once the paint dried, I spread plaster mixture onto the background to give it texture as well. When the background dried, I repeated with gesso and painted it a light green.
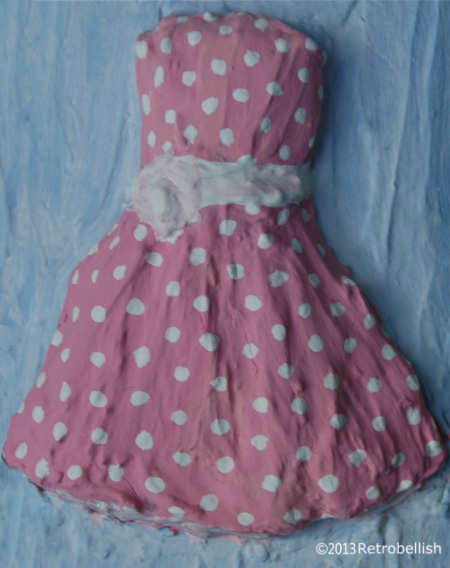
When I made the second dress (pink polka-dot dress), I made sure to use plaster mixture on the background after the dress form dried (something I didn’t do with the first yellow and orange polka-dot dress). After the second dress dried, I painted the entire piece with gesso and let it dry. I next painted the dress, and then painted the background. I painted the polka-dots on each of the dresses after their base solid colors were completely dry.
And again, although I had fun making these abstract pieces you see here (dresses, fruit, and flowers) don’t be afraid to try your hand at anything theme you like. Just have fun creating your own pieces of art.