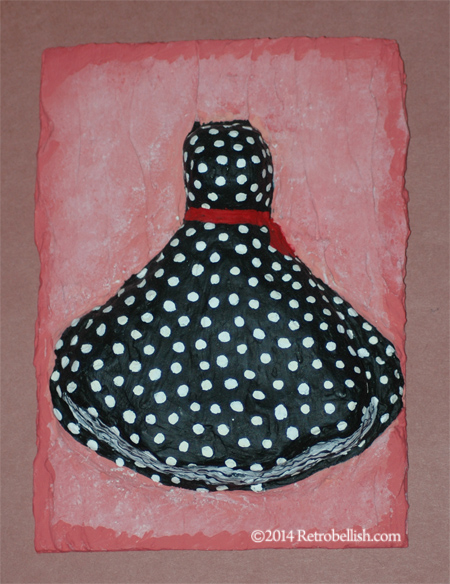
Plaster Art Dresses

These dresses are all made of reclaimed cardboard, recycled paper, and then covered with wall plaster. I start by picking out a reclaimed cardboard base and cutting it into a square or rectangular shape (approximately 4″ x 5″). I then crumple many pieces of recycled paper into small different sized shapes. Next, the paper shapes need to be glued down onto the cardboard base and it’s at this point that I try forming the dress shape by gluing the pieces onto the cardboard base. The paper shapes should not have too many gaps in between because the wall plaster is what will give the dress texture. Once the glued paper shapes are completely dry, I start spreading a thin coat of wall plaster over all of the glued paper pieces and background. I usually let the plaster coating completely dry overnight. I chose to give these pieces an abstract look (using a small plastic knife to spread the plaster), but it’s at this point that you could add as much or as little detail over the entire piece.
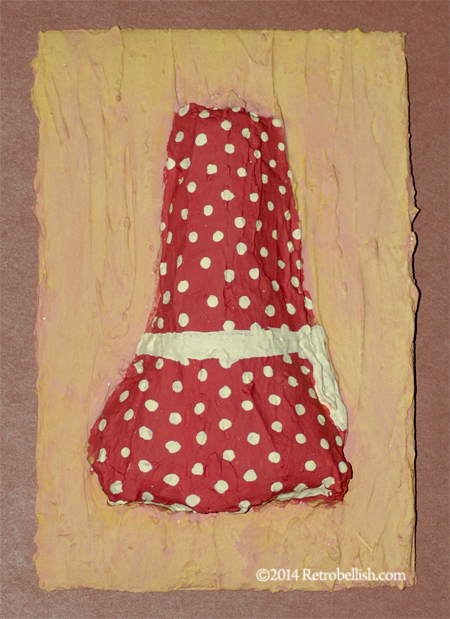
Because many of the steps involved in making these pieces is time consuming, I try to make many pieces at one time. Another fun part of the process that I enjoy is painting the dresses. I try to imagine the colors and details on these dresses and many times the outcome of the dress will change my mind to a different color I didn’t even think of before I started.
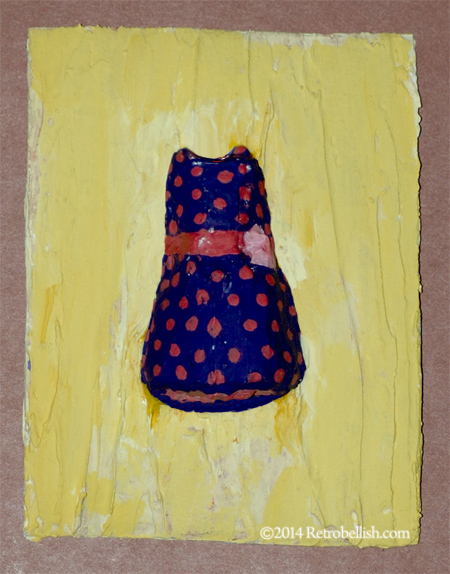
Other times, I’ll pick out colors and not know what patterns I’ll end up painting on these dresses. I enjoy the process very much and have a lot of fun. So the sky is the limit as to the themes you can make – be it flowers, animals or dresses. Just have fun creating your own designs and enjoy!
Other Examples Could also be Seen Here
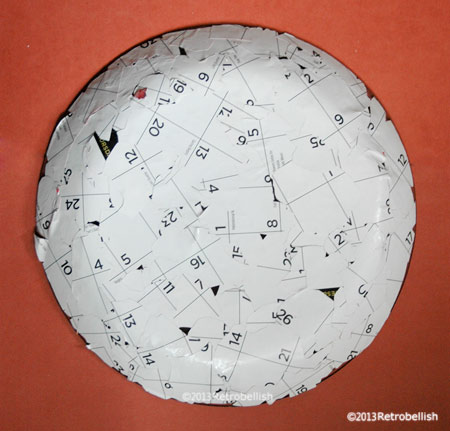
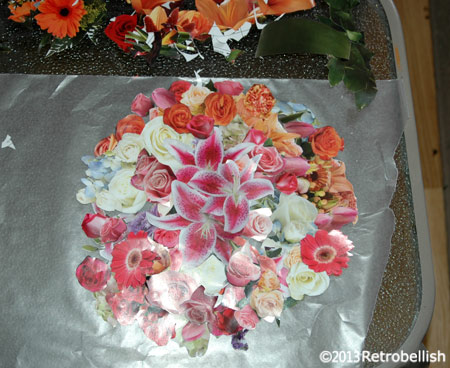
Reclaimed Calendar Floral Plate
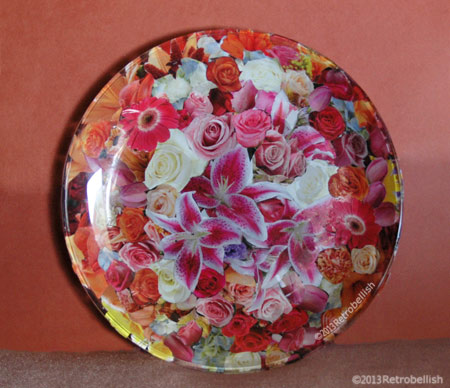
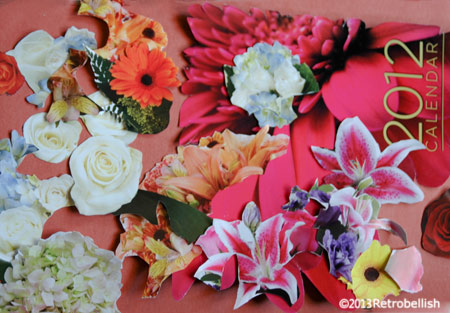
Welcome! This collage floral plate is made from using a 2012 reclaimed calendar and a thrift store clear glass plate. As you may have read on a previous post, I have made these collage plates from old magazines and brochures, which I keep for their wonderful designs. This past year, I was given a very beautiful floral calendar from one of our local businesses. The calendar featured different floral designs every month that lent themselves perfectly for this project.
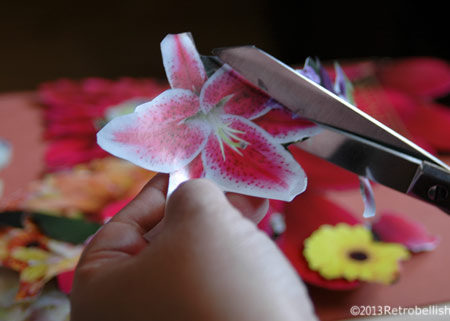
Although I photographed myself using big scissors, I also used small scissors to cut out all of the flowers. Once the flowers were all cut out, I had fun placing them in various positions side by side on a sheet of waxed paper (or you can use any type of surface). I took pictures of some floral arrangement positions I really liked, but once I found the floral arrangement I really loved, I took a picture in case I accidentally moved the waxed paper and lost the floral arrangement position.
I then used a small paintbrush to apply the Mod Podge glue to the center of each flower and onto the glass. The glue dries in about a minute giving you a small window of time to reposition the glued flower (if you need to). Gluing only the center (leaving the edges unglued) allows you to lift the edge of that (glued) flower and place the next flower over or under that flower’s edge. You can then carefully lift the plate and look at the placement of the (unglued) flower to see how you’d prefer to glue the next flower.
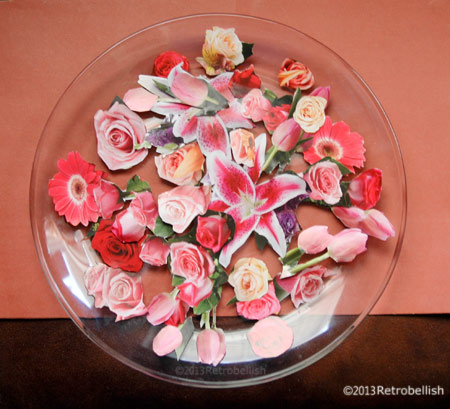
This is a great project for anyone that wants to make their own little art piece, and also great for children to make for their rooms. So just have fun and create your very own piece of recycled art.
Reclaimed Silk Flower Topiary

This reclaimed silk flower topiary started out as an idea I had after making some miniature topiary center pieces for a bridal shower. For the miniature topiary base I used some shot glasses that I purchased at a local thrift store. As I looked through my craft box, I found I had all the materials needed to make a big topiary from leftover craft materials I had collected over the years. I found a large shabby Styrofoam ball, a dowel rod, a variety of silk flowers and leaves left over from my many previous floral craft projects. I had an old planter in the basement that I cleaned up and decided to use for the base.
I first painted the dowel rod with a brown craft acrylic paint so that it would resemble a tree branch. Once the painted dried, I inserted the brown dowel rod into the center of the Styrofoam ball. The Styrofoam ball was kind of beat up, but it didn’t matter because it was going to be covered with the flowers and leaves.
I had many large yellow sunflowers, purple little blossoms, and many leaves in various shapes, sizes and shades of green, so I decided these were the materials I would use to make the topiary. I then separated all of the leaf varieties and chose the ones I would use to cover the background surface of the Styrofoam ball. I started by cutting the flower stems and leafy branches to a uniform length, leaving the stems long enough to insert into the Styrofoam ball. On a table, I laid out the flowers and leaves to get an idea of how to evenly distribute them over the surface of the Styrofoam ball. I then started inserting the flowers and leaves in a small area, and continued until I found a very nice pattern, which I continued until I covered the entire surface of the Styrofoam ball.

Once I finished covering the surface with the flowers and leaves, the topiary looked very nice and full, but then the dowel rod looked kind of thin in comparison to the volume of the topiary, so I went to my backyard and found a couple of small tree branches that I thought might look good tied to the dowel rod for extra dimension. It worked, because after using some gold ribbon to tie the branches to the dowel rod, the branches definitely added more bulk, but also made the dowel rod look like a branch as well.
For weight, I mixed some Plaster of Paris and poured it into the planter and held the dowel rod in the center until the plaster dried enough to let go. I let the plaster dry for a few hours before touching up the flowers. I added a few remnant leaves and flowers at the base of the topiary to hide the smoothness and white color of the plaster base. And although I used Plaster of Paris, other items such as rocks, dirt, cement and reused Styrofoam can also be used to weigh down the topiary. So have fun looking through your craft supplies and maybe you’ll be surprised to find that you have a lot of fun materials to make your own topiary in any size, shape and color.
Vintage Lacey Blue Hanky

This blue vintage hanky started out from one of my many botanical print fabric pieces that I’ve collected throughout the years. I also used the same fabric in a previous post titled “Something Blue,” which was a small fabric pouch with potpourri used as the “something blue” for a bride-to-be. The fabric lends itself to many projects and is so visually pleasing to me. One of the ideas I thought of after making the other project was to use it to create something reminiscent from the Victorian age, yet modern.
I thought of making this dainty little hanky and used the same vintage blue bontanical print fabric to make the 4″ x 4″ square. I cut the cotton fabric with pinking shears to minimize fraying and placed it over a solid cream colored fabric cut in the same size. I then placed the straight edge of the lace in between the botanical print fabric and the cream colored fabric and hand sewed a simple running stitch to bind all three pieces together. I then placed the blue silky ribbon over the sewn edge to hide the stitching and used navy blue thread to sew on the ribbon, making sure the needle went through all layers. The last touch was to sew a little bow on each corner of the hanky. I made the bows from the same variegated blue ribbon with no specific measurement. The bows were hand sewn onto each corner with navy blue sewing thread.
Again, although I used this specific botanical fabric I had collected, this piece could also be made from an old scarf, an old shirt, or even an old dress or skirt. All you need is a 4″ by 4″ piece of any fabric you like, some ribbon and lace that could be reclaimed from an old dress or lacy collar. One could even use fabric glue to bind the pieces without any sewing. So just have fun and create your very own vintage hanky.

Reclaimed Styrofoam Floral Painting

This Styrofoam Floral Painting started with a reclaimed piece of broken insulation. One of the aspects that caught my eye about this Styrofoam was that it was a very thick piece and when painted could easily resemble a wrapped canvas. We first trimmed the Styrofoam piece to square it off and ended up with a piece that measured approximately 16″ x 16″ x 1-1/2″ in depth. I painted the piece with gesso to seal it and give it a canvas-like texture. I used latex acrylic paints to paint the background, vase and flowers. After the flowers were thoroughly dry, I used fabric paint in slightly contrasting colors to edge out the flowers and vase, which added yet more texture and dimension.
Painting on Styrofoam was an experiment and using gesso gave the Styrofoam a more interesting texture. After the background was dry, painting the vase and flowers adhered to the surface so firmly that I didn’t even need a second coat of paint. It has been quite a few years since I painted this piece and the surface has remained in excellent condition, and the colors have not faded or flaked off at all. Another wonderful advantage of painting on thick Styrofoam is how very light this large piece is and how we were able to hang it up by merely pressing it against a tiny nail on the wall.
Although I used Styrofoam for this project, one could also use Masonite, wood or even a wood frame wrapped in old fabric and painted with gesso. Styrofoam is a very versatile and fun medium to work with and lends itself to many craft projects. Challenge yourself to be crafty and help keep it out of the trash. Also, see another one of our Styrofoam art pieces posted here titled Scrap Styrofoam Relic below.

