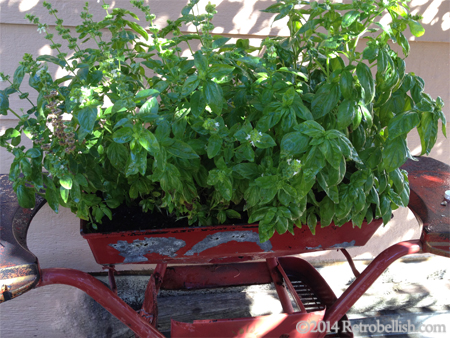
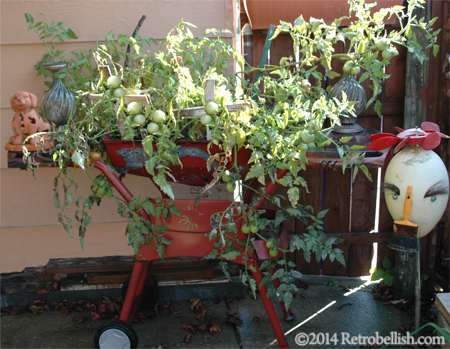
Repurposed Grill Planters
These repurposed grill planter projects started out with one of our grills that had outlived its use as a grill. The grills featured in this article were previous Retrobellish projects found here (links provided below). We have also added some new updated pictures of the grill planters in use today.
Reclaimed Grill Top Planter Published August 31, 2013 By Diana Romaxx
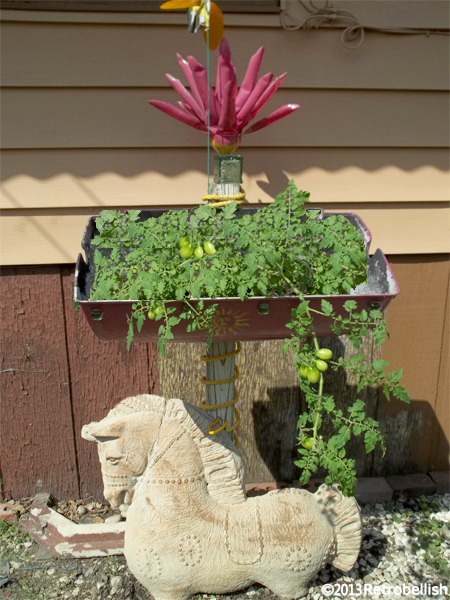
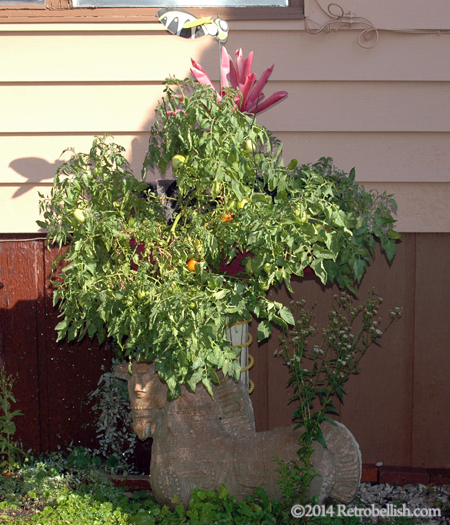
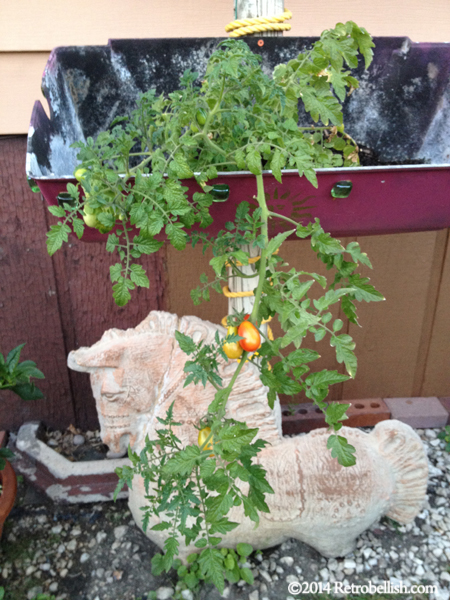
Recycled Gas Grill Planter Published October 17, 2011 By Diana Romaxx

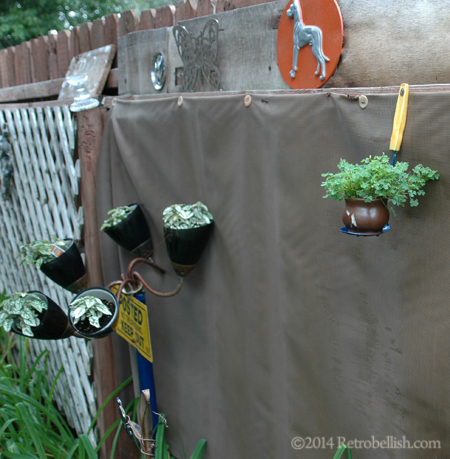
Reclycled Spoon Plant Holder
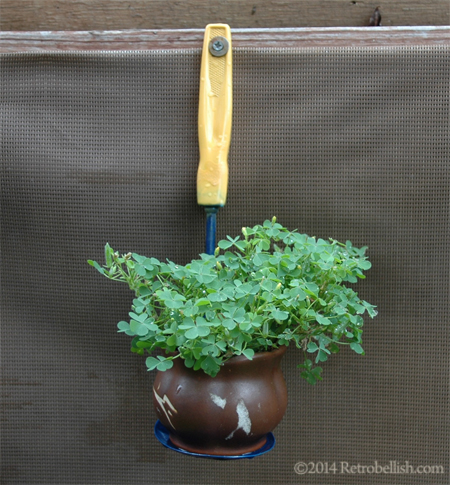
This small plant holder started out as an old perforated serving spoon that was rusted. We bent the bottom of the spoon out to make a flat surface to hold a small ceramic pot that we had lying around our project box. We spray-painted the spoon yellow and blue for a contrasting yet whimsical look. For the plant we needed a small flowering plant that could fit into the small ceramic pot. There is a wild clover plant that grows around our back fence and we decided to use one of the smallest ones for our project.
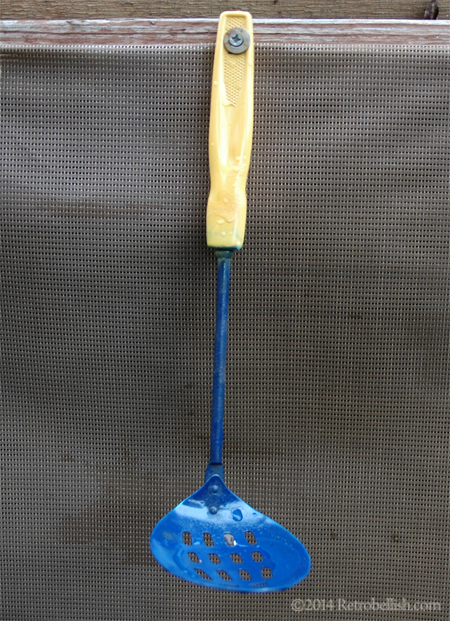
This would also be a fun project to continue if you should have other spoons to recycle.
Reclaimed Wood Puppet Box
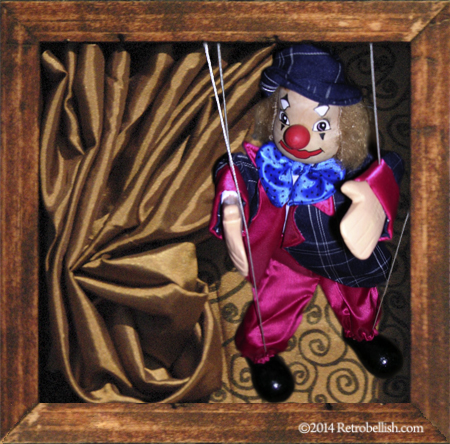
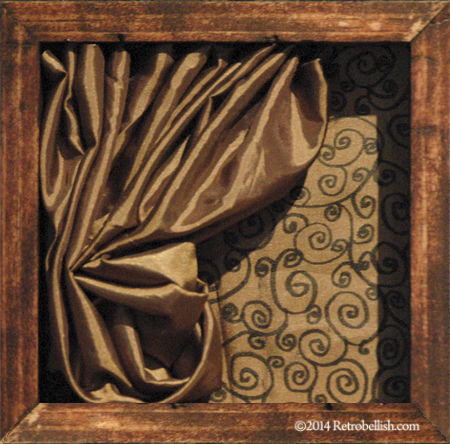
This Puppet Box Started out from a few reclaimed pieces of wood from a previous home repair. I cut the wood into four even pieces to make a square frame and then mitered the edges. I used a construction wood glue to bond the pieces together. After the wood glue dried, I applied a brown craft paint stain to the frame to give it a distressed look and feel. For the back of the wood puppet box, I measured and cut out a square from a sturdy (wheat cracker) box. I found a remnant fabric piece that was larger than the cardboard square and used fabric glue to affix the fabric edges onto the backside of the cardboard square. I then drew several swirl designs on paper to use as a guide. After the fabric glue dried, I used a fabric marker to draw a swirl design by eye onto the fabric square front side using my drawing as a guide. I used fabric glue and thumb tacks to adhere the fabric cardboard backing onto the back of the wood frame.
The little curtain was made from a larger remnant fabric piece. I measured and cut a narrow strip of sturdy cardboard from which I would suspend the little curtain. I used fabric glue along the edge of the narrow cardboard strip, gathered the fabric positioning it onto the narrow strip. Once the glued fabric draped like a little curtain, I used hot glue for a more permanent hold. Once the glue dried, I tacked the narrow strip to the top underside of the wood box. I then pulled the little curtain to one side and tacked it into the left side of the wood box. I then positioned the rest of the little curtain and carefully tucked then trimmed the bottom edge.
We had the little puppet lying around the basement for years and finally decided to give him a new purpose. The frame would make a good home for this puppet and in return we could display him on the basement wall instead of inside a storage box. The puppet’s strings are fastened to wood strips that allow you to maneuver the puppet. We posed the puppet inside the wood box and used thumb tacks to adhere the wood strips with strings into the top underside of the wood box. Although I used a stain for the frame, one can also use craft paint on the frame in your favorite color. Also the box can be used for any item such as small dolls, figurines, or even a photo.

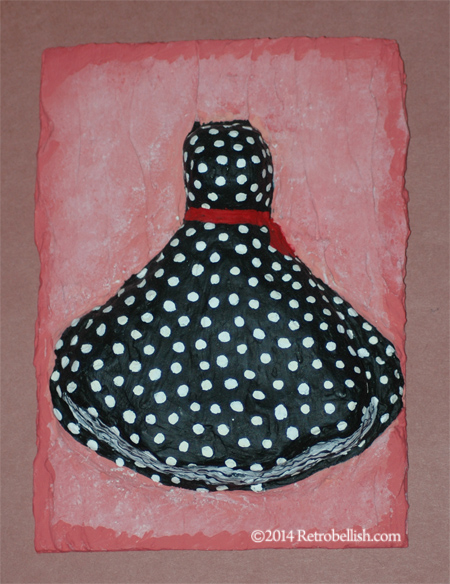
Plaster Art Dresses

These dresses are all made of reclaimed cardboard, recycled paper, and then covered with wall plaster. I start by picking out a reclaimed cardboard base and cutting it into a square or rectangular shape (approximately 4″ x 5″). I then crumple many pieces of recycled paper into small different sized shapes. Next, the paper shapes need to be glued down onto the cardboard base and it’s at this point that I try forming the dress shape by gluing the pieces onto the cardboard base. The paper shapes should not have too many gaps in between because the wall plaster is what will give the dress texture. Once the glued paper shapes are completely dry, I start spreading a thin coat of wall plaster over all of the glued paper pieces and background. I usually let the plaster coating completely dry overnight. I chose to give these pieces an abstract look (using a small plastic knife to spread the plaster), but it’s at this point that you could add as much or as little detail over the entire piece.
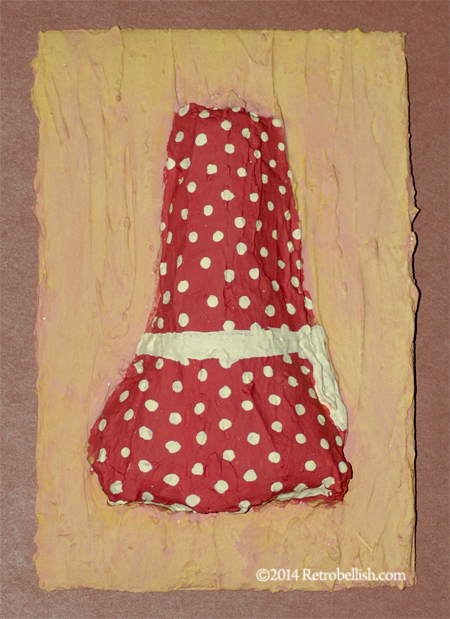
Because many of the steps involved in making these pieces is time consuming, I try to make many pieces at one time. Another fun part of the process that I enjoy is painting the dresses. I try to imagine the colors and details on these dresses and many times the outcome of the dress will change my mind to a different color I didn’t even think of before I started.
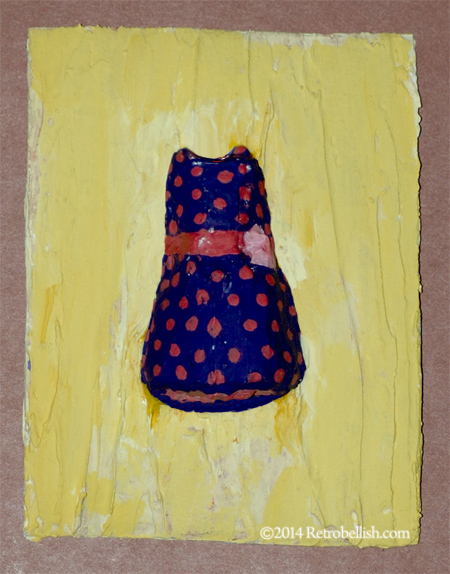
Other times, I’ll pick out colors and not know what patterns I’ll end up painting on these dresses. I enjoy the process very much and have a lot of fun. So the sky is the limit as to the themes you can make – be it flowers, animals or dresses. Just have fun creating your own designs and enjoy!
Other Examples Could also be Seen Here
Reclaimed Fabric Mini Doll Dresses
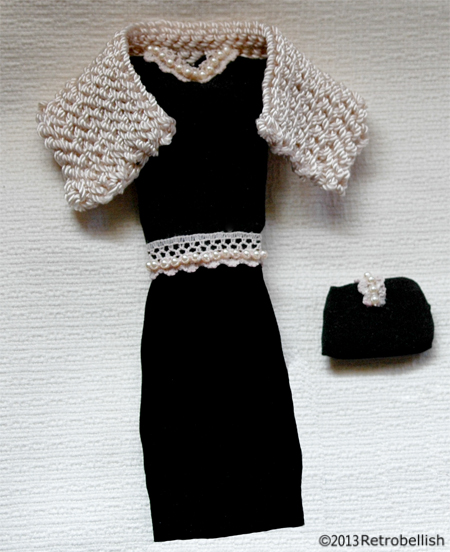
I was going through my fabric remnant box and found some very pretty small swatches that would make very pretty doll clothing. The black fabric had a nice draping quality to make a doll size little black dress. The bright pink satin fabric swatch was a bit larger so it lent itself for making a doll size fancy ball gown. Both fabric swatches were from old dresses of mine that I thought I’d one day use to make a scarf or other accessory.
I had a very pretty old doll and I thought it would be nice to make two new dresses for the doll. I held the fabric against the doll and determined that there was enough fabric to make both dresses. I used some scrap paper, traced and measured the doll’s current dress and added a 1/8″ seam allowance. I cut out the pattern, making adjustments and pinned the pattern to the fabrics. After cutting out both fabrics, I machine sewed the main segments, and preferred to hand sew the rest of the smaller pieces together.
In a small box of my remnant trims, I found a pretty cream colored pearl trim that was small enough in scale to trim the black dress. I hand sewed the pearl trim around the waist and neckline of the little black dress. I had a bit of the black fabric left over so I sewed a little black purse by folding the fabric onto itself and hand sewing the edges. I then hand sewed a tiny little piece of pearl trim in the center of the purse.
Later, I found a small skein of silky cream colored yarn that matched the shade of the trim on the dress, so I decided to crochet a little shawl for the little black dress.
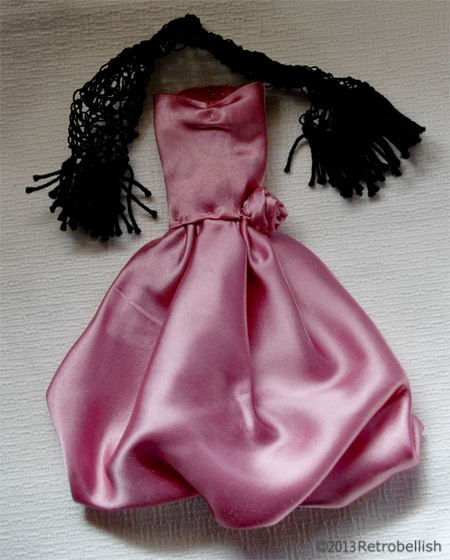
The pink dress was totally different in style but also fit the doll nicely. I also crocheted a small shawl for this dress using black embroidery floss, and although it took quite some time, I added a fringe to this tiny shawl using the same embroidery floss. So from time to time, take a look through your remnants and leftovers because they may surprise you and inspire a new creation.