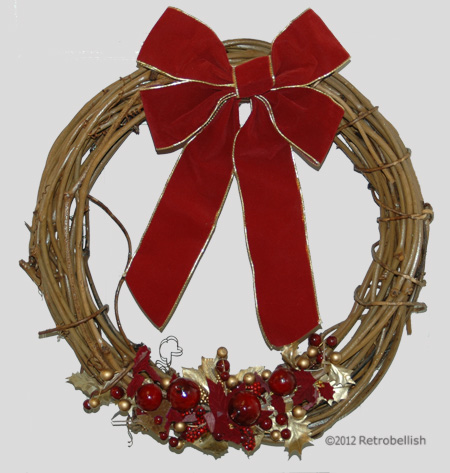
Grapevine Holiday Wreath
Originally Published 11 29, 2012
The holiday season is a fun time of the year to get creative with decorations for your home. This grapevine holiday wreath is very simple to make and could easily be updated every year with different ornaments of your choice. I had a very plain grapevine wreath at home that I wanted to decorate with some type of ornaments, but nothing too big that would hide the beauty of the vines. View Original Post Here
Upcycled Red Mittens
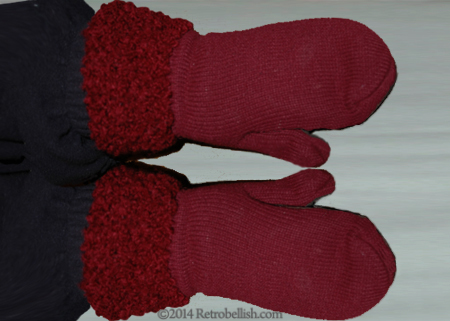
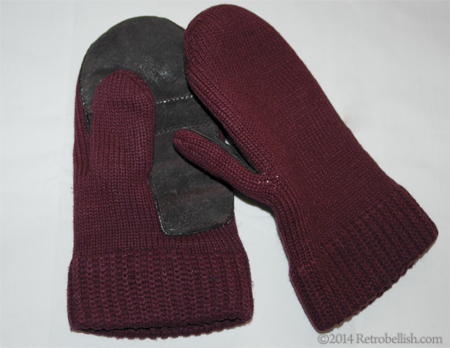
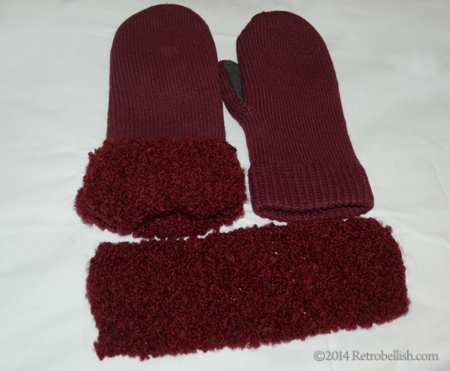
These red mittens are one of my favorites because of how warm they keep my hands in the winter months. They are not the prettiest mittens, but the wool knit and fleece lining do the job. Every so often, I’d wash them and hang them to dry so they wouldn’t shrink, but after a few years of use, the mittens began to look a little warn and the knitted edging around the wrists became stretched out of shape. Also, I wished the wrist length of the knitted edging extended longer beyond my wrists.
Since the length of the mittens didn’t extend past my wrists, I thought of finding the same color yarn, knitting an additional knitted trim to sew onto the existing knitted edging. The new knitted edging would also fit more snugly around my wrists and give the mittens a fresh new look.
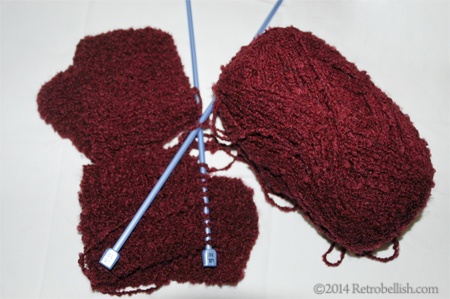
I used acrylic dark red yarn, size 10 knitting needles, cast on eleven stitches and knitted 30 rows for each edging. I then hand sewed the knitted edges to each mitten using heavy duty (dark red) sewing thread.
So don’t hesitate to give some of your old gloves or mittens a fresh new look by adding a decorative trim or embellishment. To see some of my previous glove embellishment projects, please click on the links below. And Thank You Very Much for your visit.
Other Glove Projects
Recycled Fleece Leopard Gloves
Embellished Blue Faux Suede Gloves
Repurposed Book Page Flower Art
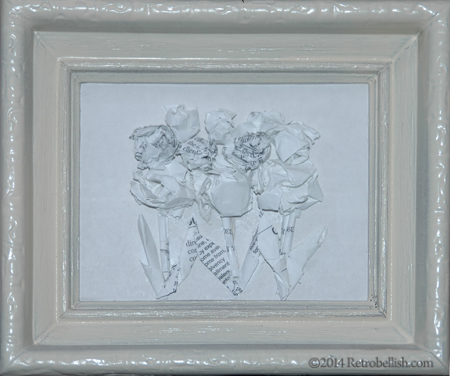
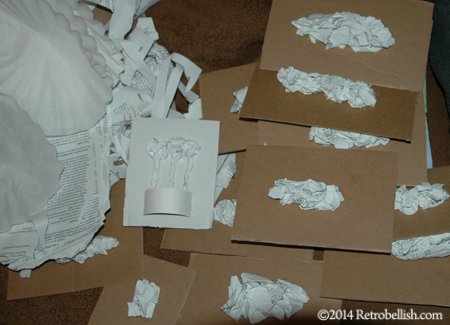
I recently posted paper mache plaster dresses and wondered what flowers might look like using the same paper mache plaster technique. I used the same recycled paper to create flower shapes and centered them on a 5″ x 7″ cardboard background, but when I applied the plaster over the paper flower petals, the mixture was too heavy and flattened the flower petals too much. I usually photograph each stage of my projects and when I reviewed the flower photos, I realized how beautiful the plain paper flowers looked before I had applied the plaster mixture over them.
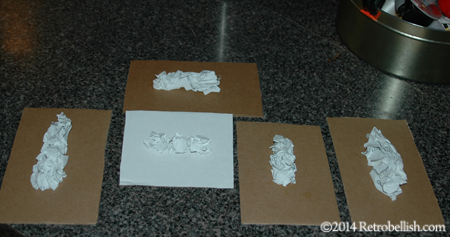
I decided to try again, but this time leave the paper flowers in their natural state and make them a little smaller in size. I shaped the recycled paper into little flowers and found out that the ones closely resembling little roses looked the prettiest. I applied a dab of white craft glue to the back of each of the little rose shaped flowers and adhered them directly onto the cardboard background, creating two rows of flowers.
I made flower stems for only the bottom row of flowers. I rolled strips of the same recycled paper into elongated little tubes and glued them directly onto the cardboard background. I used the same recycled paper to make leaves by folding them to closely resemble large leaf shapes. Again, I used craft glue to adhere the leaf shapes to the cardboard background, to each side of the stems.
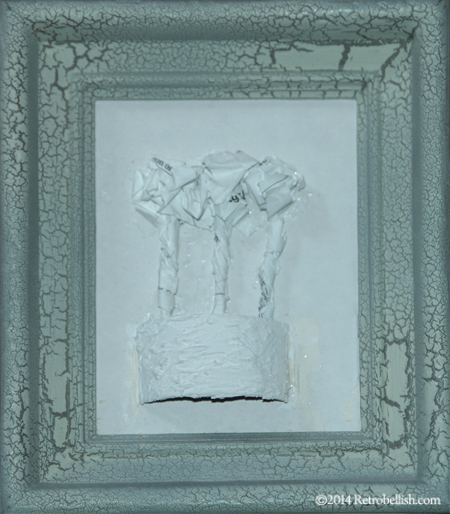
I made the flowers in the next little frame in much the same way, but used a paper towel core to make the little three dimensional flower pot. To make the little flower pot, I used scissors to cut across a small section of a paper towel core and then cut that small section into a half rounded shape. I then painted the cut cardboard with gesso. After the gesso dried, I took a small paintbrush to brush a little plaster across the surface to give the little flower pot a heavier looking texture. After the cardboard flower pot piece dried, I used glue on each end to adhere it onto the cardboard background making sure I positioned it to cover the bottom of the stems to make it appear like flowers are growing out of a little flower pot.
Although in this project I chose to leave the recycled paper in its natural state, you can give the flowers a more colorful look by applying a craft paint or a transparent color wash to each of the paper shapes before or after you create your flower shapes. Even though I used flowers as my subject, you can make any paper shapes you desire for your own personal creation.
Reclaimed Fabric Gift Wrapping
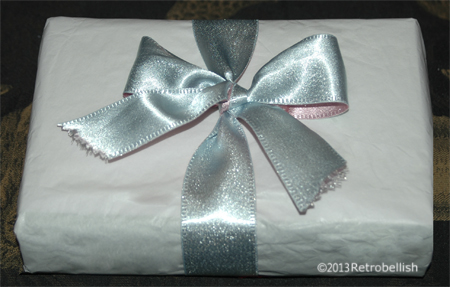
This project is one that I personally have made for many years. The use of reclaimed fabric is one that lends itself for many reclaimed craft projects. In this project I used this soft light flannel as gift wrapping for a Baby Shower, then I used a beautiful pink and blue satin ribbon from a roll that I found in a clearance bin. In the past, I have also used a receiving blanket as wrapping paper around a small gift, making sure that all the ends are gathered on the top center of the gift, then pulled the gathered blanket ends through a rubber band and spread them out through the rubber band to resemble a flower. For even smaller gifts, a cloth diaper or small baby bath towel can be used as well. So just have fun and find some fun fabric to wrap your next baby shower gift.
Pears On Branch Paper Relief
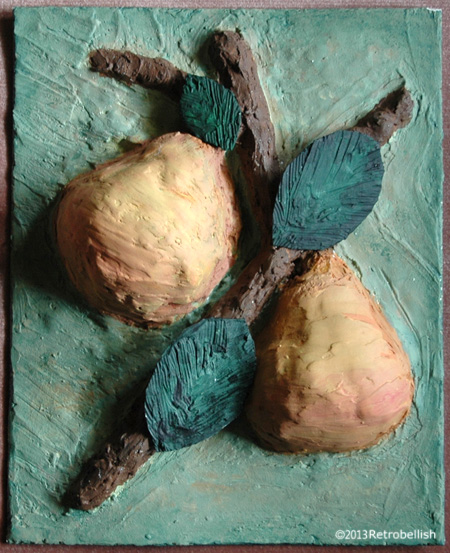
This whimsical relief of pears on a branch is made of scrap paper, recycled cardboard and plaster. About ten years ago, I had bought a similar relief of pears on a branch in solid plaster that I keep on display in my kitchen and which was the inspiration for this project.
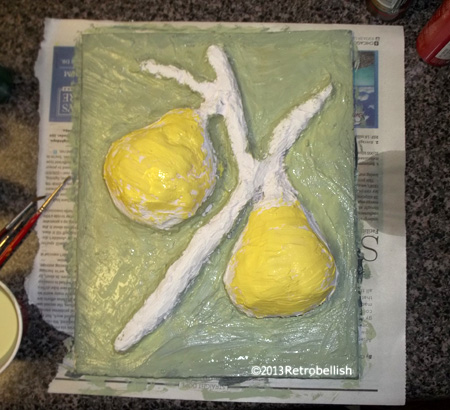
I started out by useing a recycled heavy piece of cardboard as a base. To make the pear shapes, I crumbled paper scraps into tight pear-shape balls and glued them to the cardboard shape. I then rolled more paper scraps into long narrow shapes to form the branches and glued them around the pear shapes.
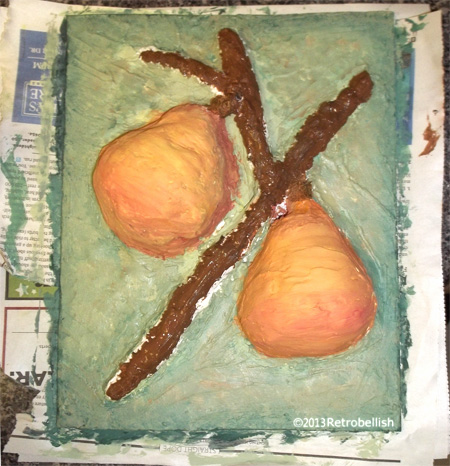
Once all of the paper shapes were glued in place, I used a plastic knife to apply a thin coat of plaster over all of the paper shapes and the cardboard base. Once the first plaster layer dried, I smoothed out a few rough spots with sandpaper, then applied another layer of plaster. Once the plaster completely dried, I started painting the relief with acrylic paints.
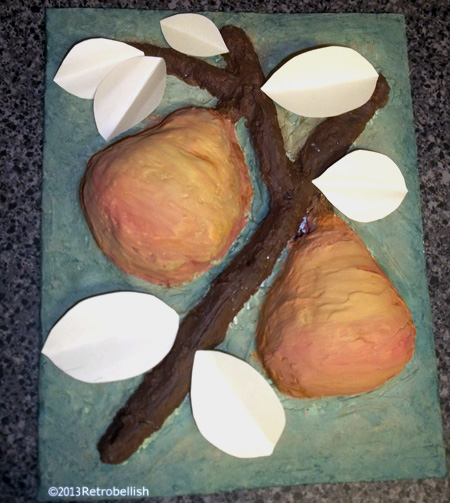
Last but not least, I cut leaf shapes from thin cardboard and applied a thin coat of plaster over each leaf. Once the light coat of plaster completely dried, I painted each leaf using the same acrylic paints.
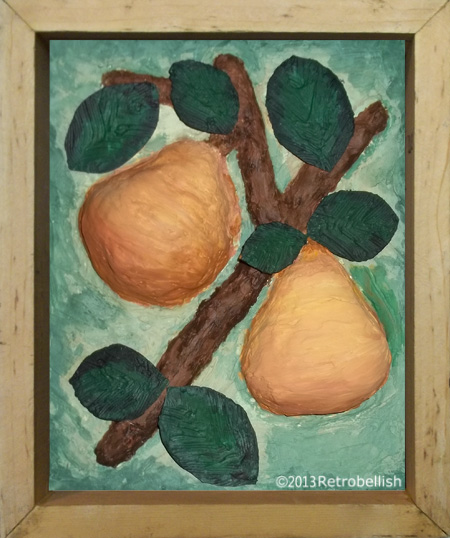
I used a wood frame for the relief that we made from scrap wood pieces that we cut and mitered to the size of the Pears On Branch Paper Relief. And although I used pears as a subject on this relief one could make one out of your favorite fruits or vegetables. So just have fun and create your very own piece of art.