Reclaimed Teddy Bear
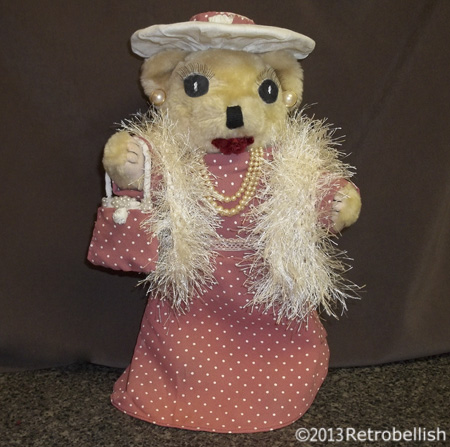
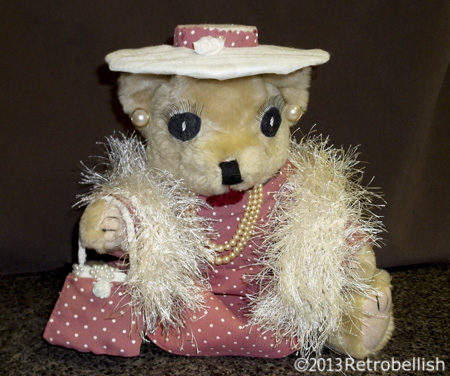
This recycled teddy bear project started from a beautiful but slightly damaged teddy bear that we bought at a craft store sidewalk sale in our neighborhood. The bear was a little dusty but nothing a little soap and water couldn’t remedy. The only thing wrong with this bear was that the eyes were ripped out and needed some kind of patches or replacement eyes. So I decided to start my next project with this bear because it had a nice color and the body joints were flexible. I was inspired to make a dress for the bear from an old deep pink polka-dot dress of mine that I had wanted to recycle for a future doll project. The bear was the perfect size and shape for this reclaimed fabric.
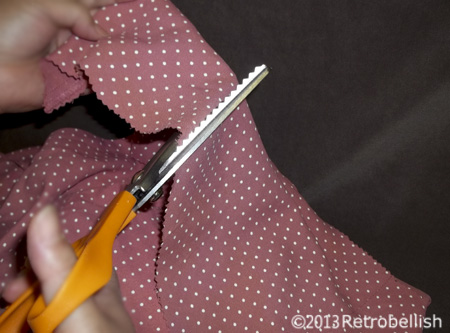
The bear washed nicely and after drying it thoroughly for several days, I laid the bear flat on craft paper that was larger than the bear. I took a pencil and traced an outline around the bear and marked the paper at the shoulders and legs (to determine the length of the dress). I then cut out the pattern, placed it against the different sections of the old dress to decide the best possible area to cut.
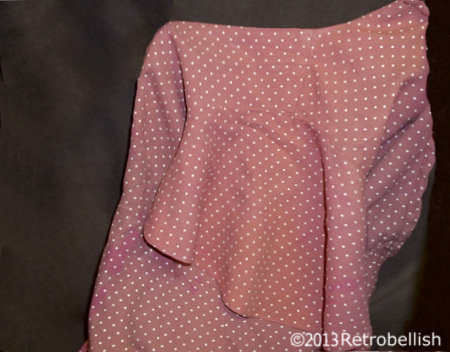
The old dress zipped on the center back and after placing the bear around different areas, I decided to try placing the actual bear inside the shoulder/sleeve section of the dress and found that the slight curve of the dress’s neck fit snugly around the curve of the bear’s neck and the dress’ floppy sleeve hung loosely around the bear’s wide belly like a skirt. There was plenty of fabric to fit all the way around the bear and more than enough dress fabric left over to make sleeves and a small purse. I designed a little purse and hat on paper.
I carefully cut the bear’s dress from the shoulder/neck section of the dress, made a few minor alterations and hand sewed the fabric to complete the back of the bear’s dress. I then traced out sleeve patterns, cut them out on the dress fabric and sewed the little sleeves to the bear’s dress. I then put the dress back on the bear and it fit very nicely. From my box of beads, I found many pearl beads I had left over from another project. I sewed a few pearl beads onto each sleeve cuff.
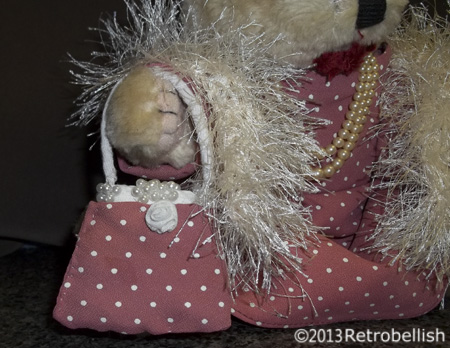
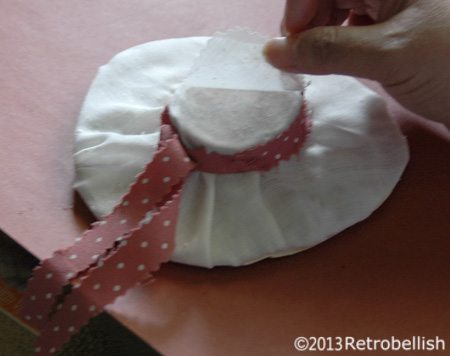
Next I traced the purse shape onto a thick piece of chip board and cut out more little cotton pieces from the cream colored blouse to cushion the little purse shape, then cut the dress fabric out for the little purse. For the purse strap, I cut a strip of cream colored cotton making sure to measure the strip length by wrapping it around the bear’s paw. I rolled up the strip and hand sewed the strap ends, one to each inside corner of the purse. I then covered the purse with the dress fabric and sewed the seam to one side of the purse. I placed a bit of cream colored fabric in the top center opening (and over the chip board insert) of the little purse and sewed more pearl beads onto the top and corner sections of the little purse.
Using matching tan colored thread, I sewed close each eye opening where the button eyes had been ripped out. In my remnant box of fabrics I used the same cream colored cotton blouse that I used to make purse parts. This particular blouse had a wide thick cotton band around the top and bottom edges. I cut out two circles on paper and held them up to the bear. After trial and error I found the perfect size eyes. I then traced the paper circles onto the blouse’s wide band and cut out two thick cotton circles. I sewed on the eyes and used a black dye fabric marker to color in the eyes. I then used white fabric paint to dot the center of each eye. The eyelashes I used were leftover from Halloween and I used fabric glue to affix them over each eye.
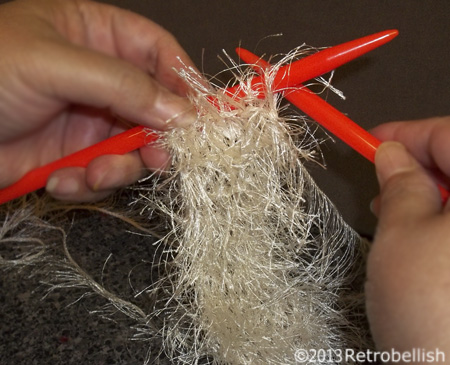
I found an old pearl necklace and pierced earrings, which I used to adorn the bear. I decided a cream colored shawl would look nice against the cream colored polka-dots, so I knitted a shawl using cream colored fun fur and size 11 knitting needles. I cast on 7 stitches and kept knitting until the shawl reached the length I liked on the bear. I also made the deep red lips on the bear by hand sewing a small length of deep red chenille yarn to the bear’s mouth area.

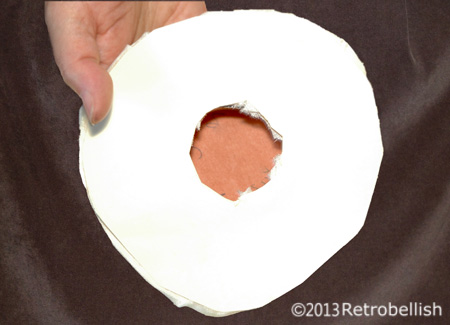
The hat was made from part of a recycled brown (thick cardboard) accordian pocket folder. Again, I measured and cut a big circle out from craft paper, put the cut paper circle on the bear’s head as this would measure the brim of the hat. I then made a couple of adjustments to the paper circle, traced it on cardboard and cut it out on the thicker cardboard. I cut the center of the circle in the center of the hat, rolled a smaller strip of the thick cardboard slightly inside the edge of the open hole (used glue along the edges), cut the a circle from the same chip board to complete the crown of the hat (also using glue to attach the circle to the crown). Next I used a remnant piece of cream colored fabric to cover the hat. I used a small strip of the polka-dot fabric to make a band around the rim of the hat.
Although I used this damaged bear to work on this project, you can always use one of your own bears or an old doll. Just remember to have fun creating your own piece of art.
Recycled Hubcap Clock
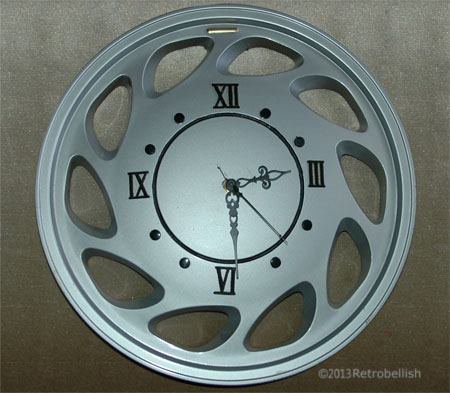
This hubcap clock was made from an old auto hubcap we found. We tend to save items that we feel could be put to good use. The hubcap was such an artistic piece because of its interesting details, beautiful shape, neutral color, and plastic composition, which made it easy to drill through. Once we bought the clock kit, this was a fun and fast project to make. Clock kits are available at most craft stores and online for very little money. The instructions were easy to follow and with the aid of some basic tools, the whole project was completed in a few hours.
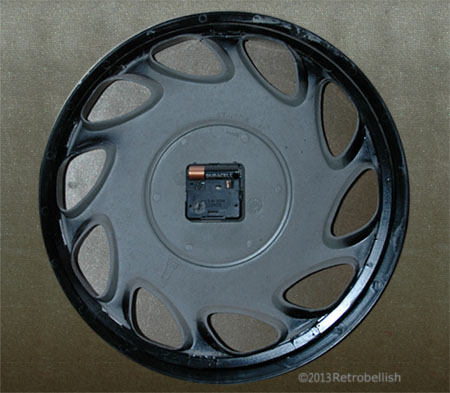
Although we used an auto hubcap for this project, one can use a piece of wood or any object that you can drill through, or make a hole through to accommodate the clock mechanism stem that holds the clock hands. Look around for items that interest you and you may find that they can be recycled into a functioning piece of art such as this one. This is also a fun project to do with kids, letting them create their own working piece of art for their rooms. Like always, just have fun.
Reclaimed Calendar Floral Plate
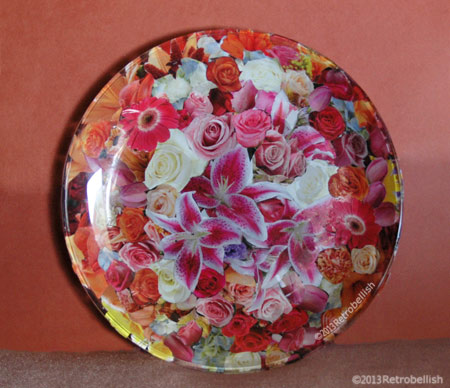
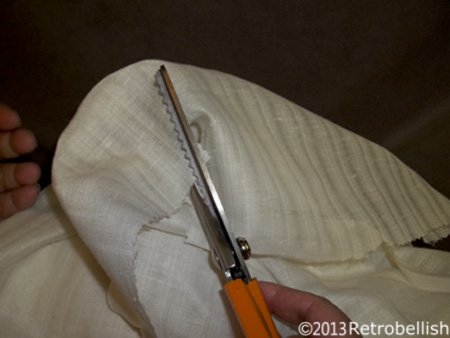
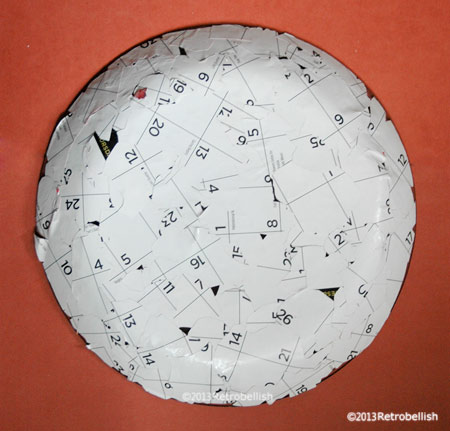
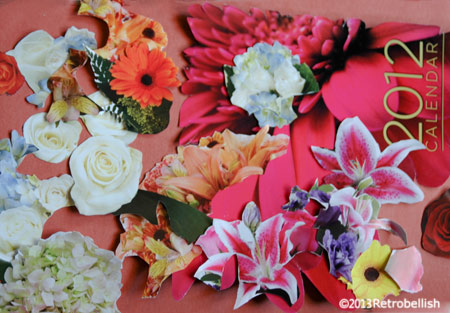
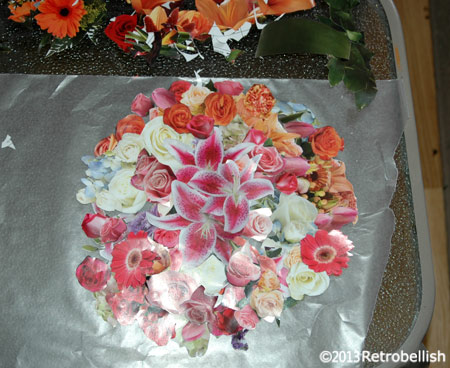
Welcome! This collage floral plate is made from using a 2012 reclaimed calendar and a thrift store clear glass plate. As you may have read on a previous post, I have made these collage plates from old magazines and brochures, which I keep for their wonderful designs. This past year, I was given a very beautiful floral calendar from one of our local businesses. The calendar featured different floral designs every month that lent themselves perfectly for this project.
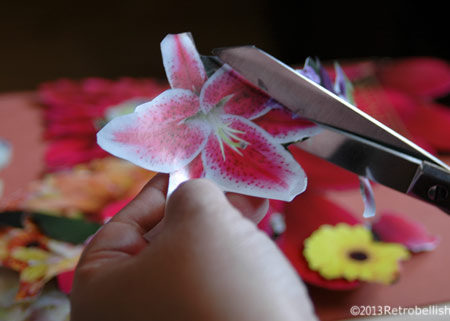
Although I photographed myself using big scissors, I also used small scissors to cut out all of the flowers. Once the flowers were all cut out, I had fun placing them in various positions side by side on a sheet of waxed paper (or you can use any type of surface). I took pictures of some floral arrangement positions I really liked, but once I found the floral arrangement I really loved, I took a picture in case I accidentally moved the waxed paper and lost the floral arrangement position.
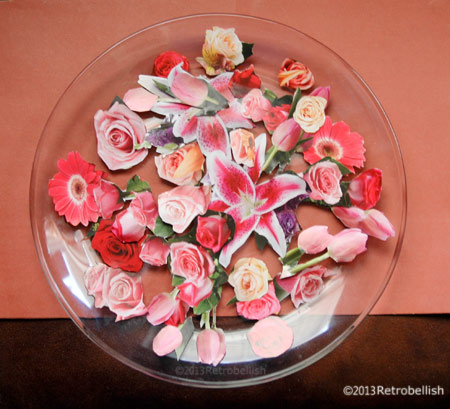
I then used a small paintbrush to apply the Mod Podge glue to the center of each flower and onto the glass. The glue dries in about a minute giving you a small window of time to reposition the glued flower (if you need to). Gluing only the center (leaving the edges unglued) allows you to lift the edge of that (glued) flower and place the next flower over or under that flower’s edge. You can then carefully lift the plate and look at the placement of the (unglued) flower to see how you’d prefer to glue the next flower.
This is a great project for anyone that wants to make their own little art piece, and also great for children to make for their rooms. So just have fun and create your very own piece of recycled art.
Reclaimed Doll Dress On Form
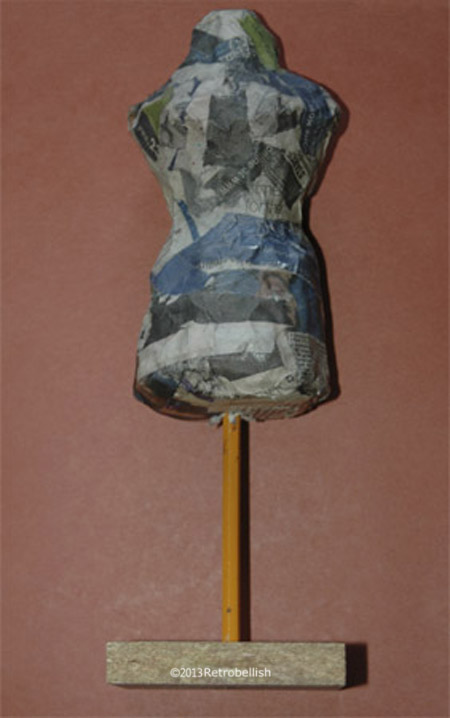
Throughout the years I have bought several interesting dolls at craft shows and garage sales. One of my doll’s had a dreary dress and for the longest time, I’ve wanted to make that doll a prettier dress. To make it easier to work on the dress, I decided to make a dress form as close as possible to the doll’s size. The form started out from a piece of reclaimed aluminum foil that I rolled up into an oblong shape. I then took old newspaper strips, made paper mache and wrapped the paper mache strips around the foil. Paper mache forms are sold at most craft stores, but are usually smaller in size. I needed this form to be approximately the same size as the doll, so making my own form was the best option and it also gave me a chance to use up some recyclable items I had lying around the house.
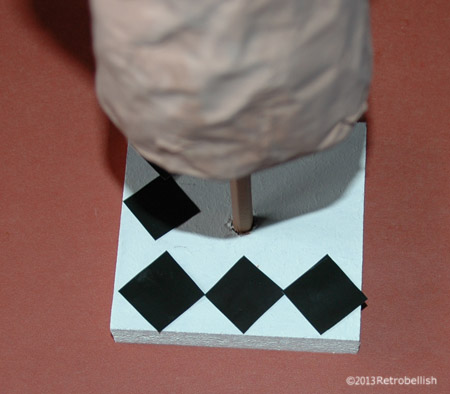
I was quite happy that the form I made was very close in size to the doll’s size. I then needed to make a stand and a base. Once the form was thoroughly dry, I drilled a small hole into the bottom center of the form and into the square wood base I had found in my garage. Using my hot glue gun, I put some hot glue onto both ends of an old pencil and stuck the pencil into the drilled hole and into the base. Once the hot glue dried, I used a light tan acrylic craft paint to paint the paper mache form.
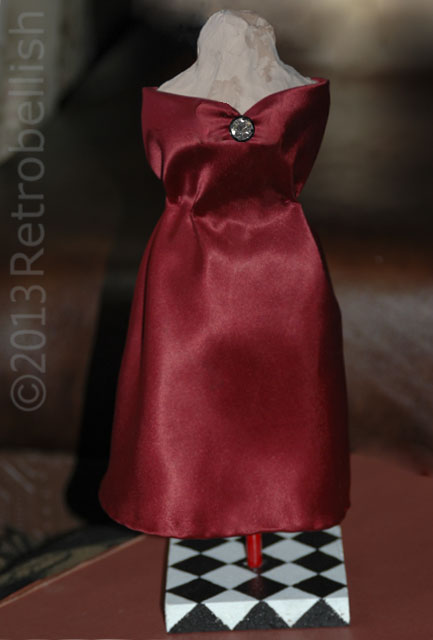
I had picked out a beautiful deep satin red fabric from my old fabric remnants to make the doll’s dress, a color that I thought looked very nice in contrast to the form’s tan color. I then decided to use acrylic craft paints to create a harlequin black and white pattern on the base. Once the base was painted in white and the paint dried, I cut out black little squares from an old calendar I was about to recycle. By trial and error, I found the right size little squares for the harlequin print on the base and used a pencil to trace the little squares. I then used black acrylic paint to paint in the little squares. Once the base was thoroughly dry, I was finally ready to make the dress.
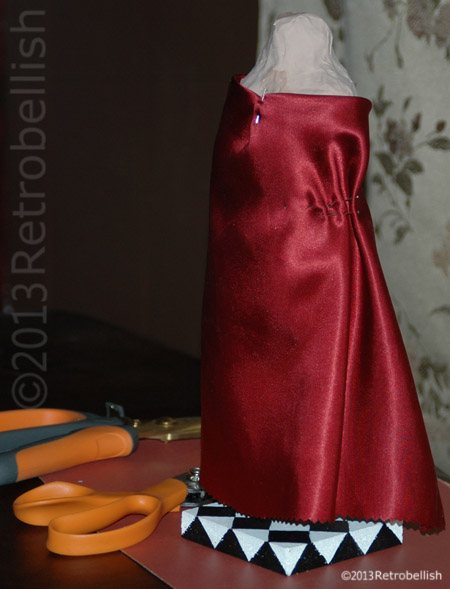
As you may have read on some of my previous posts, I love to make miniature dresses for dolls or just as art pieces. This project started out as a form for my doll’s dress, and although the red satin fabric lent itself to a much fancier dress than I intended for my doll, I decided to keep this evening dress as an art project on this stand. I used small snaps to fasten the back of this dress, so I plan to remove the dress, make a different style dress for my doll, and place the red dress back on this stand permanently as an art piece. To add a little sparkle to the top center of the dress, I used a small earring (a partner to the one I lost), but you can use any piece of jewelry you’d like.
So although I intended to use this form to help me make my doll’s dress, I was happy that I made an art piece to place in my sewing room, yet I will still be able to make my doll’s dress, and then display the red dress on my shelf as an art piece. Even though I chose to make my paper mache form, you could buy one and make your very own piece of art. Remember, just have fun and enjoy your crafts.
Recycled Coffee Cans
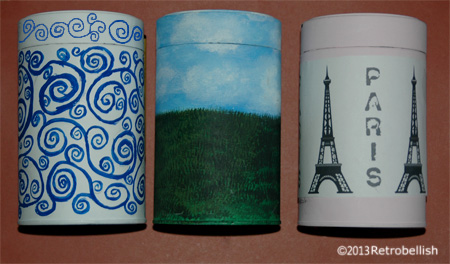
These recycled tin coffee cans make great craft storage containers. The three cans featured here are examples of three simple, yet very different ways to decorate these tin coffee cans. The first one was decorated by painting the background a solid white color with acrylic craft paint. After the white paint dried, I used a pencil to lightly draw a pretty swirl design, and then painted over the pencil design using a bright blue acrylic craft paint. I plan to use this coffee can to hold my colored pencils in my craft area, and which also matches the pretty blue and white motif on my stapler (recently featured in a separate post). Instead of painting a design, you can also use fun colorful stickers or even cut out your favorite designs, animals, letters or pictures from magazines and glue or Mod Podge them right onto the coffee can.
On the second coffee can featured here, I painted a light blue background depicting a sky on the top half of the can and a dark forest green on the bottom half of the can. After the paint dried on the coffee can, I used a true green acrylic craft paint using a fan-shaped paintbrush to make tiny strokes to depict grass blades against the (dried) dark green background. I then used watered down white acrylic craft paint to paint in light fluffy white clouds against the light blue sky. I plan to use this scene as a background on which I will paint a farm scene with a red barn, trees and farm animals (definitely a future post).
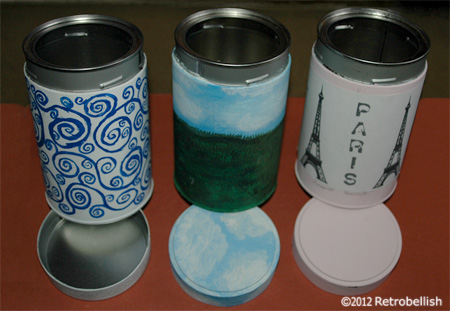
I painted the entire third coffee can with a light pink acrylic craft paint because I planned to use a Paris theme to decorate this coffee can. This time I used my printer to print out a Paris Eiffel Tower and pretty lettering in black. I found the contrast of the black decorations against the light pink background very pretty. It was great recycling these coffee cans, which are great for storing pens, pencils, crayons and many other craft items. So just have fun thinking of the ways you can create and recycle coffee cans, glass jars or other containers to store any of your favorite things.