Grapevine Holiday Wreath
Originally Published 11 29, 2012
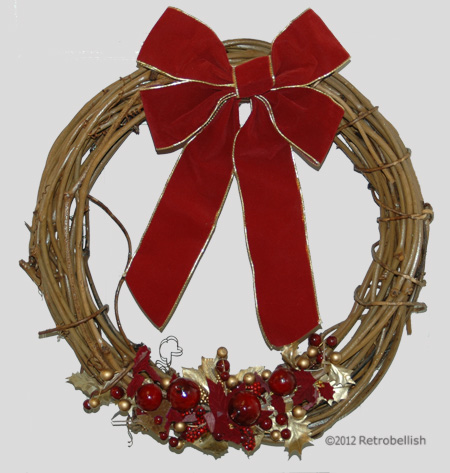
The holiday season is a fun time of the year to get creative with decorations for your home. This grapevine holiday wreath is very simple to make and could easily be updated every year with different ornaments of your choice. I had a very plain grapevine wreath at home that I wanted to decorate with some type of ornaments, but nothing too big that would hide the beauty of the vines. View Original Post Here
Upcycled Red Mittens
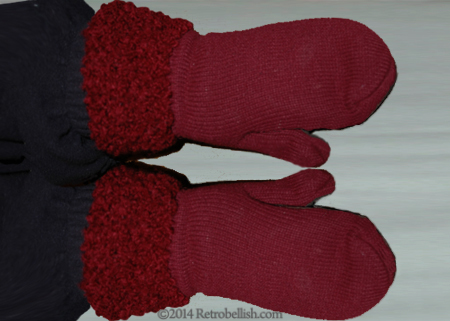
These red mittens are one of my favorites because of how warm they keep my hands in the winter months. They are not the prettiest mittens, but the wool knit and fleece lining do the job. Every so often, I’d wash them and hang them to dry so they wouldn’t shrink, but after a few years of use, the mittens began to look a little warn and the knitted edging around the wrists became stretched out of shape. Also, I wished the wrist length of the knitted edging extended longer beyond my wrists.
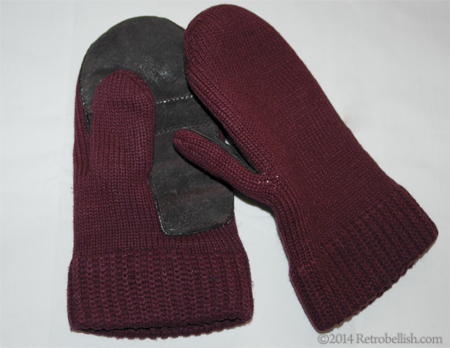
Since the length of the mittens didn’t extend past my wrists, I thought of finding the same color yarn, knitting an additional knitted trim to sew onto the existing knitted edging. The new knitted edging would also fit more snugly around my wrists and give the mittens a fresh new look.
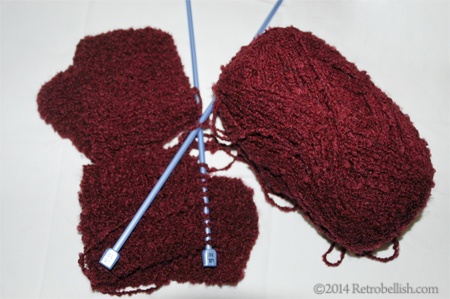
I used acrylic dark red yarn, size 10 knitting needles, cast on eleven stitches and knitted 30 rows for each edging. I then hand sewed the knitted edges to each mitten using heavy duty (dark red) sewing thread.
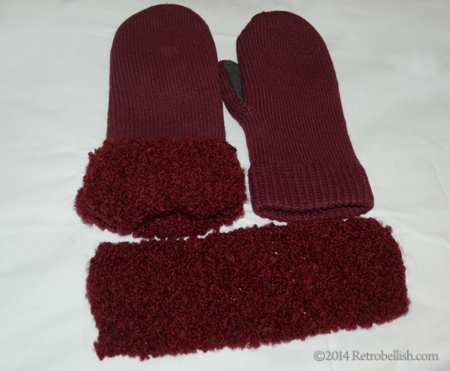
So don’t hesitate to give some of your old gloves or mittens a fresh new look by adding a decorative trim or embellishment. To see some of my previous glove embellishment projects, please click on the links below. And Thank You Very Much for your visit.
Other Glove Projects
Recycled Fleece Leopard Gloves
Embellished Blue Faux Suede Gloves

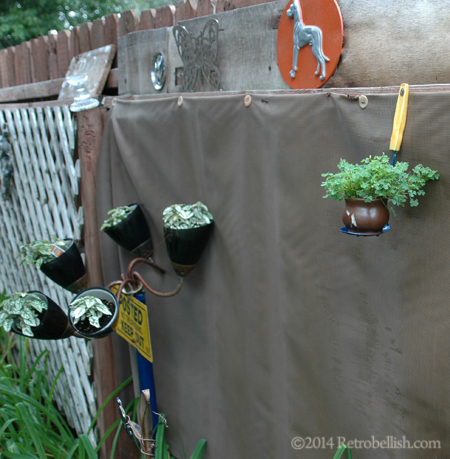
Reclycled Spoon Plant Holder
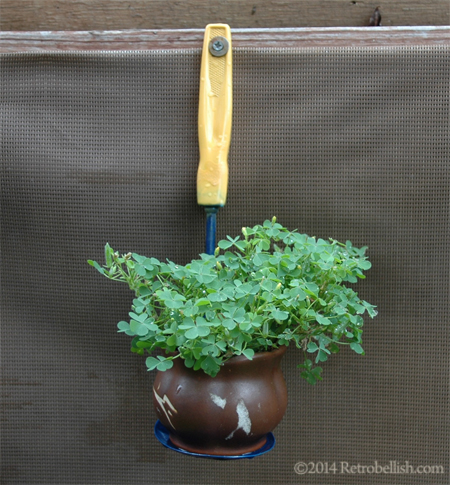
This small plant holder started out as an old perforated serving spoon that was rusted. We bent the bottom of the spoon out to make a flat surface to hold a small ceramic pot that we had lying around our project box. We spray-painted the spoon yellow and blue for a contrasting yet whimsical look. For the plant we needed a small flowering plant that could fit into the small ceramic pot. There is a wild clover plant that grows around our back fence and we decided to use one of the smallest ones for our project.
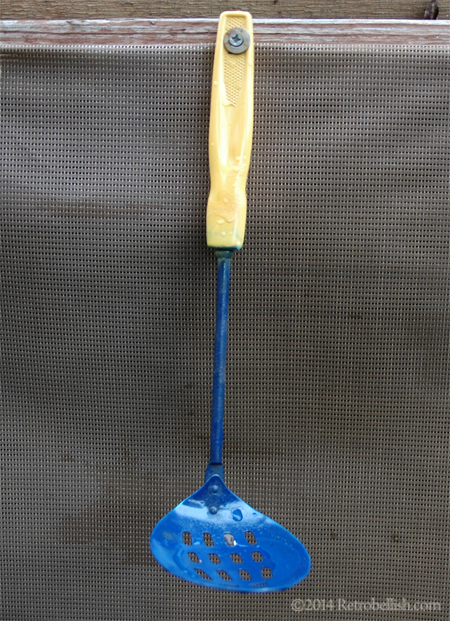
This would also be a fun project to continue if you should have other spoons to recycle.
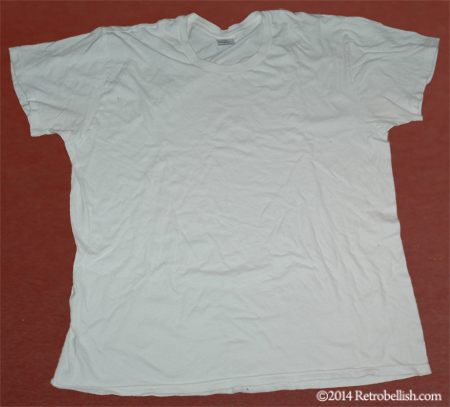
Embellished Tee-Shirt
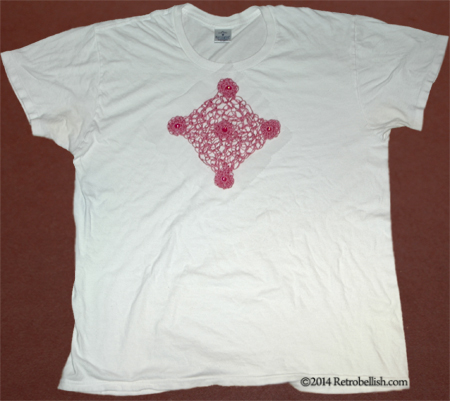
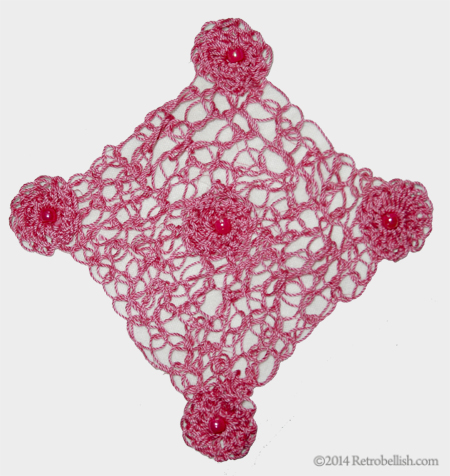
I love the beautiful crocheted and lacey trims I’ve seen on a lot of blouses and dresses. I have a comfortable but very plain white tee shirt that I’ve wanted to embellish for quite a while, and after seeing so many beautiful crocheted designs, I finally decided to try making my own crocheted embellishment to sew onto my tee shirt.
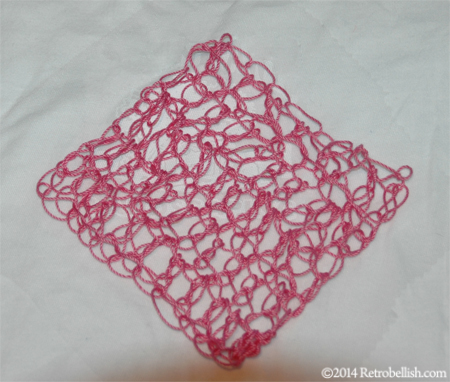
I chose a very pretty pink crochet yarn for this project (Size 3 Crochet yarn, 100% Mercerized cotton). For years, I’ve always loved a crocheted design on the center of an old scarf of mine, so I tried crocheting something similar using different sized crochet needles, but nothing I tried looked lacey enough. I then tried crocheting simple single stitches with my larger needles and that’s when I began to create an open lacey design that looked very nice.
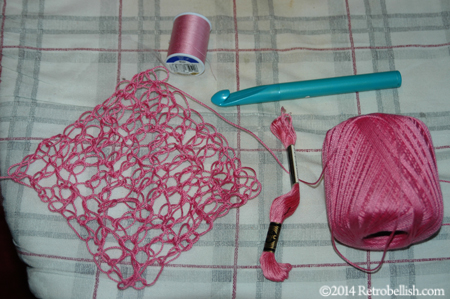
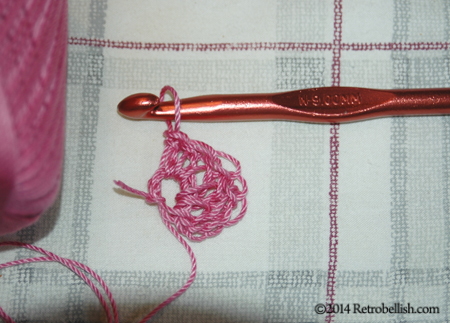
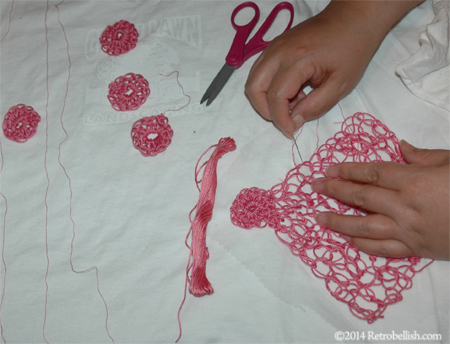
After trial and error, I found that a very large Size Q crochet needle created a loose pretty stitch I really loved. I decided to make a square shape so that when turned on its side it became a diamond shape. I single crocheted one row of 12 chains and then crocheted 12 rows of single stitches. The large open stitches of the crocheted square looked very nice when laid flat, but were very loose when I picked up the square shape. For stability I decided to sew the crocheted square in place on white tuling. I cut a square of white tuling (about an inch longer (on all sides) than the size of the crocheted square). Once I centered the crocheted piece onto the tuling, I trimmed away a little of the tuling all the way around. Using a sewing needle and a single strand of matching pink embroidery floss, I sewed the crocheted piece (on the white tuling) onto the tee shirt.
I wanted to further embellish the diamond shape at each corner and possibly in the center, so I made rosettes to adorn each corner of the crocheted diamond shape and another rosette in the center. I crocheted the rosettes using a Size N crochet needle, crocheting six single chains (using the same pink crochet yarn) and made 12 double-crochet stitches for each rosette. I repeated this four more times. Using pink embroidery floss and sewing needle, I sewed the rosettes onto the crocheted piece (making sure I sewed through the tuling and tee shirt as well). Using a sewing needle and pink polyester sewing thread, I sewed a large iridescent pink barrel bead through the center of each rosette.
Like so many of the other projects I’ve made here, this is only one example of how to embellish a tee shirt with a simple crocheted design. So just have fun creating a design of your own to embellish your tee shirt by just crocheting it and sewing it on.