Recycled Hubcap Clock
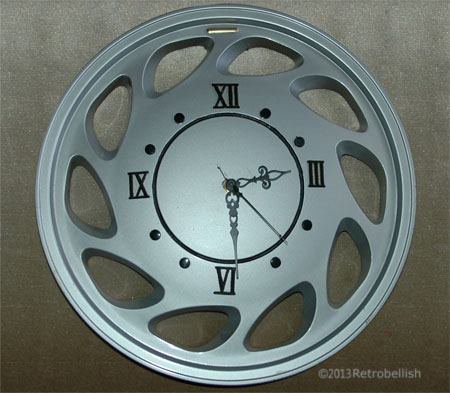
This hubcap clock was made from an old auto hubcap we found. We tend to save items that we feel could be put to good use. The hubcap was such an artistic piece because of its interesting details, beautiful shape, neutral color, and plastic composition, which made it easy to drill through. Once we bought the clock kit, this was a fun and fast project to make. Clock kits are available at most craft stores and online for very little money. The instructions were easy to follow and with the aid of some basic tools, the whole project was completed in a few hours.
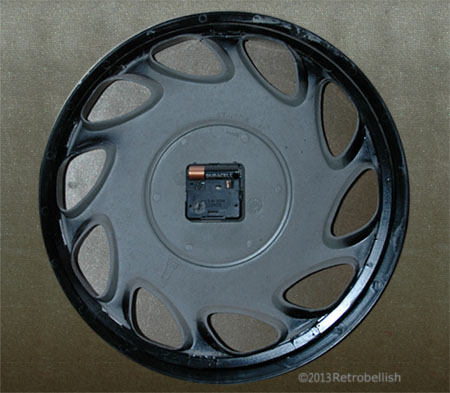
Although we used an auto hubcap for this project, one can use a piece of wood or any object that you can drill through, or make a hole through to accommodate the clock mechanism stem that holds the clock hands. Look around for items that interest you and you may find that they can be recycled into a functioning piece of art such as this one. This is also a fun project to do with kids, letting them create their own working piece of art for their rooms. Like always, just have fun.
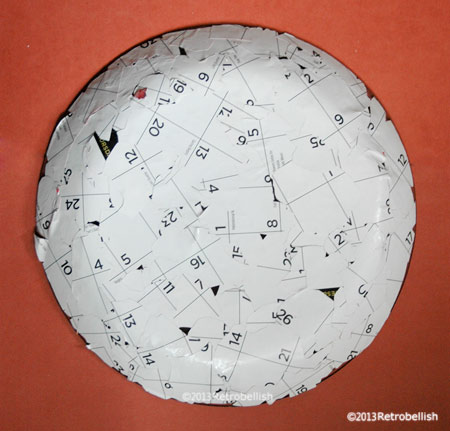
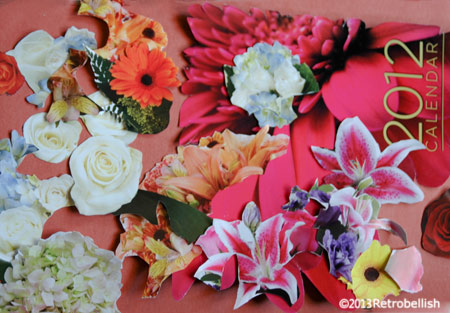
Reclaimed Calendar Floral Plate
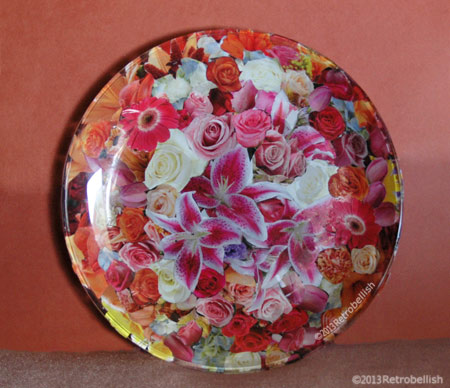
Welcome! This collage floral plate is made from using a 2012 reclaimed calendar and a thrift store clear glass plate. As you may have read on a previous post, I have made these collage plates from old magazines and brochures, which I keep for their wonderful designs. This past year, I was given a very beautiful floral calendar from one of our local businesses. The calendar featured different floral designs every month that lent themselves perfectly for this project.
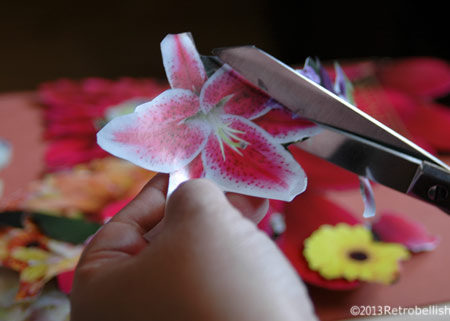
Although I photographed myself using big scissors, I also used small scissors to cut out all of the flowers. Once the flowers were all cut out, I had fun placing them in various positions side by side on a sheet of waxed paper (or you can use any type of surface). I took pictures of some floral arrangement positions I really liked, but once I found the floral arrangement I really loved, I took a picture in case I accidentally moved the waxed paper and lost the floral arrangement position.
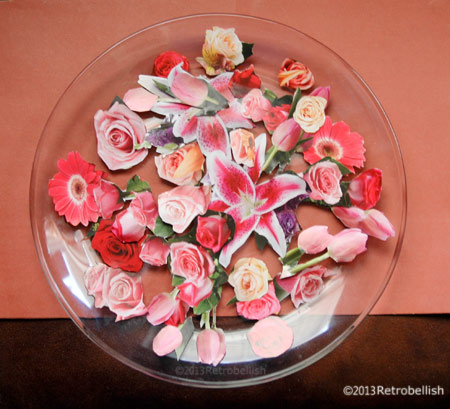
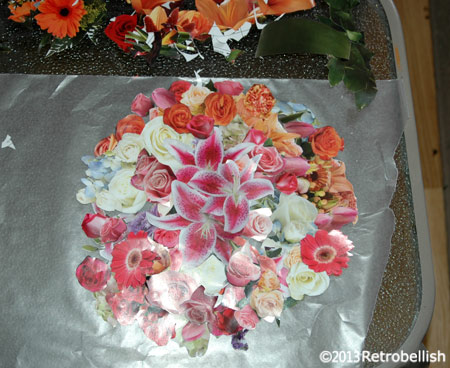
I then used a small paintbrush to apply the Mod Podge glue to the center of each flower and onto the glass. The glue dries in about a minute giving you a small window of time to reposition the glued flower (if you need to). Gluing only the center (leaving the edges unglued) allows you to lift the edge of that (glued) flower and place the next flower over or under that flower’s edge. You can then carefully lift the plate and look at the placement of the (unglued) flower to see how you’d prefer to glue the next flower.
This is a great project for anyone that wants to make their own little art piece, and also great for children to make for their rooms. So just have fun and create your very own piece of recycled art.
Recycled Coffee Cans
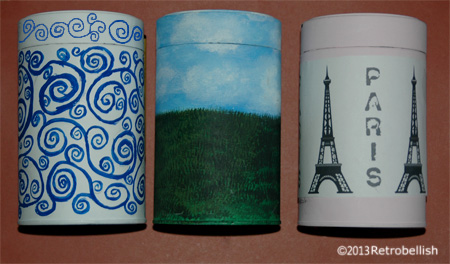
These recycled tin coffee cans make great craft storage containers. The three cans featured here are examples of three simple, yet very different ways to decorate these tin coffee cans. The first one was decorated by painting the background a solid white color with acrylic craft paint. After the white paint dried, I used a pencil to lightly draw a pretty swirl design, and then painted over the pencil design using a bright blue acrylic craft paint. I plan to use this coffee can to hold my colored pencils in my craft area, and which also matches the pretty blue and white motif on my stapler (recently featured in a separate post). Instead of painting a design, you can also use fun colorful stickers or even cut out your favorite designs, animals, letters or pictures from magazines and glue or Mod Podge them right onto the coffee can.
On the second coffee can featured here, I painted a light blue background depicting a sky on the top half of the can and a dark forest green on the bottom half of the can. After the paint dried on the coffee can, I used a true green acrylic craft paint using a fan-shaped paintbrush to make tiny strokes to depict grass blades against the (dried) dark green background. I then used watered down white acrylic craft paint to paint in light fluffy white clouds against the light blue sky. I plan to use this scene as a background on which I will paint a farm scene with a red barn, trees and farm animals (definitely a future post).
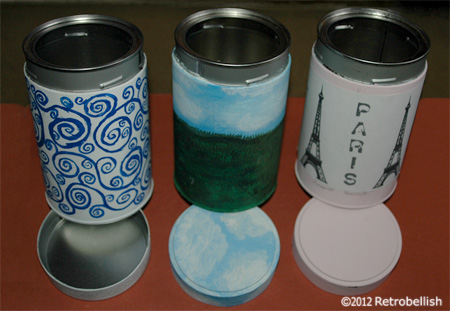
I painted the entire third coffee can with a light pink acrylic craft paint because I planned to use a Paris theme to decorate this coffee can. This time I used my printer to print out a Paris Eiffel Tower and pretty lettering in black. I found the contrast of the black decorations against the light pink background very pretty. It was great recycling these coffee cans, which are great for storing pens, pencils, crayons and many other craft items. So just have fun thinking of the ways you can create and recycle coffee cans, glass jars or other containers to store any of your favorite things.
Hand Decorated Recycled Stapler
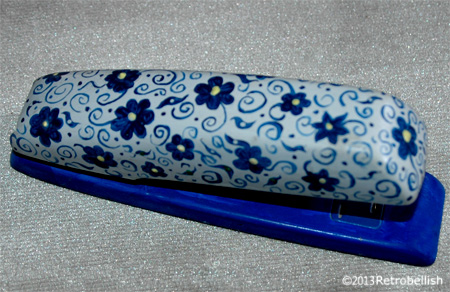
This stapler had been lying around our garage for many years. We used to use it at our craft shop back in the 90s. The stapler had started to rust a little on the inside, but the outside was in good condition. While painting another item, I had an idea and decided to get the old stapler and just have fun decorating it.
Long ago, I had a sharp blue inked pen that I loved to use when drawing on thick white scrap paper. The contrast of the sharp blue on white was very pretty, and one time I really liked the pattern I drew, so I saved it. When I saw the smooth surface of the old stapler, I thought I’d try painting that same pattern on the stapler using the same color scheme. I painted the stapler body with Gesso to better adhere the white craft paint I’d use as the background. Once the Gesso dried, I painted the stapler with bright white craft paint. Once the paint was dry, I used a pencil to lightly trace the flowers and scrolls free hand. I then used a bright blue fabric paint to draw the flowers and scrolls. The small bottle of fabric paint made it easy to draw the designs and fill in the flowers. You may have also seen a similar pattern on another project in this blog, in which I used a bright blue fabric marker to draw a flower design on the collar of a white blouse.
Although the old stapler doesn’t function as a stapler, it works wonderfully as a paperweight. It was great to recycle the old stapler into an art piece that I truly enjoy. Even though I tried this on a stapler, there are so many other items that you may have fun recycling into your very own desk art.
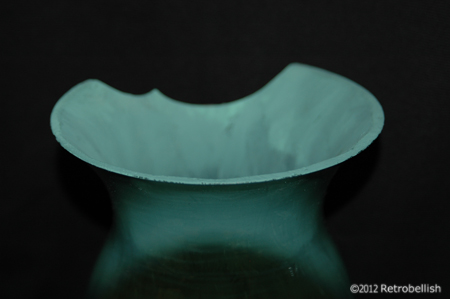
Repurposed Floral Vase
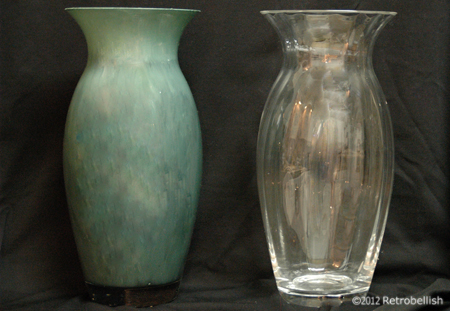
This glass vase started out as a gift from a close friend of ours. She gave us a set of two, but we were on the verge of a home remodeling project and decided not to open the vase boxes for fear of breaking them. When we finally decided to use the vases, we discovered one vase had a cracked rim, and by then too much time had gone by to exchange it.
So I decided to re-purpose the damaged vase as a painted glass vase. I started out by taking a trip to my local home improvement store to get all the items I needed for the project. Since the crack was only about a few inches long (in the shape of a half moon), I decided to just get some fine grade sandpaper to smooth off the broken glass edges. Also, I was able to purchase a small can of forest green acrylic enamel on clearance. I sanded the cracked rim until the sharpness was gone (wear gloves when doing this part) and the glass was smooth. I then painted the inside of the glass vase with the deep forest green paint I had purchased. I then let it dry for about a day. After the vase was completely dry, it looked like green glass and the crack was not as visible any more–perfect for some dry or silk flower arrangement.
I decided to use some tall silk peonies I had purchased a few months back on one of my weekend trips to a small neighborhood craft store. The craft store mostly has a lot of bridal accessories, but always has great clearance sales on their floral supplies. The flowers I had were big and bulky, perfect for the size of the vase. The other green leafed pieces I had were leftovers from other projects. When I started to play around with the flowers and the greenery, it started to create a very lifelike arrangement that I decided to keep.
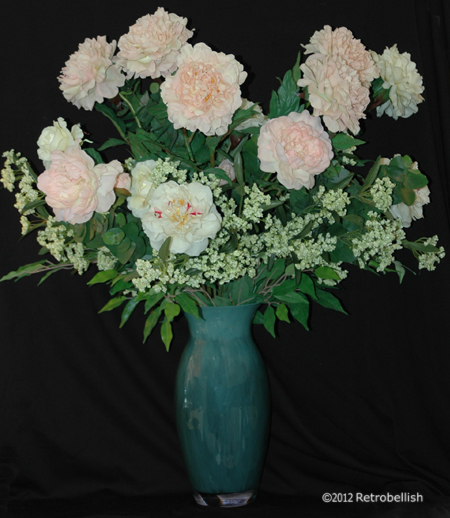
This vase could also have been painted in any color of your choice, even Mod Podged with old magazine cutouts or any art of your choice. This project could also be done on any glass vase to which you may want to give a new look. The beauty is that if you don’t like the color, it could be changed. So just have fun and create your very own one-of-a-kind piece.