Reclaimed Fabric Mini Doll Dresses
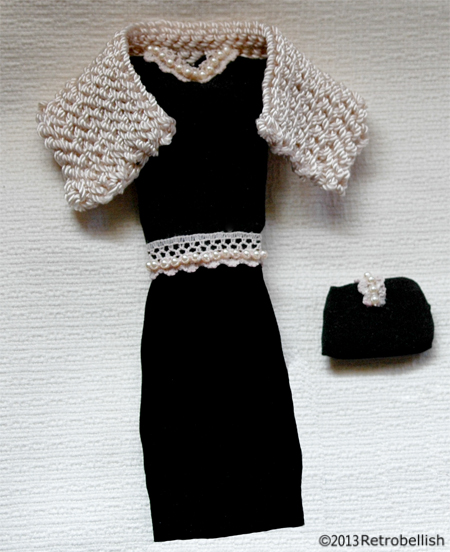
I was going through my fabric remnant box and found some very pretty small swatches that would make very pretty doll clothing. The black fabric had a nice draping quality to make a doll size little black dress. The bright pink satin fabric swatch was a bit larger so it lent itself for making a doll size fancy ball gown. Both fabric swatches were from old dresses of mine that I thought I’d one day use to make a scarf or other accessory.
I had a very pretty old doll and I thought it would be nice to make two new dresses for the doll. I held the fabric against the doll and determined that there was enough fabric to make both dresses. I used some scrap paper, traced and measured the doll’s current dress and added a 1/8″ seam allowance. I cut out the pattern, making adjustments and pinned the pattern to the fabrics. After cutting out both fabrics, I machine sewed the main segments, and preferred to hand sew the rest of the smaller pieces together.
In a small box of my remnant trims, I found a pretty cream colored pearl trim that was small enough in scale to trim the black dress. I hand sewed the pearl trim around the waist and neckline of the little black dress. I had a bit of the black fabric left over so I sewed a little black purse by folding the fabric onto itself and hand sewing the edges. I then hand sewed a tiny little piece of pearl trim in the center of the purse.
Later, I found a small skein of silky cream colored yarn that matched the shade of the trim on the dress, so I decided to crochet a little shawl for the little black dress.
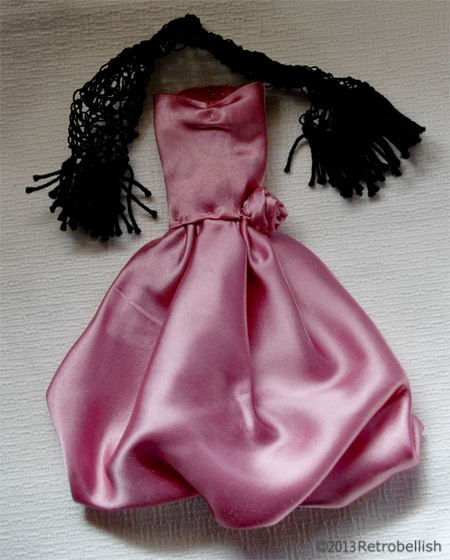
The pink dress was totally different in style but also fit the doll nicely. I also crocheted a small shawl for this dress using black embroidery floss, and although it took quite some time, I added a fringe to this tiny shawl using the same embroidery floss. So from time to time, take a look through your remnants and leftovers because they may surprise you and inspire a new creation.
Pears On Branch Paper Relief
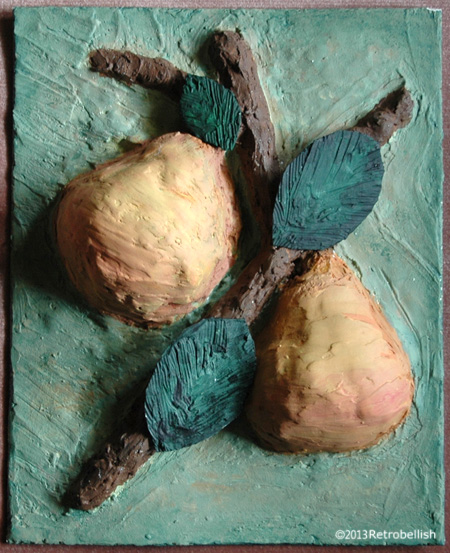
This whimsical relief of pears on a branch is made of scrap paper, recycled cardboard and plaster. About ten years ago, I had bought a similar relief of pears on a branch in solid plaster that I keep on display in my kitchen and which was the inspiration for this project.
I started out by useing a recycled heavy piece of cardboard as a base. To make the pear shapes, I crumbled paper scraps into tight pear-shape balls and glued them to the cardboard shape. I then rolled more paper scraps into long narrow shapes to form the branches and glued them around the pear shapes.
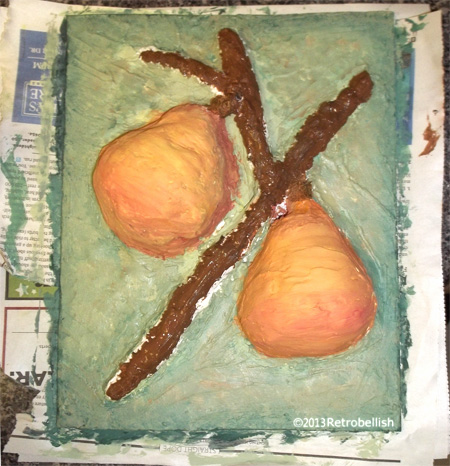
Once all of the paper shapes were glued in place, I used a plastic knife to apply a thin coat of plaster over all of the paper shapes and the cardboard base. Once the first plaster layer dried, I smoothed out a few rough spots with sandpaper, then applied another layer of plaster. Once the plaster completely dried, I started painting the relief with acrylic paints.
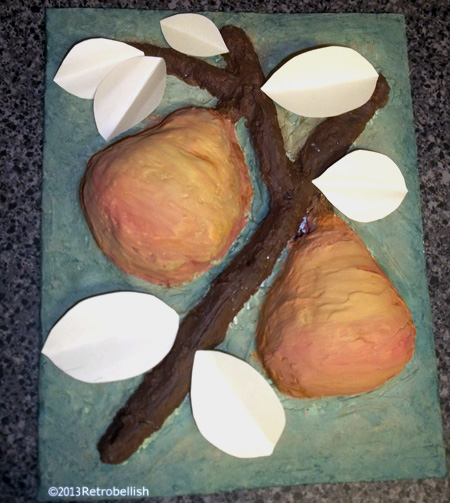
Last but not least, I cut leaf shapes from thin cardboard and applied a thin coat of plaster over each leaf. Once the light coat of plaster completely dried, I painted each leaf using the same acrylic paints.
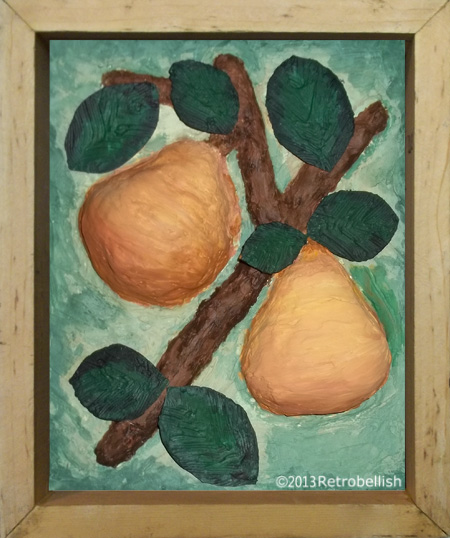
I used a wood frame for the relief that we made from scrap wood pieces that we cut and mitered to the size of the Pears On Branch Paper Relief. And although I used pears as a subject on this relief one could make one out of your favorite fruits or vegetables. So just have fun and create your very own piece of art.
Recycled Cardboard Plaster Reliefs
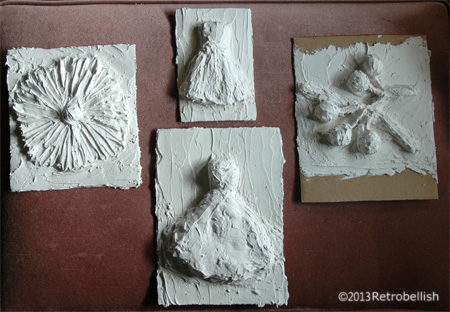
These small plaster reliefs started out from a cardboard and paper recycling project. I had saved several boxes from our favorite wheat crackers because they’re made of a very nice grade of cardboard that was sturdy yet flexible. I had fun thinking of different mediums I could try on these cardboard pieces and remembered a past project where I had used plaster on Styrofoam and wood. I wondered if I could try making a similar craft using these recycled cardboard pieces.

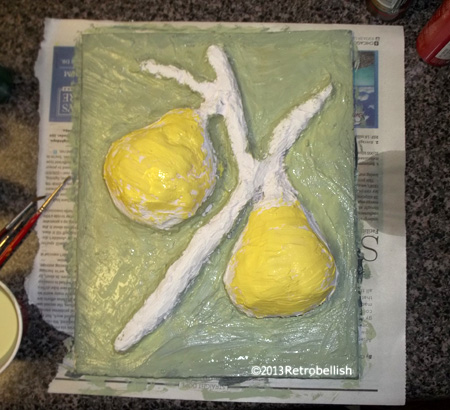
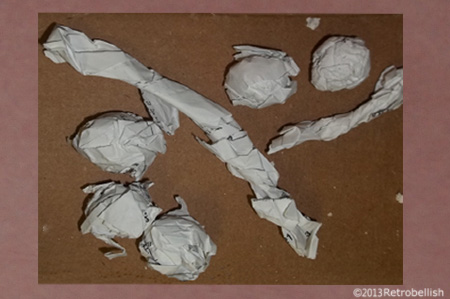
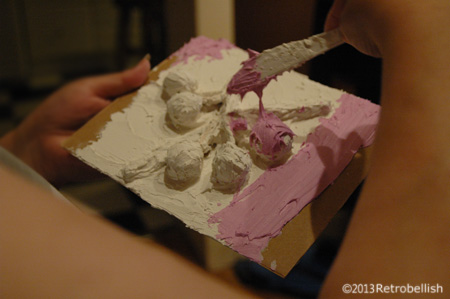
I decided to make a few little abstract dresses and other pieces. I took some newspapers we were recycling, tore some pages into medium sized pieces, crumpled and twisted them up into medium chunky pieces. I used several of the 4″ x 6″ cardboard pieces as the base for the dresses. I dabbed a little fabric glue onto the center areas and placed the bulky crumpled pieces of newspaper onto these dabs of glue so they could remain stationary for the next step. I decided to use a wall repair plaster that is pink and soft (like frosting) in it’s original form, but hardens and dries white in color. Once the chunky paper dried on the glue, I used a plastic knife to spread the plaster over the paper and smoothed it over the chunky paper.
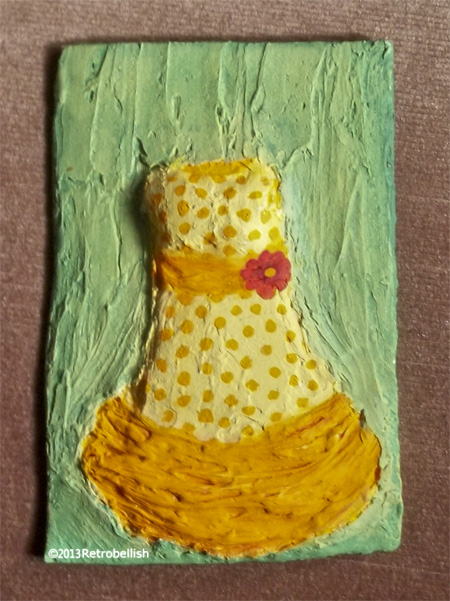
It takes a little while to get used to this medium, but its easier to work with if you let the first layer dry overnight. It is then easier to work the plaster, shape it into a simple dress form and smooth out uneven areas. Once the entire piece was thoroughly dry, I painted it with gesso and let that thoroughly dry. I then painted the dress using yellow and orange acrylic craft paints. Once the paint dried, I spread plaster mixture onto the background to give it texture as well. When the background dried, I repeated with gesso and painted it a light green.
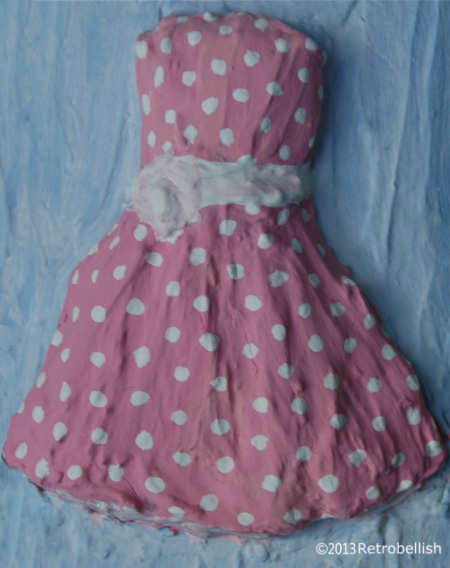
When I made the second dress (pink polka-dot dress), I made sure to use plaster mixture on the background after the dress form dried (something I didn’t do with the first yellow and orange polka-dot dress). After the second dress dried, I painted the entire piece with gesso and let it dry. I next painted the dress, and then painted the background. I painted the polka-dots on each of the dresses after their base solid colors were completely dry.
And again, although I had fun making these abstract pieces you see here (dresses, fruit, and flowers) don’t be afraid to try your hand at anything theme you like. Just have fun creating your own pieces of art.
Reclaimed Plastic Frame Art
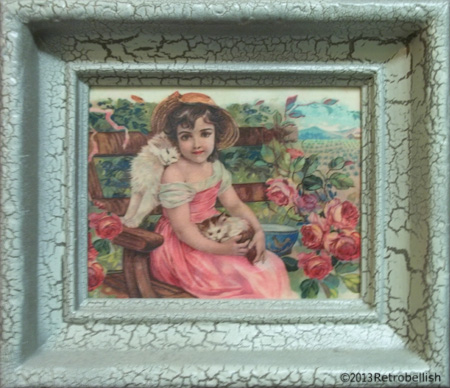
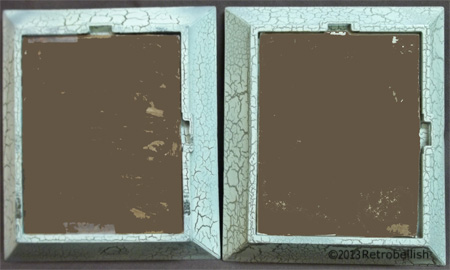
About ten years ago, we bought about eight plastic frames at a local surplus science store. These hard plastic frames were perfect in size to hold a 5″ x 7″ picture or other projects that I could use them in when crafting. We used some of them to hold some family pictures and had some left for crafting. This Project started from a CD we had purchased of vintage Victorian labels that we could print out for various craft projects.
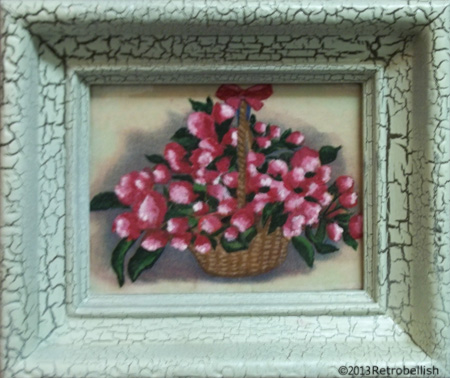
We painted the frames in three different colors, black, cream and gray with a crackle finish. The two featured here were crackled with a kit from a craft store. I printed out a few labels that I really loved. But since they are from a vintage collection the colors were very faded, so I decided to paint in some of the highlights in the prints to brighten the colors and enhance the overall look. I used craft acrylic paints and the results were amazing on the first one, so I decided to enhance the second one the same way. After the prints were dry, I used Mod Podge on them to protect and preserve the colors. I used the gloss Mod Podge to give the pieces a more vibrant look.
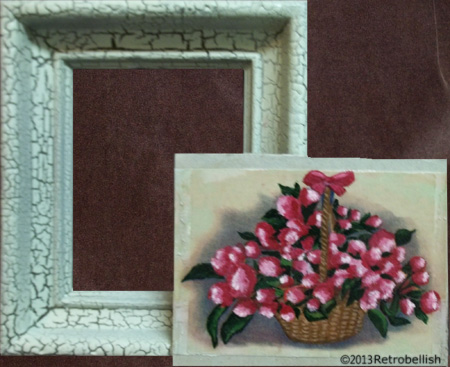
I had some pieces of museum art boards (sturdy cardboard) that I had bought in a frame shop. The shop would sell their leftover art board remnants in many shapes and sizes in plastic bags. I decided to glue these prints onto the museum art boards by using Mod Podge on the backside of these prints, but you can use any kind of sturdy cardboard that you may have handy.
Although we used this type of frame and medium for this project, there are so many fun prints you can use. Just have fun and create your own.
Upcycled Polka-Dot Scarf

This simple project started out with an old black and white polka-dot pattern skirt that had outlived its used in my closet. I’m a big fan of anything polka-dot so I knew I just had to reuse this wonderful fabric in some of my future projects. I studied the skirt and realized that the fabric was still very silky, vibrant in color and had a great draping quality. These qualities made it the perfect fabric to make a beautiful scarf. The scarf style that I had in mind was a narrow and long scarf that would tie in a simple knot at the chest, or one that could be worn draped with a loose flipped-over knot at the chest.

I used one of my favorite scarfs that was similar in style. length and width as a template to see if I had the length and width needed for this project. I laid the old scarf over the longest length of the skirt to see if I had enough fabric to fashion the scarf. Once I determined that I had enough fabric on the skirt to cut out two long rectangles, I knew that sewing the two halves together at the half-mark would make one long beautiful scarf. I figured that the sewn seam at the half-mark would not be very noticeable because of the fabric’s pattern, and also because the scarf would be worn as a tie-style scarf which means the seam would always be (hidden) tucked under the collar of any blouse I’d wear.

I measured, then cut out two long wide rectangles from each edge of the skirt, folded the rectangles in half at the seams, ironed them smooth and sewed the open (opposite side) edges together. Then (wrong sides out) I sewed close one bottom edge and left the edge (at the neckline) open and then turned it inside out (gently pushing out the little corners with a knitting needle). This completed one long rectangle, thus making one-half of the scarf. Then I repeated these entire steps for the second-half of the scarf. I then joined both halves at the center and sewed the two halves together and ironed the whole scarf again. I was very happy with the results and was so glad to see that the fabric did drape beautifully.

And although I used an old polka-dot skirt from my closet for this project, you could use any fabric or style to make it your own. Another great project is to use fabric with a holiday theme print, they make a great personal gift for family and friends. So just have fun and make your own reclaimed fabric designer scarf.
