Collage On Lampshade
A great way to give old worn out or damaged lamp shades a different look and feel is to cover them with anything from leftover fabrics to holiday wrapping paper. In the case of the lampshade featured here, I decided to cover it with some type of fabric or paper when I found it had gotten stained after many years in our garage. I was lucky to find a beautiful Victorian print wrapping paper that had the colors and feel of the look I was trying to capture. To get started, I first removed the outer cloth-like fabric from the lampshade, which revealed a white plastic lampshade base. To give this white plastic base a more antique look, I painted the inside of the lampshade with a brown acrylic craft paint. The lampshade also had a narrow white cloth strip at the top and bottom rims, so I used a strong cup of coffee and paintbrush to tint both of the white cloth strips.
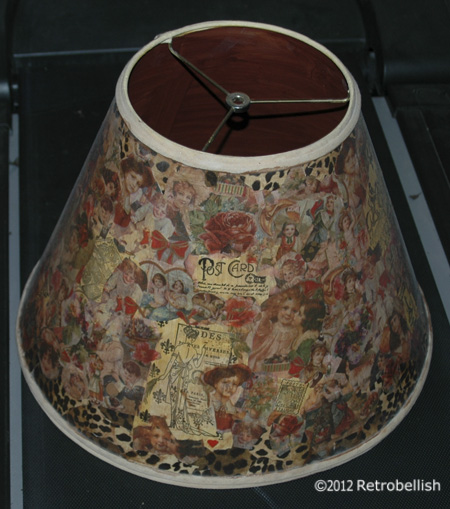
I then cut out all of my favorite pictures from the Victorian wrapping paper, and pieces from some leopard print wrapping paper too. I also have some rubber stamps of different old world pictures (like the London Tower, the Paris Eiffel Tower, and other various Victorian images) which I stamped onto parchment paper and cut out as well. Next, I laid out all of the pictures on a table so that I could see their placement before gluing them onto the lampshade. Once I finished positioning the pictures in an order I found very pleasing, I used a sponge brush and Mod Podge to apply the pictures onto the old lampshade. After the lampshade thoroughly dried, I applied another coat of Mod Podge on the entire shade to seal it. I let that coat dry for a couple hours, and then applied one more coat, which gave the pieces a blended look.
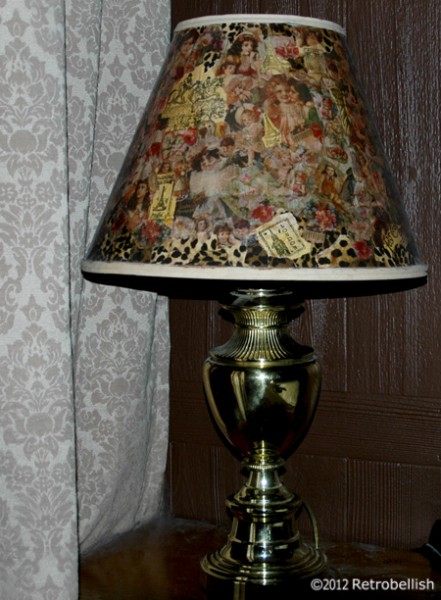
I was very happy with the results and although I didn’t use any decorative embellishments on the top and bottom edges of my lampshade, you can always use beautiful fringe, jewels or textured trim to decorate your lampshade. After a party or any holiday, if I come across a beautiful piece of wrapping paper, I try to recycle as much of it as I can for future craft projects.
Reclaimed Holiday Cards
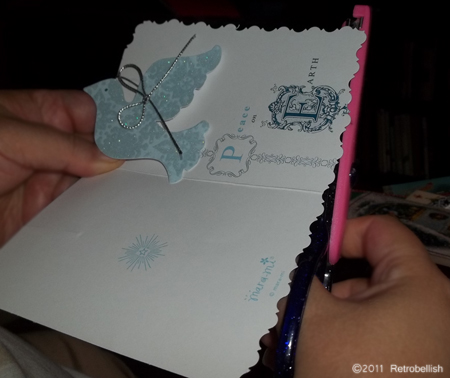
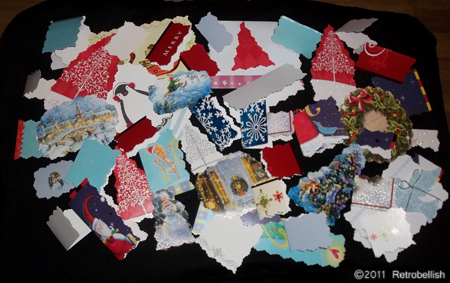
Greetings and happy new year. With all the holiday cards we received throughout this holiday season, we ended up with quite a few holiday cards that were too beautiful to throw away. One of my favorite things to do with my old holiday cards is to cut out name tags and smaller cards for many other occasions throughout the year. Those little gift cards at the card section in many big box stores can get a bit pricey. In the past I’ve either free handed my own drawings onto small cards or I’ve made them out of reclaimed holiday cards.
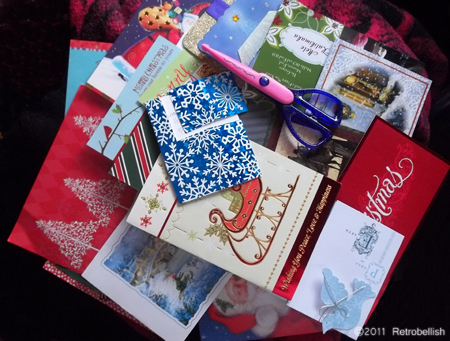
After the holidays, I start out by eying the cards to see where would be the best areas to start cutting out my new cards. Great tools to have are a pair of scalloped edge scissors and a one-hole punch that you may already have or that can be picked up at any craft store. In the past, I have even used a small knitting needle to make the hole. Scalloped edged scissors make great designs on your borders and the one-hole punch is to pierce a small hole in the top center or corner of a gift tag. If you don’t want to tape the gift tag or note card to a gift and you can also pierce a spot on the gift tag or card and run any kind of string, ribbon, or even yarn through the pierced hole. I use a toothpick to push the string, ribbon or yarn through the pierced hole.
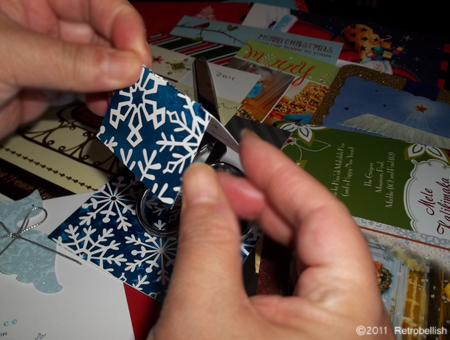
Using the scalloped edge scissors to cut around objects and even shaping your own plain circles and tree shapes in the blank areas of most cards can make very beautiful little gift tags. You can even create small note cards by cutting simple square shapes from the folded edge of a card, which looks even more decorative when cut with the scalloped scissors. These tags and cards are not only colorful and whimsical, but also very original. I just hated to throw away such beautifully designed and artistic cards. Some tags have turned out so beautiful that I’ve used them as an ornament to hang on our tree and our wreath.
I hope this gives everyone fun and useful ideas on how to reclaim your holiday cards.
Strawberry Snow Sundae Planter
This giant snow sundae was made by David while shoveling some snow from our back yard. We normally grow flowers or a small tree in this cement planter in the summer months, but in the winter it just sits there empty and drab. While shoveling after one of our snow storms, David decided to pile some of the snow on the planter, then he packed it down with a snow shovel and shaped it with his hands. He then made a snow ball big enough to represent a cherry on top of the snow cap and then added a green plastic tie to the top of the cherry to represent the stem. He then mixed the colors with food coloring and put them in a reused plastic spray bottle and sprayed the snow to look like a strawberry hot fudge sundae. The red swirl straw is made from an old scrap piece of 1 x 2 wood covered with some emergency tape. The ice piece is from an icicle that formed down our gutter. The planter lasted for a few weeks before it started to melt down. Happy Holidays to all from Retrobellish.com!
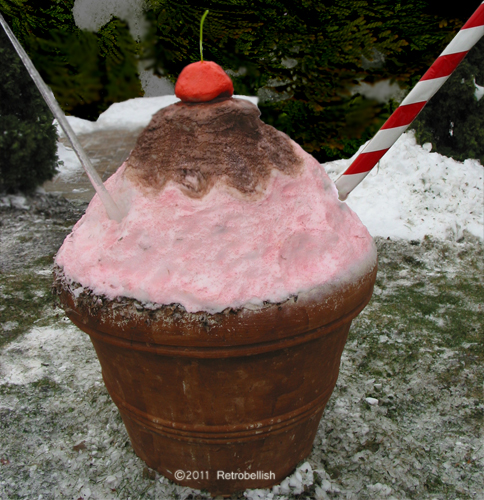
Snow Strawberry and Chocolate Sundae
Forest Maiden Paper Mache Mask
In the past, when working on paper mache projects, I’ve always made small paper mache items, but I’ve always wanted to try making a large paper mache mask. I thought about the many different style masks I’ve seen on television, in books and at museums. I drew several rough sketches on paper and finally decided to try and make an abstract mask that looked like a forest maiden with leaves for hair.
I found a large piece of masonite board in the garage that I thought would be a perfect size base for my mask. I dusted off the board and wiped it clean. I then gathered a stack of old newspapers and started tearing up sheets into medium size pieces (about 3 to 6 inch pieces). I continued until I had a large pile of torn newspaper pieces. I then made the paper mache paste using flour and water – with a dash of salt as a preservative.
I took some of the larger newspaper pieces and started soaking them into the paste mixture. I first started the mask with the face by placing some of the bigger soaked chunks down on the board. Once I started forming the face, I started to place smaller soaked pieces on top of the base pieces by laying them on as smoothly as possible.
Once I formed a shape resembling a pleasing face, I worked on building up the forehead, the eyebrow areas and then the cheek bones. I rolled and soaked several torn pieces together and placed those large soaked pieces in the area where the nose would go and then did the same with the mouth, which I decided to make slightly open. I then worked on the hair, which I tried as closely as possible to resemble leaves. It is an abstract piece that measures 16 inches in length and 14-1/2 inches wide (the board measures 24 inches by 24 inches). Once I felt it was done, I was very pleased with the entire piece.
Although I started this project on a weekend, I let it dry thoroughly for a week before I primed it with a coat of gesso. The piece is primed and ready to be painted or even embellished with pieces of fabric, beads, small found objects or leftover jewelry pieces, but that will be the next project. I really enjoyed making this mask, and although I used old newspapers, you can always use magazines or any kind of scrap paper to make this project. You can use craft paint, a color wash or patina to paint your piece or any technique you’d prefer.
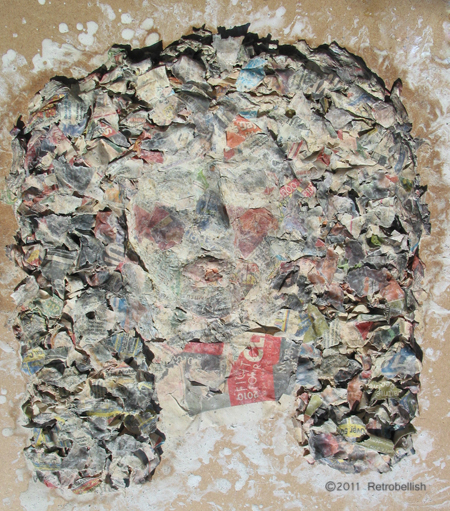
Forest Maiden Paper Mache Mask Before Primer
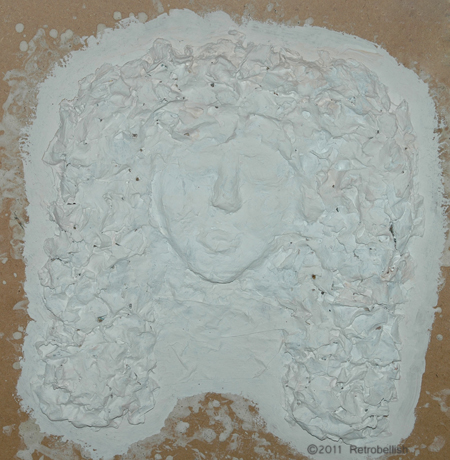
Forest Maiden Paper Mache Mask Primered with Gesso.
Recycled Magazine Glass Plate Collage
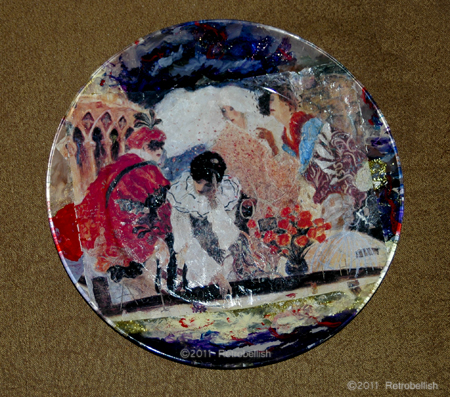
Recycled Magazine Collage On Glass Plate
It is very ironic how some of the things we take for granted, like throwing away magazines, can help you create your own very little treasured pieces of art. About 20 years ago, my husband used to collect depression glass pieces and I used to pick up a lot of clear plates at garage sales, estate sales, and thrift stores. I didn’t know what I was going to do with them, but I accumulated quite a few of these clear glass plates. I’ve always loved the art and paintings in magazines, especially some of the landscapes, florals and nature scenes. Even some of the ads were so beautiful that I would keep the magazines around for a while.
While recycling our paper one year, I got an idea that since I loved some of the art in these magazines so much, I would create a collage of some kind. I started by cutting some pages out, tearing pieces from others that I liked and placing them side by side to create scenes until I found the right combinations to create these collage plates. On one plate I created some Tuscan scenes, on others I created a stormy sky with some angels, and on another there was an abstract garden scene. The following plate is one of my favorite collage plates — it’s a painting of four persons dressed in Carnival costumes by a fountain. I carefully ripped multiple pieces from magazines to create a scene.
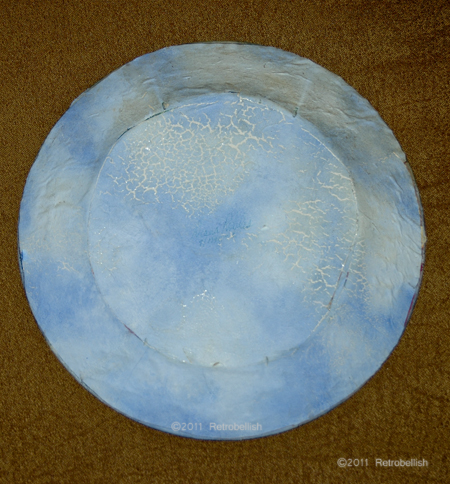
Recycled Magazine Collage On Glass Plate--Back Side
The clear glass plate is 9″ in diameter and the torn scene did not quite fit to the edges of the plate, so I Mod Podged it onto the center of the plate anyway. Once the piece on the plate was dry, I thought I’d use acrylic paints to paint in the clear parts of the plate by just matching the colors on the edges of the piece. I couldn’t believe how the plate began to look as I extended the edge colors to the end of the plate edges. Up close you could clearly see where the piece ended and the painting began, but from a distance, the plate actually looked like it was all one piece.
For strength and to protect the piece, I thought I’d Mod Podge some thick white art paper to the back of the entire plate. The paper was so plain and even though no one would see it on the back of the plate, I wanted to paint something pretty on it. I decided to paint a light blue sky with soft white clouds. Once the paint dried, I Mod Podged it to the back of the plate and as you can see, after all these years it has a little cracking on it, but it still sealed the plate beautifully. I love the brilliant colors of this beautiful piece and to this day it still hangs on my kitchen wall high above the cabinets.