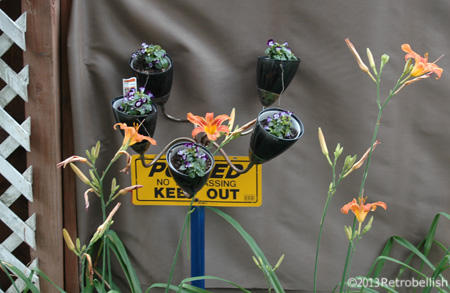
Recycled Lamp Planter
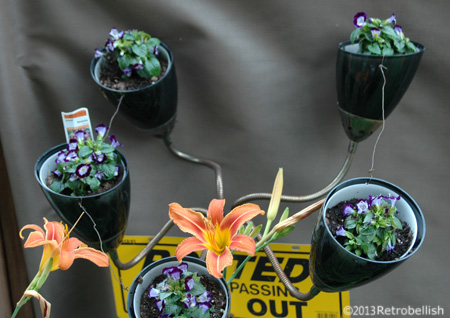
This recycled lamp planter was a trash find. We removed the stand from the top of the lamp and used it as a stand for my clothing projects. We then used the top of the lamp as a planter for small plants. The blue tube base is from a recycled piece of chain link fencing. The no trespassing sign we had lying around for many years. All combined, this piece adds a little whimsy to our yard.
Mache Forest Maiden Mask
Paper Mache Forest Maiden Mask
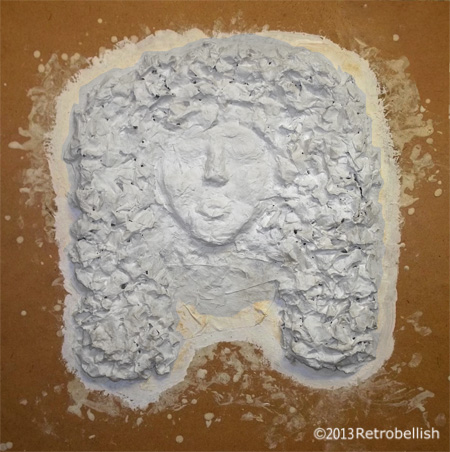
In the past, I’ve often made small paper mache items, but some of my favorite pieces I’ve had the most fun with are the small masks. I’ve always wanted to try making a larger version paper mache mask. I thought about the many different style masks I’ve seen in the past. I had fun drawing several rough sketches and finally decided to try making a mask that looked like a forest maiden with leaves for hair.
I found a large piece of Masonite board in the garage that I thought was the perfect size base for my mask. I dusted off the board and wiped it clean. I then gathered a stack of old newspapers and started tearing up sheets into medium size pieces (about 2 to 4 inch pieces). I continued until I had a large pile of torn up newspaper pieces. I then made the paper mache paste using flour and water – with a dash of salt as a preservative.
I took some of the larger newspaper pieces and started soaking them into the paste mixture. I then started the mask with the face by placing some of the bigger soaked chunks down on the board. Once I started forming the face, I started to place smaller soaked pieces on top of the base pieces by laying them on as smoothly as possible.
Once I had something resembling a pleasing shape of a face, I worked on building up the forehead, the eyebrow areas and then the cheek bones. I rolled and soaked several torn pieces together and placed those large soaked pieces in the area where the nose would go and then did the same with the mouth. I decided to make her mouth open as if she was whispering to nature. While the face was drying, I worked on the hair, which I tried as closely as possible to resemble leaves. I had to let the basic parts of the mask dry before adding on additional layers over certain parts of the face and hair. It is an abstract piece and once I felt it was done, I was very pleased with the entire piece because I was able to make it look closely to what I had imagined.
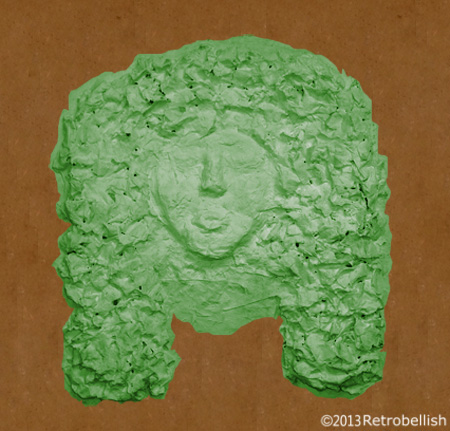
I had started this mask project on a weekend and after the base layers dried for several days, I waited until the next weekend to add the final layers that needed to be built up. Once, I knew the mask was completely dry, I painted a coat of gesso on the entire piece. I let the gesso coat dry overnight. I then painted a base green color over the entire piece on which I will add to at a later date. I really enjoyed making this mask, and although I used old newspapers, you can always use magazines or scrap paper of any kind to make this project.
Recycled Hubcap Clock
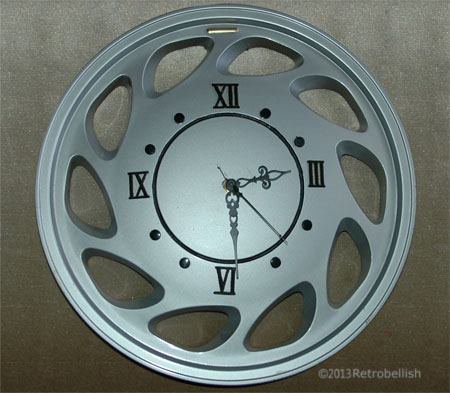
This hubcap clock was made from an old auto hubcap we found. We tend to save items that we feel could be put to good use. The hubcap was such an artistic piece because of its interesting details, beautiful shape, neutral color, and plastic composition, which made it easy to drill through. Once we bought the clock kit, this was a fun and fast project to make. Clock kits are available at most craft stores and online for very little money. The instructions were easy to follow and with the aid of some basic tools, the whole project was completed in a few hours.
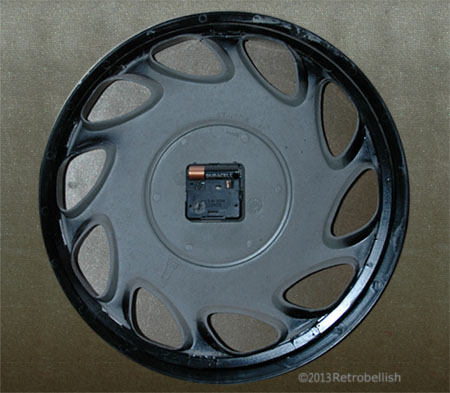
Although we used an auto hubcap for this project, one can use a piece of wood or any object that you can drill through, or make a hole through to accommodate the clock mechanism stem that holds the clock hands. Look around for items that interest you and you may find that they can be recycled into a functioning piece of art such as this one. This is also a fun project to do with kids, letting them create their own working piece of art for their rooms. Like always, just have fun.
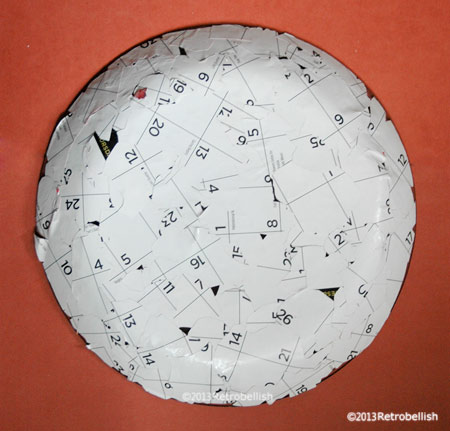
Reclaimed Calendar Floral Plate
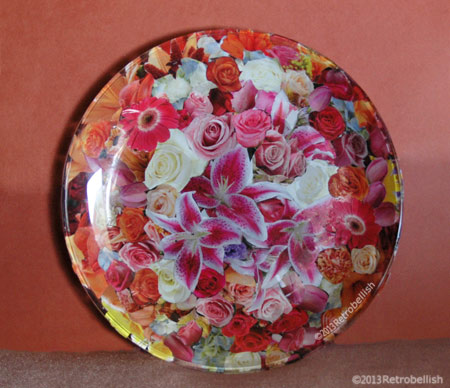
Welcome! This collage floral plate is made from using a 2012 reclaimed calendar and a thrift store clear glass plate. As you may have read on a previous post, I have made these collage plates from old magazines and brochures, which I keep for their wonderful designs. This past year, I was given a very beautiful floral calendar from one of our local businesses. The calendar featured different floral designs every month that lent themselves perfectly for this project.
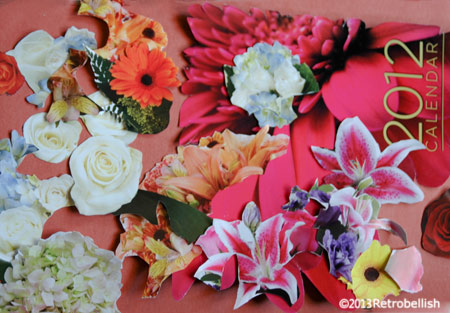
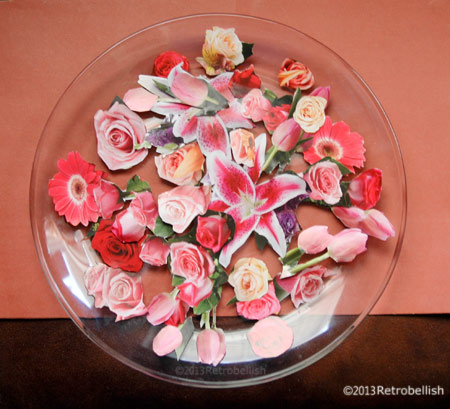
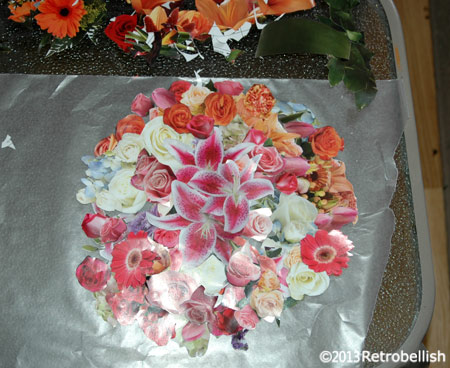
Although I photographed myself using big scissors, I also used small scissors to cut out all of the flowers. Once the flowers were all cut out, I had fun placing them in various positions side by side on a sheet of waxed paper (or you can use any type of surface). I took pictures of some floral arrangement positions I really liked, but once I found the floral arrangement I really loved, I took a picture in case I accidentally moved the waxed paper and lost the floral arrangement position.
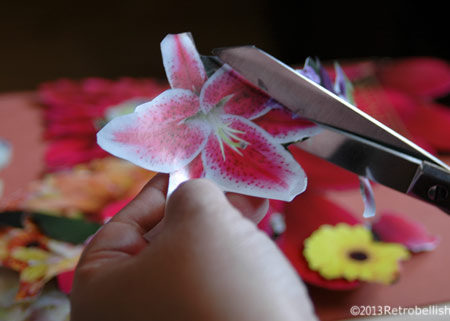
I then used a small paintbrush to apply the Mod Podge glue to the center of each flower and onto the glass. The glue dries in about a minute giving you a small window of time to reposition the glued flower (if you need to). Gluing only the center (leaving the edges unglued) allows you to lift the edge of that (glued) flower and place the next flower over or under that flower’s edge. You can then carefully lift the plate and look at the placement of the (unglued) flower to see how you’d prefer to glue the next flower.
This is a great project for anyone that wants to make their own little art piece, and also great for children to make for their rooms. So just have fun and create your very own piece of recycled art.
Reclaimed Doll Dress On Form
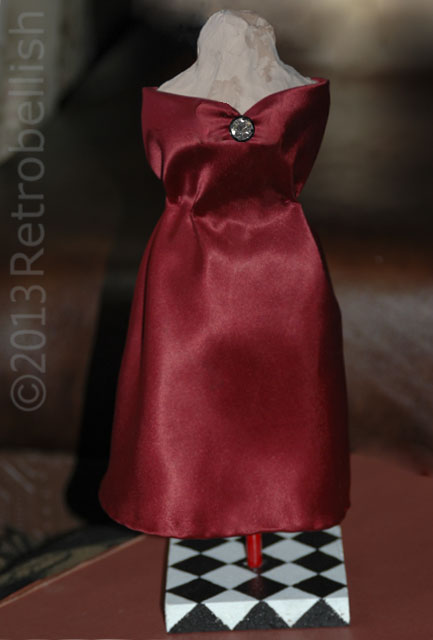
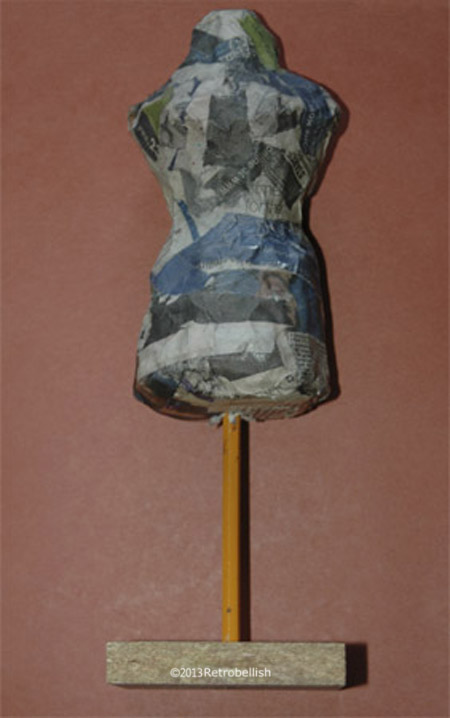
Throughout the years I have bought several interesting dolls at craft shows and garage sales. One of my doll’s had a dreary dress and for the longest time, I’ve wanted to make that doll a prettier dress. To make it easier to work on the dress, I decided to make a dress form as close as possible to the doll’s size. The form started out from a piece of reclaimed aluminum foil that I rolled up into an oblong shape. I then took old newspaper strips, made paper mache and wrapped the paper mache strips around the foil. Paper mache forms are sold at most craft stores, but are usually smaller in size. I needed this form to be approximately the same size as the doll, so making my own form was the best option and it also gave me a chance to use up some recyclable items I had lying around the house.
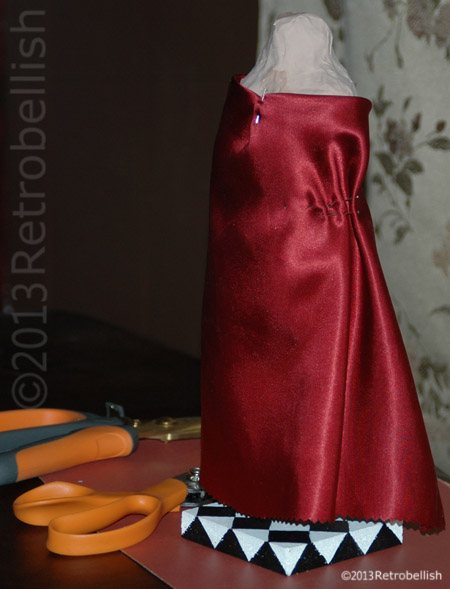
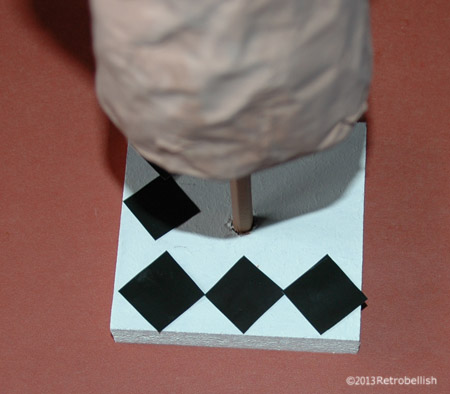
I was quite happy that the form I made was very close in size to the doll’s size. I then needed to make a stand and a base. Once the form was thoroughly dry, I drilled a small hole into the bottom center of the form and into the square wood base I had found in my garage. Using my hot glue gun, I put some hot glue onto both ends of an old pencil and stuck the pencil into the drilled hole and into the base. Once the hot glue dried, I used a light tan acrylic craft paint to paint the paper mache form.
I had picked out a beautiful deep satin red fabric from my old fabric remnants to make the doll’s dress, a color that I thought looked very nice in contrast to the form’s tan color. I then decided to use acrylic craft paints to create a harlequin black and white pattern on the base. Once the base was painted in white and the paint dried, I cut out black little squares from an old calendar I was about to recycle. By trial and error, I found the right size little squares for the harlequin print on the base and used a pencil to trace the little squares. I then used black acrylic paint to paint in the little squares. Once the base was thoroughly dry, I was finally ready to make the dress.
As you may have read on some of my previous posts, I love to make miniature dresses for dolls or just as art pieces. This project started out as a form for my doll’s dress, and although the red satin fabric lent itself to a much fancier dress than I intended for my doll, I decided to keep this evening dress as an art project on this stand. I used small snaps to fasten the back of this dress, so I plan to remove the dress, make a different style dress for my doll, and place the red dress back on this stand permanently as an art piece. To add a little sparkle to the top center of the dress, I used a small earring (a partner to the one I lost), but you can use any piece of jewelry you’d like.
So although I intended to use this form to help me make my doll’s dress, I was happy that I made an art piece to place in my sewing room, yet I will still be able to make my doll’s dress, and then display the red dress on my shelf as an art piece. Even though I chose to make my paper mache form, you could buy one and make your very own piece of art. Remember, just have fun and enjoy your crafts.