Grapevine Holiday Wreath
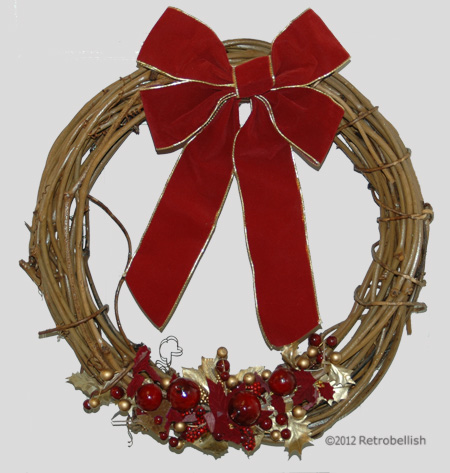
The holiday season is a fun time of the year to get creative with decorations for your home. This grapevine holiday wreath is very simple to make and could easily be updated every year with different ornaments of your choice. I had a very plain grapevine wreath at home that I wanted to decorate with some type of ornaments, but nothing too big that would hide the beauty of the vines.
Right after the holidays last year, I went to a craft store clearance sale and found some beautiful ornamental sprigs that I really loved. One of these sprigs was perfect because it had beautiful deep red berries and gold leaves that looked beautiful when I held them up against the wreath. I loved the look so much that I wired the sprig onto the wreath and decided that a bow at the top would balance out the wreath. I found a beautiful deep red bow with gold edging that complimented the sprig perfectly.
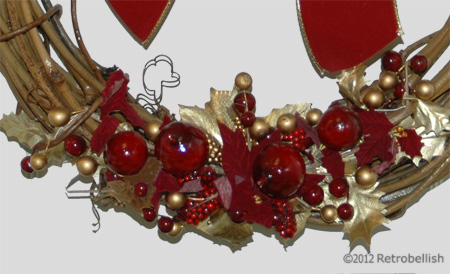
It felt wonderful to hang such a beautiful wreath on the door. These grapevine wreaths are very strong and versatile and lend themselves to many different types of decorating techniques. So just have fun and create your very own one-of-a-kind wreath.
Reclaimed Silk Flower Topiary
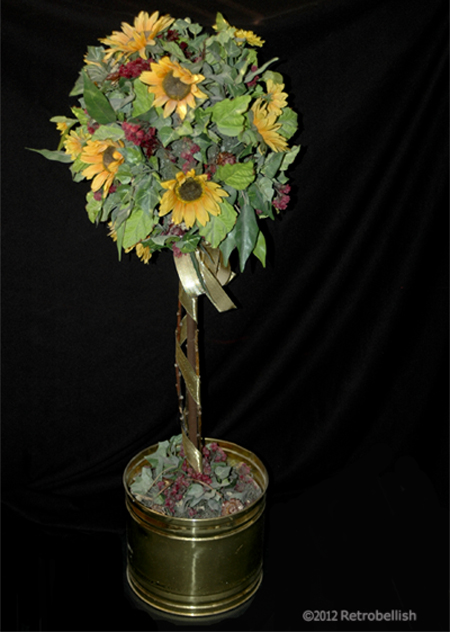
This reclaimed silk flower topiary started out as an idea I had after making some miniature topiary center pieces for a bridal shower. For the miniature topiary base I used some shot glasses that I purchased at a local thrift store. As I looked through my craft box, I found I had all the materials needed to make a big topiary from leftover craft materials I had collected over the years. I found a large shabby Styrofoam ball, a dowel rod, a variety of silk flowers and leaves left over from my many previous floral craft projects. I had an old planter in the basement that I cleaned up and decided to use for the base.
I first painted the dowel rod with a brown craft acrylic paint so that it would resemble a tree branch. Once the painted dried, I inserted the brown dowel rod into the center of the Styrofoam ball. The Styrofoam ball was kind of beat up, but it didn’t matter because it was going to be covered with the flowers and leaves.
I had many large yellow sunflowers, purple little blossoms, and many leaves in various shapes, sizes and shades of green, so I decided these were the materials I would use to make the topiary. I then separated all of the leaf varieties and chose the ones I would use to cover the background surface of the Styrofoam ball. I started by cutting the flower stems and leafy branches to a uniform length, leaving the stems long enough to insert into the Styrofoam ball. On a table, I laid out the flowers and leaves to get an idea of how to evenly distribute them over the surface of the Styrofoam ball. I then started inserting the flowers and leaves in a small area, and continued until I found a very nice pattern, which I continued until I covered the entire surface of the Styrofoam ball.
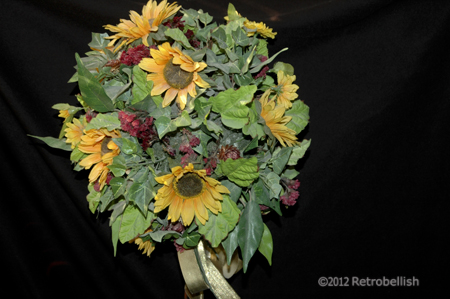
Once I finished covering the surface with the flowers and leaves, the topiary looked very nice and full, but then the dowel rod looked kind of thin in comparison to the volume of the topiary, so I went to my backyard and found a couple of small tree branches that I thought might look good tied to the dowel rod for extra dimension. It worked, because after using some gold ribbon to tie the branches to the dowel rod, the branches definitely added more bulk, but also made the dowel rod look like a branch as well.
For weight, I mixed some Plaster of Paris and poured it into the planter and held the dowel rod in the center until the plaster dried enough to let go. I let the plaster dry for a few hours before touching up the flowers. I added a few remnant leaves and flowers at the base of the topiary to hide the smoothness and white color of the plaster base. And although I used Plaster of Paris, other items such as rocks, dirt, cement and reused Styrofoam can also be used to weigh down the topiary. So have fun looking through your craft supplies and maybe you’ll be surprised to find that you have a lot of fun materials to make your own topiary in any size, shape and color.
Reclaimed Styrofoam Floral Painting
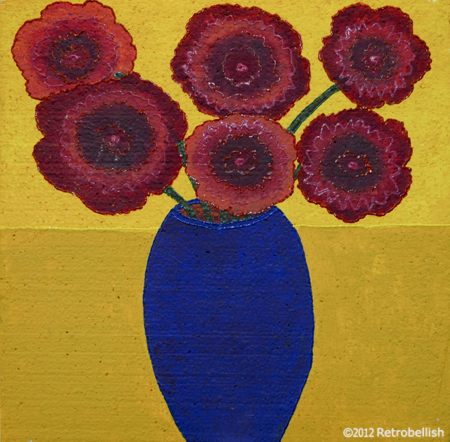
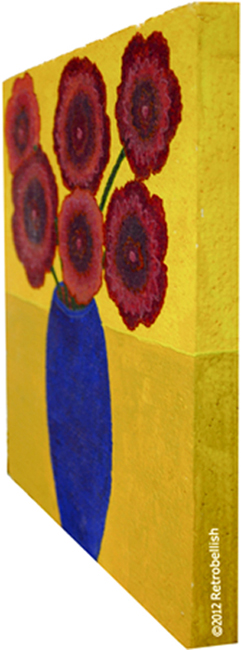
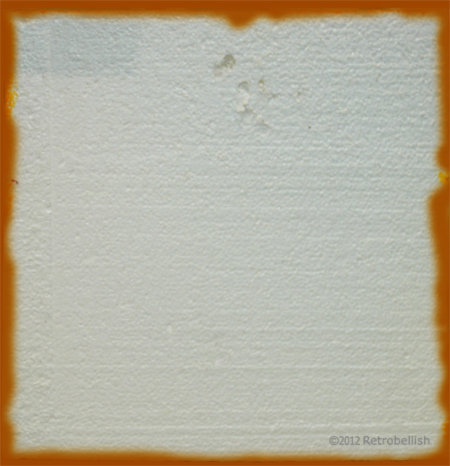
This Styrofoam Floral Painting started with a reclaimed piece of broken insulation. One of the aspects that caught my eye about this Styrofoam was that it was a very thick piece and when painted could easily resemble a wrapped canvas. We first trimmed the Styrofoam piece to square it off and ended up with a piece that measured approximately 16″ x 16″ x 1-1/2″ in depth. I painted the piece with gesso to seal it and give it a canvas-like texture. I used latex acrylic paints to paint the background, vase and flowers. After the flowers were thoroughly dry, I used fabric paint in slightly contrasting colors to edge out the flowers and vase, which added yet more texture and dimension.
Painting on Styrofoam was an experiment and using gesso gave the Styrofoam a more interesting texture. After the background was dry, painting the vase and flowers adhered to the surface so firmly that I didn’t even need a second coat of paint. It has been quite a few years since I painted this piece and the surface has remained in excellent condition, and the colors have not faded or flaked off at all. Another wonderful advantage of painting on thick Styrofoam is how very light this large piece is and how we were able to hang it up by merely pressing it against a tiny nail on the wall.
Although I used Styrofoam for this project, one could also use Masonite, wood or even a wood frame wrapped in old fabric and painted with gesso. Styrofoam is a very versatile and fun medium to work with and lends itself to many craft projects. Challenge yourself to be crafty and help keep it out of the trash. Also, see another one of our Styrofoam art pieces posted here titled Scrap Styrofoam Relic below.
Fabric Pen Embellishing
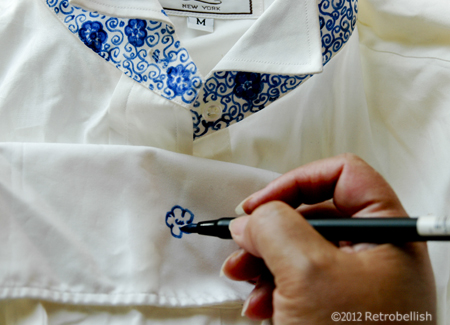
Using Blue Fabric Pen to Embellish Lapel
A fast and inexpensive way to give an outdated or worn blouse a fresh look is to embellish it with whatever color and design you’d like. Fabric paint pens are a great way to create your own designs on reclaimed or new clothing. I loved this white blouse, but I’ve always enjoyed wearing it mostly with blue jeans or navy blue pants. So when the blouse got a little worn in the collar and cuffs, I decided to give it an updated look with a pretty dark blue hand-printed design on the collar and cuffs.
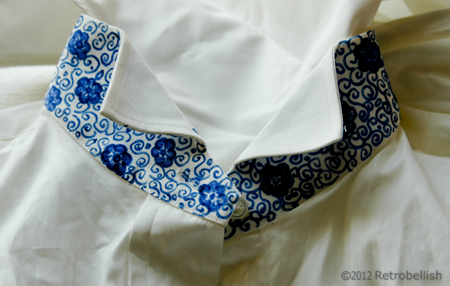
Blue Fabric Pen Embellished Collar
I first practiced drawing a simple design on paper using a regular pen. Once I found a simple design pattern I liked, I used the actual fabric marker on an old plain cotton tee shirt to test the ink and feel of the pen on fabric. I practiced the design on that tee shirt and shortly thereafter started drawing the design onto the white blouse. The dark blue paint line drawn with the fabric marker does not spread at all like a regular marker does on paper, so take your time and practice until you feel comfortable.
There are several fabric marker brands on the market, most of which are available in many beautiful colors, resist fading, machine washable, and are surprisingly very inexpensive. The brand I bought is sold separately (not in a set), inexpensive, and available in about 15 different colors. For the best results, just follow your manufacturer’s instructions.
I had a lot of fun with this project and I may change the blouse buttons from white to blue, but that definitely will be a project for another day (another blog post). Although I used a white cotton blouse for this project you can use any color clothing and definitely any article of clothing from jeans to scarves, so just have fun creating your own designs.
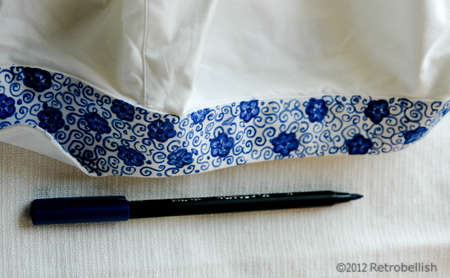
Blue Fabric Pen Embellished Sleeve Cuff
Recycled VHS Booklets Art Collage
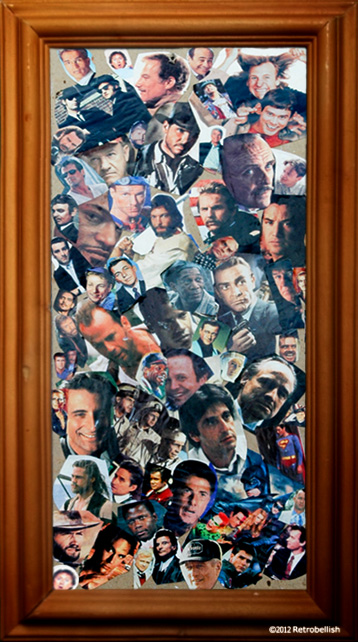
This small collage started out with a shoe box full of ad booklets from a VHS movie club I had joined so many years ago. Every month, the movie club would send me an envelope full of ad booklets that were so beautiful and filled with so many thumbnail photos of popular movies, shows and movie stars. From time to time, I’d cut out my favorite pictures before recycling the rest of the booklets.
A while back, I was going through my shoebox and the picture cutouts still looked so beautiful that I decided to make a collage. I noticed that I had more cutouts of male actors than of any other picture cutouts, so I decided to make the actors my theme. I laid out the pictures on a table and went in search of a board to use as a base. I found a small clean leftover piece of drywall in the basement, which had an interesting rectangular shape so I used the drywall as my base. I used Mod Podge to glue on the picture cutouts and really loved the way the collage started to look as I finished each section. After finishing the collage, I liked it so much that I asked my husband to frame it for me using a frame I had leftover from another project.
It turned out to be a very nice piece and although I made this project a while ago, I wanted to post it here to show how simple and fun it can be to make a project from recycled items. And although I used a wood frame, you can use anything to frame out the collage or even no frame at all by leaving a border around the collage that you can paint using any craft paints.
A fun and great part of the project was collecting the pictures and cutting them out, so this could also be a great family project to do with your children or at school using favorite characters that you and your children love.
