Purple Blouse To Embellished Jacket
This project started out as a blouse I picked up at a local resale shop. I really love the style and deep plum color of this blouse, especially the iridescent colors it reflects under different lighting. And as interesting as this fabric is, the iridescence made it difficult to capture the deep plum color in the photographs below, but the true plum color is visible in the silky threading of the beaded trim.
What gave me the idea to embellish this blouse, and perhaps convert it to an evening jacket, was that the fabric color was a perfect match for a great trim I had bought months ago at a clearance sale. I’m a big fan of sparkly beaded trim embellishments and this beautiful trim happened to be such a bargain. It was so amazing to have found a trim and (months later) a blouse that matched so perfectly in this shade of deep plum purple.
I measured the blouse and trim, and was glad that there was more than enough trim to not only complete this project, but to sew onto both cuffs as well. To prepare the blouse, I washed and ironed it, removed all of the buttons (but not the cuff buttons). I then pinned down the collar to the inside of the blouse leaving just a half inch of the collar showing above the collar line. I then started hand sewing the pinned down fabric flat to the neckline.
Because the trim was ten yards long, it was heavy and bulky, so I decided to first pin it onto the blouse. I pinned one trim end to the front left edge of the opening up towards the collar, around the neckline, and then back down the front right edge of the opening (over the area where the buttons used to be). Once the entire trim was pinned in place, I cut the trim away from the edge end. Then I started hand sewing the trim to the blouse (which took me three evenings).
This was a simple and inexpensive project to do. I enjoyed working on this project and am very happy with the results. It’s amazing how a pretty trim converted the look of a blouse into a jacket.
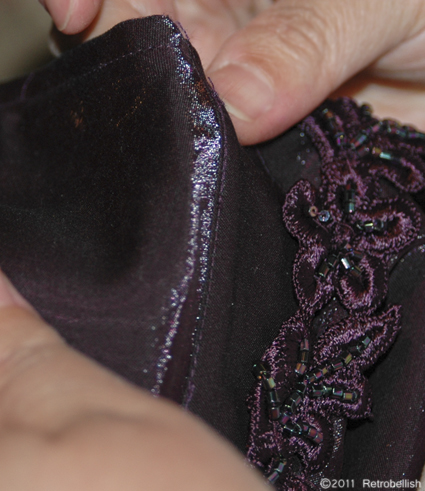
Adding Trim To Jacket
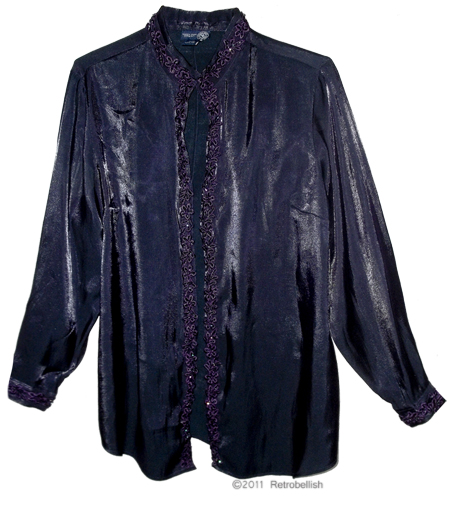
Finished Purple Jacket
Embellished Navy Blue Blouse
This is a soft stretch cotton blouse that has a gathered v-neckline. Because the gathered neckline has a lot of texture, I thought it would look even more interesting with some sparkle in between the little creases of the gathered fabric. I had some iridescent bugle beads that reflected blue and purple hues of color. I sewed on a few bugle beads and saw how nice they looked, so I kept sewing them on.
When I sewed on the beads to about a three inch section of the neckline, I was really happy with how different the blouse looked. This project did take a while to complete, but after sewing a little while each night for about a week, I can say that the results were worth it. I still wear this blouse with jeans, but it’s nice to have given my blouse a fun and pretty new look.
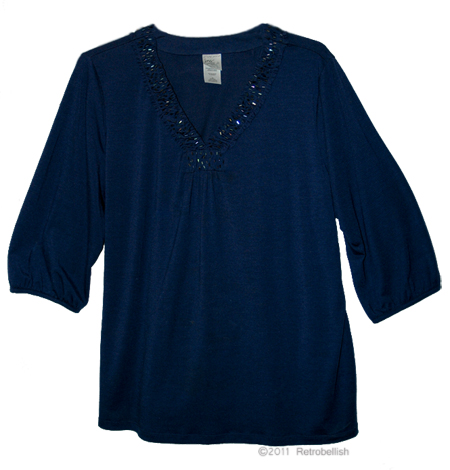
Embellished Navy Blue Blouse
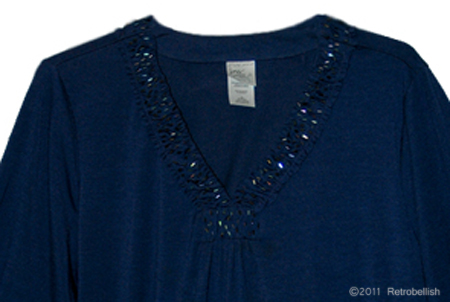
Closeup Of The Navy Blue Blouse Neckline.
Embellished Purple Blouse
I really like this purple blouse and wanted to give it a new look. I realized that when I wear this purple blouse, I always wear it with black — be it a pair of black pants or a black skirt. The blouse has a nice texture so I thought it would look nice with some kind of black trim around the neckline.
Recently, I found some black trim that I thought would look very nice around the neckline. After I measured the trim and the neckline, I confirmed that I had more than enough trim to complete this project.
Once I pinned the trim onto the neckline, I started to sew it on the blouse. I loved that this was a quick and easy project to do. Including the time it took to pin the trim to the blouse, I was able to complete this entire project in one hour. I’m very happy with the results and how the trim gave my blouse a new look.
TIP: The back (top center) of the blouse has a one-button closure, which makes it easy to remove over my head. However, please keep in mind the type of trim you use to embellish articles of clothing made of stretch fabric, because when you have to pull a stretch sweater or blouse over your head to wear it, the trim should also be of an elastic type to be compatible with the fabric.

Embellished Purple Blouse
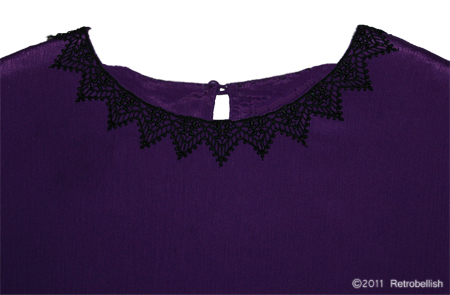
Closeup of Embellishment On Purple Blouse
Fall Holiday Wreath
This wreath started out as a round, green wire bare frame I bought at a craft store. Along with the wreath, I also bought numerous springs of beautiful silk maple leaves and some floral wire. I cut the leaves off of the spring and wired individual leaves onto the wreath. The warm festive fall colors are very cheerful and versatile because they can be displayed from mid-September to Thanksgiving day (US).
Over the years, I’ve added different embellishments to form the wreath featured below. The pieces I added early on were the little scarecrow, little berries and a few fall flowers. Recently, I added the little pumpkin and small gourds. Over the years I’ve had fun adding embellishments to this wreath and although I’ve finished the wreath for now, I know that if I should find fun embellishments I like in the future, I can always swap them out because they are wired on. This is a simple wreath for anyone to make and you can re-use your favorite fall flowers or silk plants, and even some fun embellishments to make your own. A great time to pick up some of these fall items and embellishments is at the end of the holiday seasons.
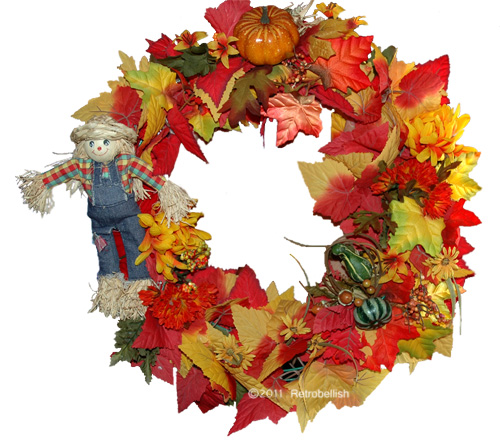
Fall Holiday Wreath
Abstract Autumn Leaf Pin
Autumn is a fun time of the year for crafting seasonal pieces from fall color pieces to nature inspired embellishments. This leaf pin was inspired by all of the beautiful fall colors of the leaves all around us. I recently made a fall wreath from silk maple leaves and had a few sprigs left over. I cut the most colorful leaf from the sprig, which was a beautiful red orange color. I had some sheer brown organza which I intended to use over the leaf to blend with the bright red color, but not cover its brightness completely. I also thought I might try sewing on some sparkly copper and brass toned beads over the surface of the leaf.
I took my pinking shears and cut out two squares of brown sheer organza, which measured 4-1/2″ X 4-1/2″ (slightly larger than the leaf). The leaf measured 4″ X 4″ at its widest points. I centered the silk maple leaf on the two cut pieces of organza and with pinking shears started cutting the organza loosely following the shape of the maple leaf (leaving that slightly larger margin of organza). Once I finished cutting out the leaf shaped organza pieces, holding the leaf and organza pieces together, I hand sewed a few copper colored beads through the organza pieces and the leaf, which helped to anchor everything together. I then used larger brass toned beads near the base of the leaf. I then sewed on a pin closure on the back, but if you’d prefer, you can also use glue on the pin closure. I then took some gold glitter fabric paint and outlined the organza shaped leaf and made a few little vein designs on the leaf for a little more sparkle. I was very pleased with the way the pin turned out and will enjoy wearing it on my jacket and sweaters.
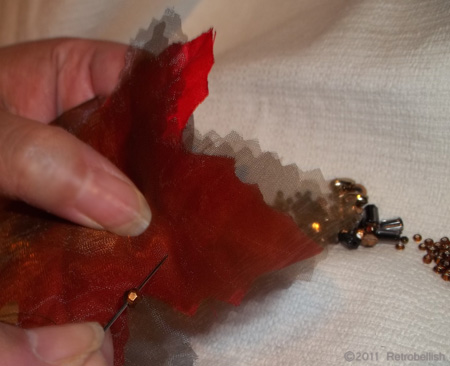
Making Autumn Leaf Pin
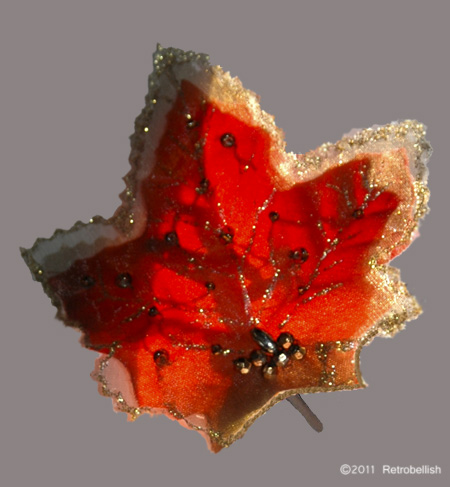
Autumn Leaf Pin