Lost Earring Crochet Pin
I was looking for a pair of earrings to wear and couldn’t help notice the sparkle from some earrings at the back of my jewelry box. I have several lone earrings that don’t have a matching earring because I’ve lost them over the years. Each time I’d lose one, I’d put it in what became the lost earring section of my jewelry box with the hopes of soon finding the lost one. As time passed, I couldn’t throw them out and thought they might one day become a nice future craft project.
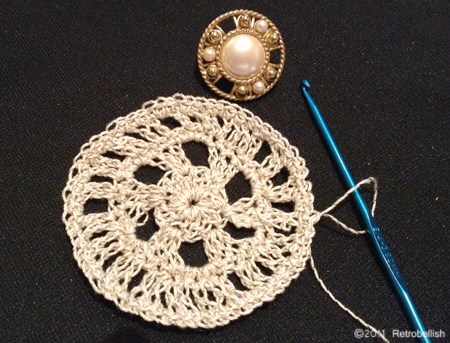
This crocheted pin is one such project that was inspired from browsing through several craft magazines. The old pierced earring I chose measures 1 inch in diameter and the crocheted part measures 2-1/2 inches in diameter. I used a fine beige crochet thread that is intertwined with gold metallic thread and used a size E-4 MM crochet hook. I looked at the earring for design inspiration and by trial and error came up with a very simple pattern.
I started by crocheting five single chains and joined them with a slip stitch. Next, I crocheted four single chains and double-crocheted 12 stitches into the center and then ended that row by joining with a slip stitch. Next, I chained four (to match the length of a double crochet) and double crocheted into each of the next two stitches, then crocheted four single chains and repeated double-crocheting into each of the next three stitches, repeating to the end and joined that row with a slip stitch.
In the next row, I single crocheted into every stitch all the way around. Next, I made four single chains, then double-crocheted into the next stitch, crocheted two single chains and then double-crocheted into each of the next two stitches and repeated all the way around and ended that row with a slip stitch. In the last row, I single crocheted into every stitch all the way around and finished with a knot.
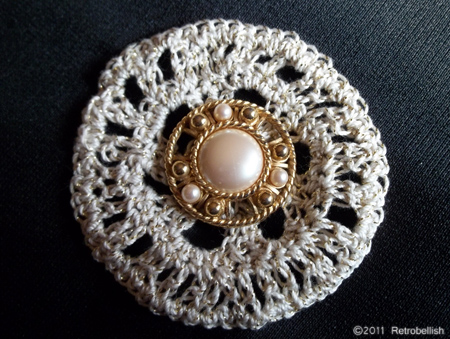
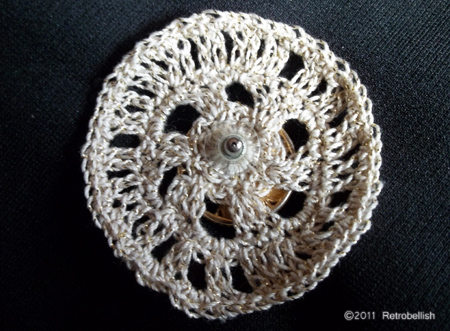
I placed the pierced earring post through the crocheted center, and the post is sharp enough to go through a sweater. The earring back holds the earring in place very well. I’m happy with the results and have worn the pin on a few of my sweaters. Instead of an earring in the center, you can also use a small pin in the center of any crocheted design you create.
Reclaimed Holiday Cards
Greetings and happy new year. With all the holiday cards we received throughout this holiday season, we ended up with quite a few holiday cards that were too beautiful to throw away. One of my favorite things to do with my old holiday cards is to cut out name tags and smaller cards for many other occasions throughout the year. Those little gift cards at the card section in many big box stores can get a bit pricey. In the past I’ve either free handed my own drawings onto small cards or I’ve made them out of reclaimed holiday cards.
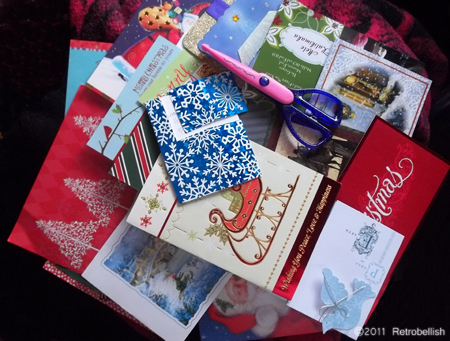
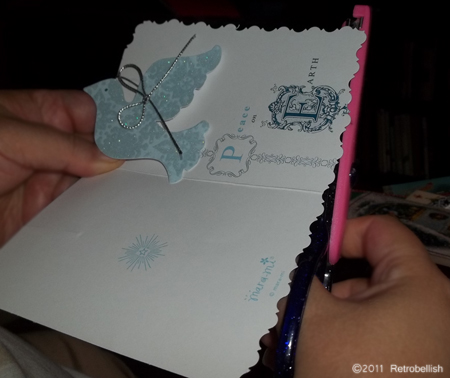
After the holidays, I start out by eying the cards to see where would be the best areas to start cutting out my new cards. Great tools to have are a pair of scalloped edge scissors and a one-hole punch that you may already have or that can be picked up at any craft store. In the past, I have even used a small knitting needle to make the hole. Scalloped edged scissors make great designs on your borders and the one-hole punch is to pierce a small hole in the top center or corner of a gift tag. If you don’t want to tape the gift tag or note card to a gift and you can also pierce a spot on the gift tag or card and run any kind of string, ribbon, or even yarn through the pierced hole. I use a toothpick to push the string, ribbon or yarn through the pierced hole.
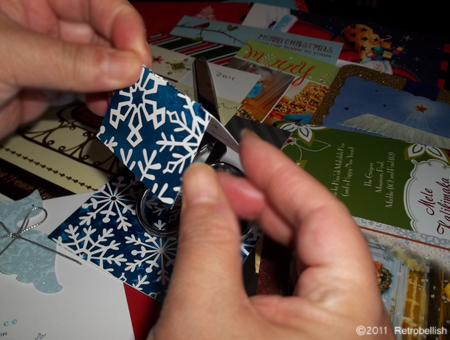
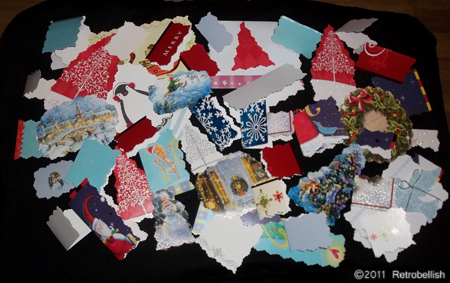
Using the scalloped edge scissors to cut around objects and even shaping your own plain circles and tree shapes in the blank areas of most cards can make very beautiful little gift tags. You can even create small note cards by cutting simple square shapes from the folded edge of a card, which looks even more decorative when cut with the scalloped scissors. These tags and cards are not only colorful and whimsical, but also very original. I just hated to throw away such beautifully designed and artistic cards. Some tags have turned out so beautiful that I’ve used them as an ornament to hang on our tree and our wreath.
I hope this gives everyone fun and useful ideas on how to reclaim your holiday cards.
Happy New Year!
Happy New Year! May you all have a spectacular 2012. Thank you for your support.
Strawberry Snow Sundae Planter
This giant snow sundae was made by David while shoveling some snow from our back yard. We normally grow flowers or a small tree in this cement planter in the summer months, but in the winter it just sits there empty and drab. While shoveling after one of our snow storms, David decided to pile some of the snow on the planter, then he packed it down with a snow shovel and shaped it with his hands. He then made a snow ball big enough to represent a cherry on top of the snow cap and then added a green plastic tie to the top of the cherry to represent the stem. He then mixed the colors with food coloring and put them in a reused plastic spray bottle and sprayed the snow to look like a strawberry hot fudge sundae. The red swirl straw is made from an old scrap piece of 1 x 2 wood covered with some emergency tape. The ice piece is from an icicle that formed down our gutter. The planter lasted for a few weeks before it started to melt down. Happy Holidays to all from Retrobellish.com!
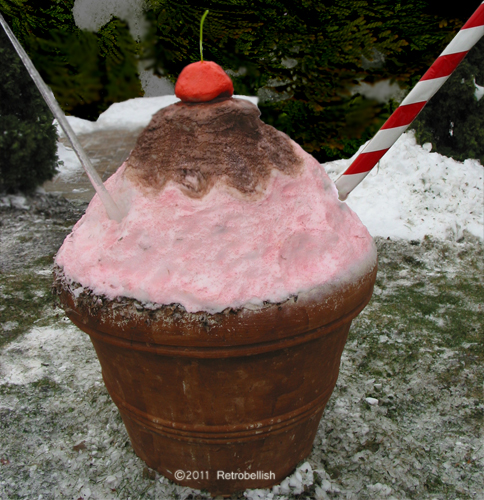
Snow Strawberry and Chocolate Sundae
Forest Maiden Paper Mache Mask
In the past, when working on paper mache projects, I’ve always made small paper mache items, but I’ve always wanted to try making a large paper mache mask. I thought about the many different style masks I’ve seen on television, in books and at museums. I drew several rough sketches on paper and finally decided to try and make an abstract mask that looked like a forest maiden with leaves for hair.
I found a large piece of masonite board in the garage that I thought would be a perfect size base for my mask. I dusted off the board and wiped it clean. I then gathered a stack of old newspapers and started tearing up sheets into medium size pieces (about 3 to 6 inch pieces). I continued until I had a large pile of torn newspaper pieces. I then made the paper mache paste using flour and water – with a dash of salt as a preservative.
I took some of the larger newspaper pieces and started soaking them into the paste mixture. I first started the mask with the face by placing some of the bigger soaked chunks down on the board. Once I started forming the face, I started to place smaller soaked pieces on top of the base pieces by laying them on as smoothly as possible.
Once I formed a shape resembling a pleasing face, I worked on building up the forehead, the eyebrow areas and then the cheek bones. I rolled and soaked several torn pieces together and placed those large soaked pieces in the area where the nose would go and then did the same with the mouth, which I decided to make slightly open. I then worked on the hair, which I tried as closely as possible to resemble leaves. It is an abstract piece that measures 16 inches in length and 14-1/2 inches wide (the board measures 24 inches by 24 inches). Once I felt it was done, I was very pleased with the entire piece.
Although I started this project on a weekend, I let it dry thoroughly for a week before I primed it with a coat of gesso. The piece is primed and ready to be painted or even embellished with pieces of fabric, beads, small found objects or leftover jewelry pieces, but that will be the next project. I really enjoyed making this mask, and although I used old newspapers, you can always use magazines or any kind of scrap paper to make this project. You can use craft paint, a color wash or patina to paint your piece or any technique you’d prefer.
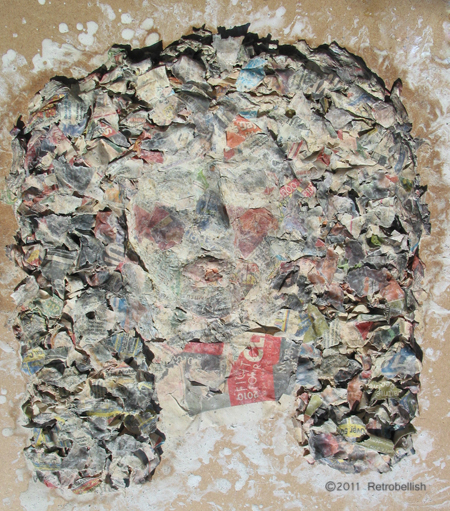
Forest Maiden Paper Mache Mask Before Primer
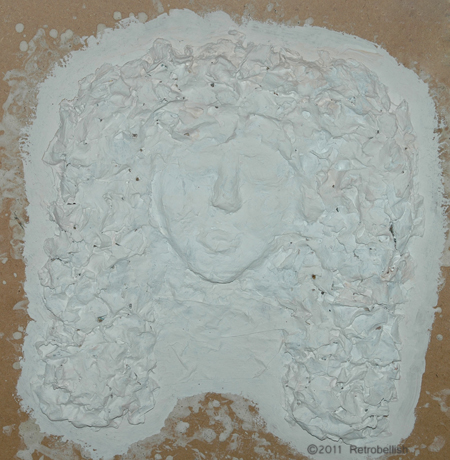
Forest Maiden Paper Mache Mask Primered with Gesso.