Beading A Deep Pink Blouse
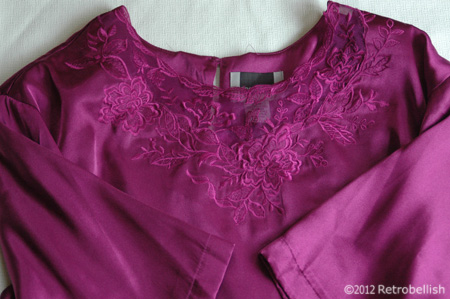
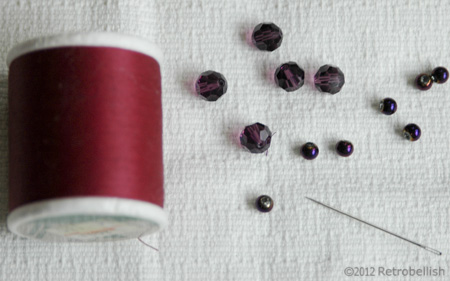
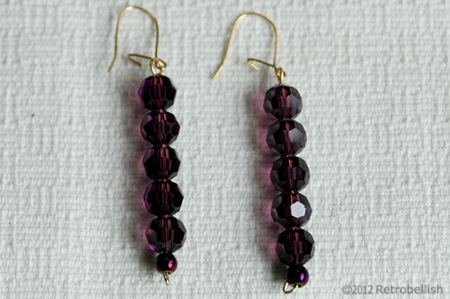
Sometimes we have clothing items that we’ve outgrown or have fallen out of love with or maybe it’s just lacking a little pizazz! Whatever the reason, I’ve found that what always works for me is to take out all of my colorful beads and set them out on a piece of fabric on the dinning room table. I then study all of the beautiful colors of the sparkling beads next to that article of clothing and it’s easy to imagine them already sewn on and make the final decision. The beads I used on this embroidered deep pink blouse are not necessarily the most traditionally used style of beads, but rather what I thought would give the blouse an accent and subtle sparkle without taking away the focus from the beautiful embroidery on this blouse. After I sewed the crystal beads on the blouse, I realized I had leftover quite a few deep pink crystal beads and decided to make a set of matching earrings.
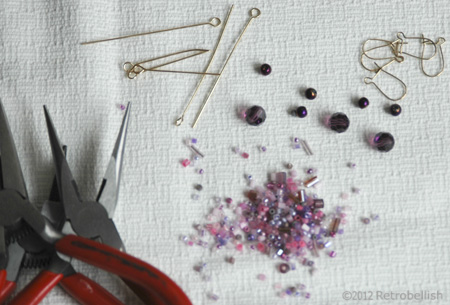
A very long time ago, I had dabbled in making earrings because I couldn’t find the style of drop pearl earrings to match my wedding dress. I had bought earring findings–packets of head pins, eye pins, jump rings, earring hooks, faux pearls and jewelry pliers to make my drop pearl earrings. I was very happy with the outcome of my loop pearl earrings and saved all of the leftover pieces. I dug around and found the small box containing those findings that I needed to make matching earrings for this deep pink blouse.
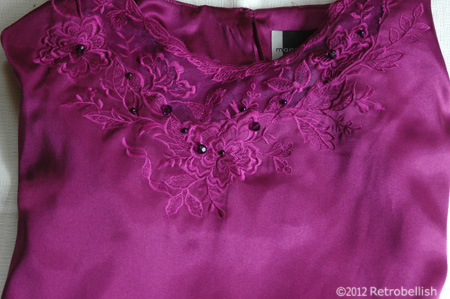
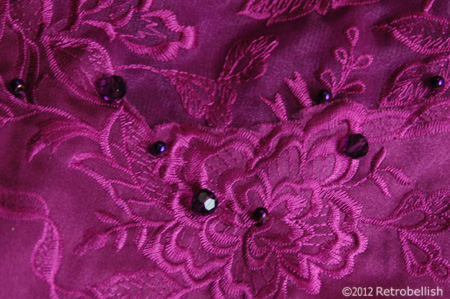
Giving used clothing a beaded look could be very rewarding and depending on the size of the beads, not too tedious. You can use larger special types of beads as an accent on the blouse especially if the article of clothing already has beautiful embroidery or an interesting pattern. Beading can be used as an accent rather than the focus of any piece. So don’t be afraid to try out new projects with items of clothing that could use Just a little of your creative touch. Thank You for your visit!
Reclaimed Wood Abstract Doll
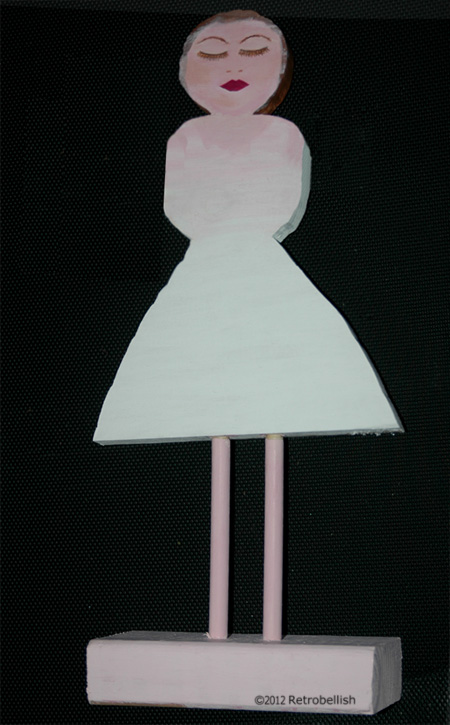
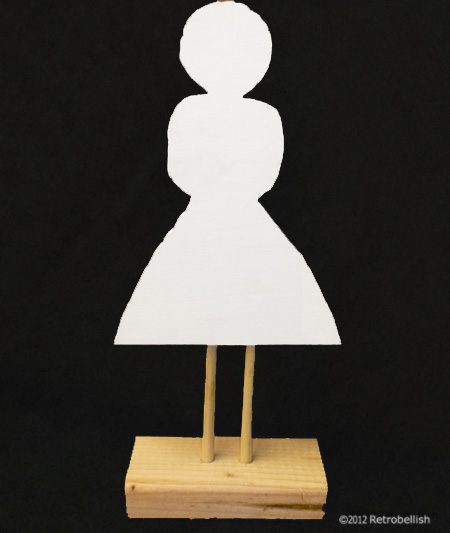
I’ve always wanted to try making an abstract doll of some kind, but had no idea where to even start. Four months ago, I experimented and drew a simple shape on a piece of scrap wood I found in our basement and asked my husband to cut out the drawn shape. Although the shape was simple, it was also a bit crude as the shape had a round head (no neck), a squarish torso and a bell shaped skirt bottom for the lower body. The doll measures 17 inches tall (including the base on which she is perched) and 11-1/2 inches wide (at its widest point of the wood skirt/body).
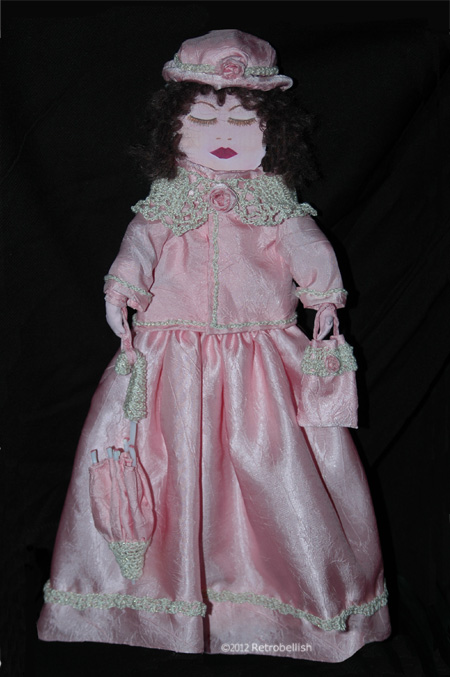
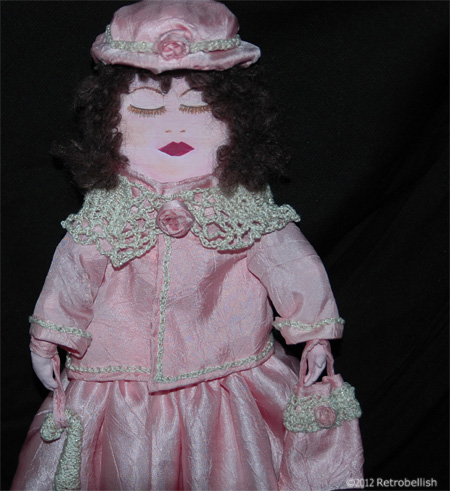
I thought I’d make the doll’s arms with wire and envisioned bending her wired arms, attaching a small bouquet of flowers to her hands and her (wire arms) holding them up near her face as if to smell them. That’s when I thought of painting her face with closed eyes as if she was taking in the fragrance of the flowers. I did paint the doll’s face with her eyes closed, but the plan to use wire arms did not work out, so I ended up leaving the doll’s face painted with her eyes closed.
I wanted to make some kind of outfit for the doll using as much of my reclaimed fabrics as possible. Looking through my old fabrics, I found a very pretty light pink (polyester) fabric that was perfect because I had so much of this fabric that if I made any mistakes on any part of the outfit, I could start all over again without worries of running out of fabric.
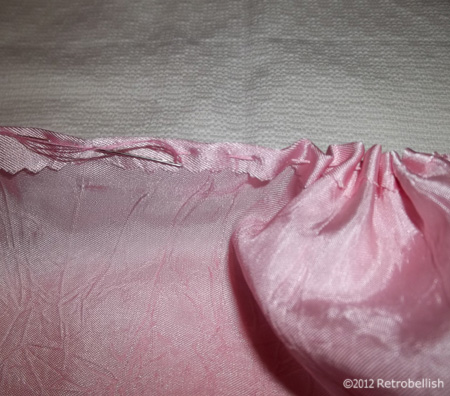
I held the fabric up to the doll’s waist, pinned the fabric a half inch longer for the hem allowance at both ends, cut the fabric and held the fabric against the doll, roughly gathering it to get an idea of how full/wide to make the full length skirt. I tripled the width and then cut the fabric. I made a simple running stitch hem at the waistline and ran a bigger basting stitch at the top edge of the waistline so I could pull the fabric, gathering it at the waist. The skirt began to fully gather and take a beautiful shape. Once the fabric was more or less evenly gathered around the waist, I knotted the thread to hold that tension. For a closure at the waist I sewed a very small snap (base), then sewed the other snap (top half) to the other end at the waist. I left a two inch opening at the waist below the snap closure, hand sewed a quarter inch hem straight down to seal both open fabric panels at the back of the skirt and then sewed them together to complete the skirt. I ironed the entire skirt and surprisingly the fabric turned out very nice and full ,considering I did not use a petticoat underneath.
Because the skirt was so plain, I decided to crochet a pretty beige trim about an inch from the bottom edge of the skirt and continued crocheting all the way around. I used a 00 size crochet needle and crocheted the trim with three double-crochet stitches. I pinned the crochet trim to the skirt as I continued to crochet the trim all the way around the base of the skirt. I removed one pin at a time and hand sewed the trim to the skirt with matching beige thread.
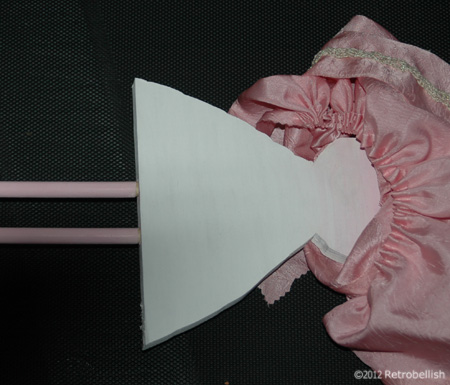
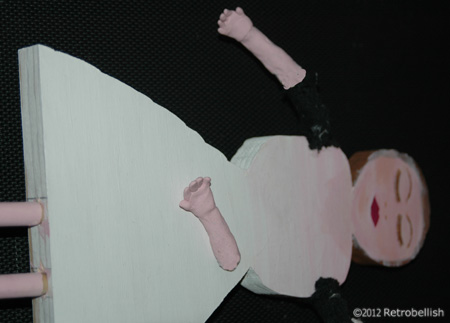
I ended up making the doll arms from two square pieces I cut from my old black sweatshirt. I rolled up the squares, pulling on the stretchy fabric and hand sewing them into a rough arm shape. Since the doll had no shoulders, I hot glued (and tacked down) each of the arms to an approximate place where they looked best on either side of doll’s torso. I made the little hands from polymer clay and pierced a hole in the top part of the clay wrists before baking them so that I could later sew (attach) them onto the (sweatshirt) arms.
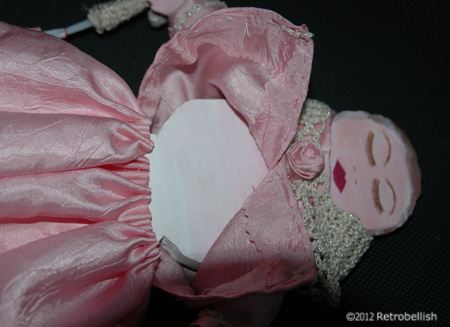
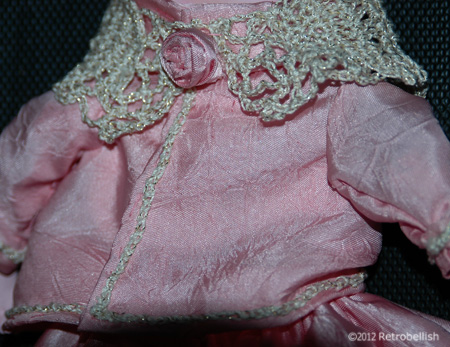
The jacket was made from two squares of the same pink fabric. I measured the two squares by eye, cut and then sewed them together, cutting the front square down the middle so the jacket would be open in front. I left two holes on either side near the top of the squares so I could sew on sleeves. The sleeves were also squarish in shape and very loosely made so that I could put the doll arms into the sleeves. I later crocheted the shawl around the doll to make it look like she had shoulders and to cover the loose fitting clothes.
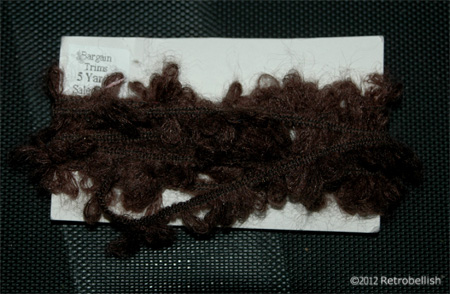
For the doll hair, I used a roll of brown woolly trim that I found in my yarn box. I cut six 4″ long pieces, and with needle and matching brown thread loosely sewed the six pieces together to form a head cover that resembled hair. The furry wool is so wild, it really looked like hair, and I painted the doll’s wood head in a matching brown color so you can’t really notice the open spaces throughout the sewed hair piece.
The Accessories
The hat is made from a scrap piece of thick interfacing leftover from a purse project. I had several jar lids, and placed them on the doll’s head to find the right hat width for the doll’s head. With a pencil, I traced around the lid onto the interfacing, cut the round shape and then by eye, another round hole in the center to rest on the doll’s head. For the crown, I cut a rectangular strip of interfacing and hot glued it from one edge of the center hole to the other edge of the hole. I covered the entire hat with the same pink fabric, and hot glued it to the interfacing. I also crocheted a trim for the hat (sewed it onto the hat) and embellished the hat with a little rosette (from the same pink fabric) and hot glued the rosette to the center front of the hat.
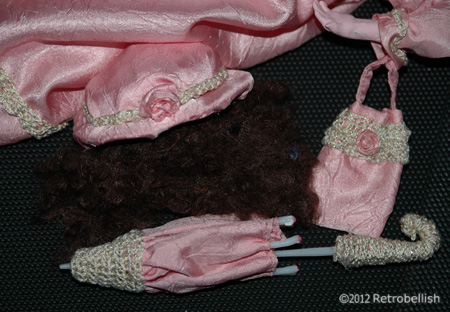
The little purse measures 1-3/4″ wide by 2″ long and is made of the same pink fabric folded into a little rectangle and then hand sewn to shape. I also cut and sewed a small narrow piece of the same pink fabric for a tiny purse strap. Later, I also crocheted a matching trim near the top of the purse and added a tiny rosette.
The parasol measures 7″ long by 2″ wide and is made from plastic skewers that I had saved from a gift fruit arrangement. I used one skewer as the main center post, tightly wrapped a rubberband (wound around many times) near the skewer bottom end, took six more skewers and tucked them into one strand of the wound rubber band, spacing them evenly around the main center skewer. I was surprised that this worked and the six skewers remained in place evenly around the center skewer. Using wire cutters, I trimmed the six skewers shorter than the main center skewer. I then measured and wrapped the same pink fabric around the length of the skewers and added four inches to the total fabric width. I then hot glued the bottom (folded) edge of the pink fabric to the skewers one at a time making sure to pull extra fabric in between the skewers so it would mimic the look of a semi-folded umbrella. I repeated the same process to the top end of the parasol.
To make the parasol handle, I used three plastic hook-shaped pieces (saved from the top of three packets of socks) and hot glued them together. I also hot glued the main skewer to the hook handle. I later wrapped the handle with the crochet thread to make it look like one uniform piece and repeated that process around the bottom end of the parasol.
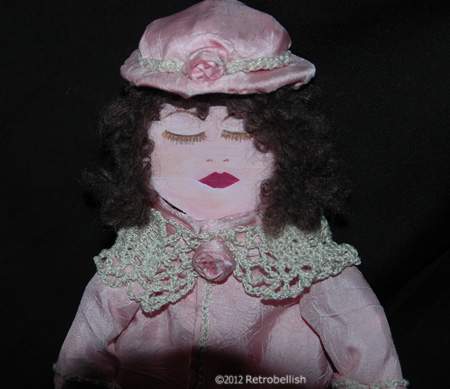
Making this doll was a very challenging experience, but very rewarding upon completing all of the accessories. And the most fun part of making this doll was that there were no rules because this was an abstract doll that I made from scrap wood and leftover reclaimed materials.
White Crocheted Pearl Purse
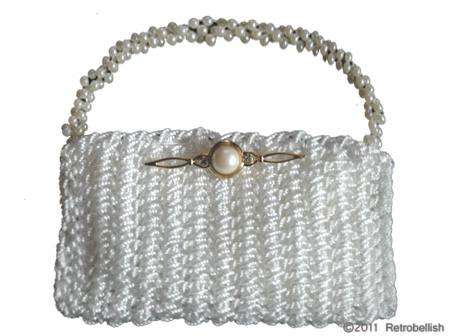
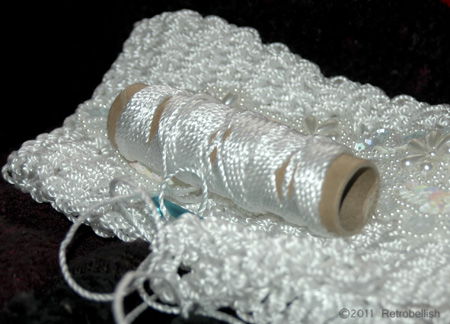
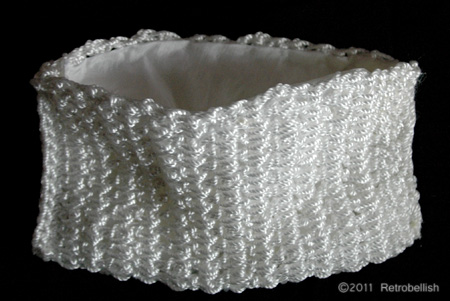
Just when I thought I couldn’t find any other type of fiber thread to crochet with, I found this Twisted Mason’s String Line in many colors at our local home improvement store. One of the pros I liked about this nylon string is that it’s very strong and lends itself to making very strong crochet pieces such as purses and straps. Other great qualities about this string is that it’s so soft to the touch and crocheting with it creates a great thick texture and an incredible satin sheen. It’s also waterproof.
Although the string is very thick and beautiful, it does have one drawback, the cut end of the string easily unravels. Before starting this project, I used my hot glue gun to dab a very small dot of hot glue onto the loose ends, and used a toothpick to push the loose ends together. Once the glued tip is dry, you can begin to crochet.
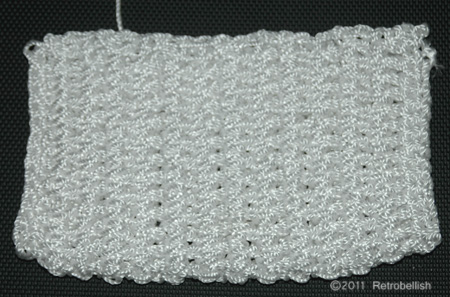
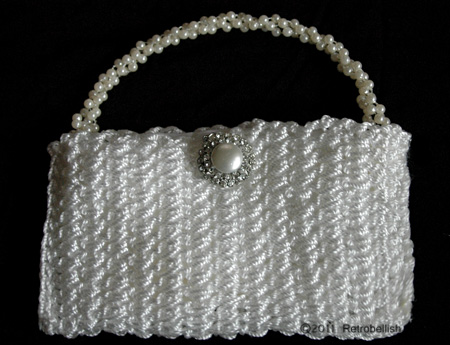
Because the string is so thick, I used a size N crochet needle. I crocheted 28 single chains, single crocheted the next row, and double crocheted the next ten rows. At this point I experimented by folding the purse in half vertically (against the direction of the crocheted rows). I loved the way the weave looked vertically when I held it in my hand like a clutch purse. This part is great, because at an early point you can decide how big you want your purse. I decided at this point that I wanted my purse a little bigger, so I crocheted several more rows and stopped at 14 (double crocheted) rows. I then single crocheted one more row before finishing. I knotted and hot glued the cut end (and after it dried) tucked the end within the stitches.
Next I wanted to line the inside of the purse, so I measured the purse. When folded, the purse measures five inches long and eight inches wide. I had a pretty white (polyester blend) fabric left over from another project which I used to line the purse. I hand sewed the fabric to the inside of the purse (making sure to stop within 1/4 inch from the edges). I folded the purse in half and using a smaller crochet needle weaved a ten inch long (same) string through the purse edge stitches to seal each side of the purse (making sure to hot glue the cut ends). For the purse closure on the inside top center, I decided to cut and sew on two small white Velcro pieces.
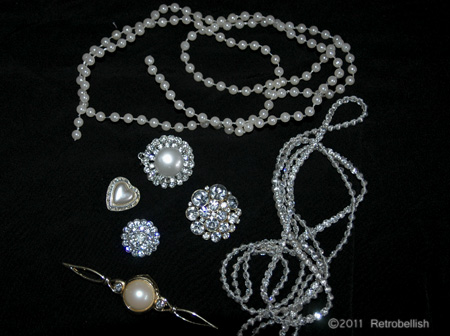
Some of the embellishments used in this project are from leftover miscellaneous broken pieces and even thrift store finds that I keep in a box for projects such as this one. I thought some of these pieces might look pretty on the purse. In a few of the featured pictures you can see where I’ve tried comparing different pieces to embellish the purse. I also had a long strand of wired pearls that I thought would make a great purse handle. I tripled and twisted the wired pearl strand into a handle shape that gave me that unique look for the purse and actually complimented the beautiful thick weave of the purse.
I enjoyed making this purse very much, and had even more fun embellishing it. The sky is the limit for creating and embellishing a small purse. The white string I used for this purse was beautiful, but the string also comes in different colors so I can’t wait to try my next purse in a beautiful bright color, which I will definitely post here. I also imagine using a bright print fabric to line the inside of my next purse along with some beautiful colorful beads for the handle and outside embellishments.
Recycled Fleece Leopard Gloves
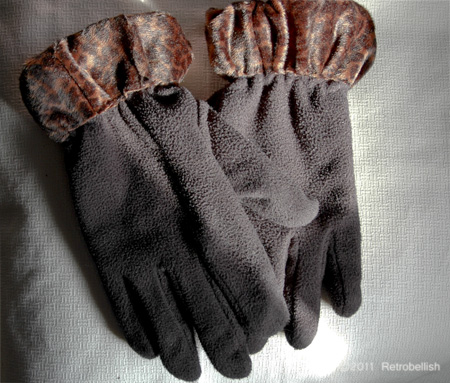
Another way to give an old pair of gloves a fresh new look is by adding some type of embellishment, especially when the gloves have a two inch extended cuff. I thought the gloves would look very nice embellished with some beautiful fabric. I looked through my fabric remnants and found an old leopard print that I thought would look very nice sewn onto the cuffs of my gloves. I measured the cuffs, the fabric, and then cut enough fabric for both cuffs.
I sewed the fabric onto each cuff and started by placing the fabric edge near the elastic edge part of the cuff. I then made sure to slightly gather the fabric every inch or so and sewed that gathered fabric firmly to the glove. This would ensure that the fabric would have enough elasticity to stretch with the glove’s elastic edge.
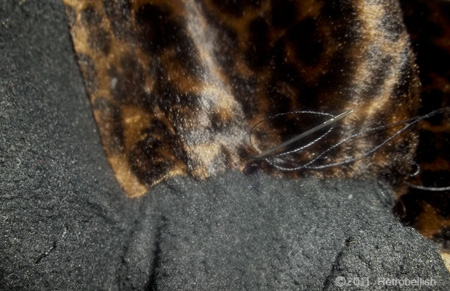
Next I folded the rest of the fabric over the cuff edge and sewed the other end to the inside part of the glove. I really loved the way the newly embellished gloves turned out. They have a totally different look and with only a little less than a quarter yard of fabric. You don’t have to embellish a cuff with fabric, you can easily change the look of gloves with simple and colorful buttons, bows, or other embellishments. There are so many wonderful and fun fabrics for children and many that can be found on sale in the remnants section of a fabric store.
Lost Earring Crochet Pin
I was looking for a pair of earrings to wear and couldn’t help notice the sparkle from some earrings at the back of my jewelry box. I have several lone earrings that don’t have a matching earring because I’ve lost them over the years. Each time I’d lose one, I’d put it in what became the lost earring section of my jewelry box with the hopes of soon finding the lost one. As time passed, I couldn’t throw them out and thought they might one day become a nice future craft project.
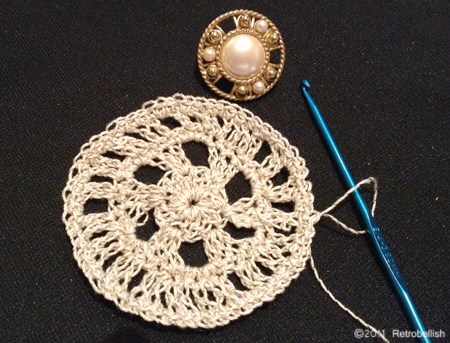
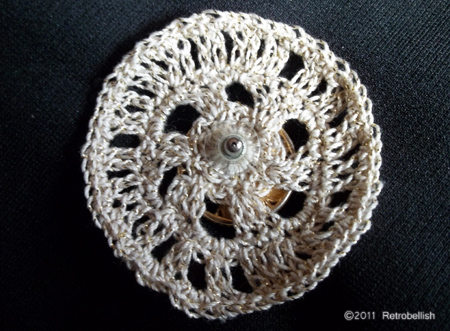
This crocheted pin is one such project that was inspired from browsing through several craft magazines. The old pierced earring I chose measures 1 inch in diameter and the crocheted part measures 2-1/2 inches in diameter. I used a fine beige crochet thread that is intertwined with gold metallic thread and used a size E-4 MM crochet hook. I looked at the earring for design inspiration and by trial and error came up with a very simple pattern.
I started by crocheting five single chains and joined them with a slip stitch. Next, I crocheted four single chains and double-crocheted 12 stitches into the center and then ended that row by joining with a slip stitch. Next, I chained four (to match the length of a double crochet) and double crocheted into each of the next two stitches, then crocheted four single chains and repeated double-crocheting into each of the next three stitches, repeating to the end and joined that row with a slip stitch.
In the next row, I single crocheted into every stitch all the way around. Next, I made four single chains, then double-crocheted into the next stitch, crocheted two single chains and then double-crocheted into each of the next two stitches and repeated all the way around and ended that row with a slip stitch. In the last row, I single crocheted into every stitch all the way around and finished with a knot.
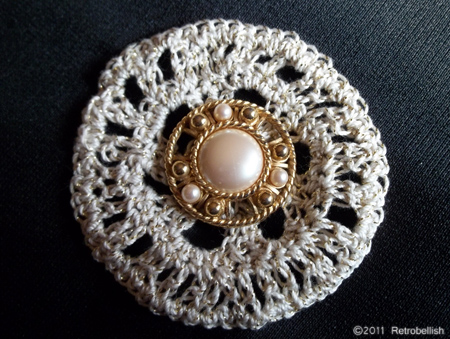
I placed the pierced earring post through the crocheted center, and the post is sharp enough to go through a sweater. The earring back holds the earring in place very well. I’m happy with the results and have worn the pin on a few of my sweaters. Instead of an earring in the center, you can also use a small pin in the center of any crocheted design you create.
