Fall Holiday Wreath
This wreath started out as a round, green wire bare frame I bought at a craft store. Along with the wreath, I also bought numerous springs of beautiful silk maple leaves and some floral wire. I cut the leaves off of the spring and wired individual leaves onto the wreath. The warm festive fall colors are very cheerful and versatile because they can be displayed from mid-September to Thanksgiving day (US).
Over the years, I’ve added different embellishments to form the wreath featured below. The pieces I added early on were the little scarecrow, little berries and a few fall flowers. Recently, I added the little pumpkin and small gourds. Over the years I’ve had fun adding embellishments to this wreath and although I’ve finished the wreath for now, I know that if I should find fun embellishments I like in the future, I can always swap them out because they are wired on. This is a simple wreath for anyone to make and you can re-use your favorite fall flowers or silk plants, and even some fun embellishments to make your own. A great time to pick up some of these fall items and embellishments is at the end of the holiday seasons.
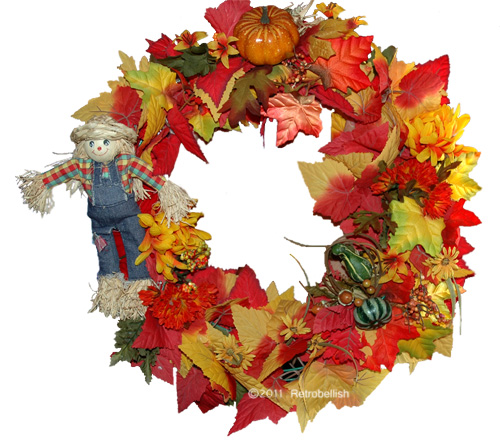
Fall Holiday Wreath
Abstract Autumn Leaf Pin
Autumn is a fun time of the year for crafting seasonal pieces from fall color pieces to nature inspired embellishments. This leaf pin was inspired by all of the beautiful fall colors of the leaves all around us. I recently made a fall wreath from silk maple leaves and had a few sprigs left over. I cut the most colorful leaf from the sprig, which was a beautiful red orange color. I had some sheer brown organza which I intended to use over the leaf to blend with the bright red color, but not cover its brightness completely. I also thought I might try sewing on some sparkly copper and brass toned beads over the surface of the leaf.
I took my pinking shears and cut out two squares of brown sheer organza, which measured 4-1/2″ X 4-1/2″ (slightly larger than the leaf). The leaf measured 4″ X 4″ at its widest points. I centered the silk maple leaf on the two cut pieces of organza and with pinking shears started cutting the organza loosely following the shape of the maple leaf (leaving that slightly larger margin of organza). Once I finished cutting out the leaf shaped organza pieces, holding the leaf and organza pieces together, I hand sewed a few copper colored beads through the organza pieces and the leaf, which helped to anchor everything together. I then used larger brass toned beads near the base of the leaf. I then sewed on a pin closure on the back, but if you’d prefer, you can also use glue on the pin closure. I then took some gold glitter fabric paint and outlined the organza shaped leaf and made a few little vein designs on the leaf for a little more sparkle. I was very pleased with the way the pin turned out and will enjoy wearing it on my jacket and sweaters.
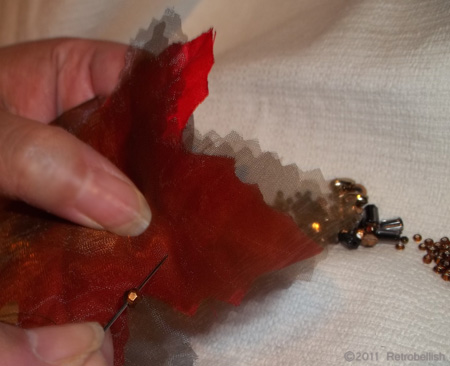
Making Autumn Leaf Pin
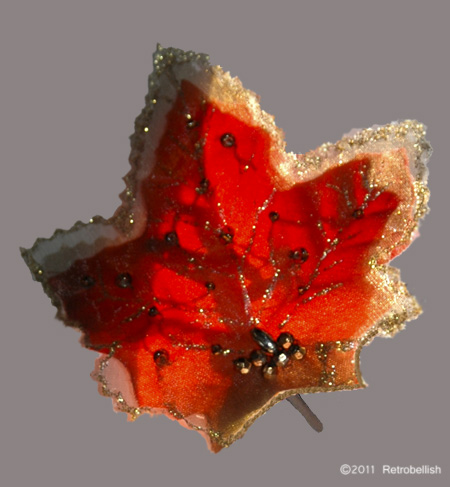
Autumn Leaf Pin
Small Dress In Reused Frame
This small dress is framed in an old plastic frame. We picked up these frames from our local science surplus store. We painted a few of them and gave two of them a crackle finish. I decided to use one of these frames for a small dress project I thought of making. The frame measures 6″ x 7″ and the dress measures approximately 3″ long by 1-3/4″ wide. I first drew a small plain dress outline on thin cardboard. Once I had a simple shape I liked, I cut out the traced cardboard shape. I then placed the cardboard cutout onto a small remnant piece of pink cotton fabric and with pinking shears cut fabric about 1/4″ larger on all sides. I then hot glued the fabric only onto the back of the cardboard.
I took some white tuling and measured a square a few inches wide, folded it in half, held it against the dress and trimmed the length to the same length of the dress. I then threaded a sewing needle with white thread and sewed in and out of the tuling’s folded edge every 1/8″ inch. When I reached the end, I pulled on the thread and gathered the tuling and when I had the gathered look I liked, I made a knot. I placed the tuling about waist high and used a small dot of hot glue on the back left side of the dress to adhere the tuling and the same on the right back side.
I had a small white remnant piece of soft cotton I cut with pinking shears to the shape of a cute rounded collar, and also found some very pretty embellishments to decorate the dress. I carefully hot glued little beaded strands around the collar and two strands at the waist. I also glued a small pink flower onto the dress. With colored pencils I drew a striped wall paper design on plain paper and placed a piece of velum in front of the paper to soften the look. This was a fun project to make using a lot of remnant pieces.
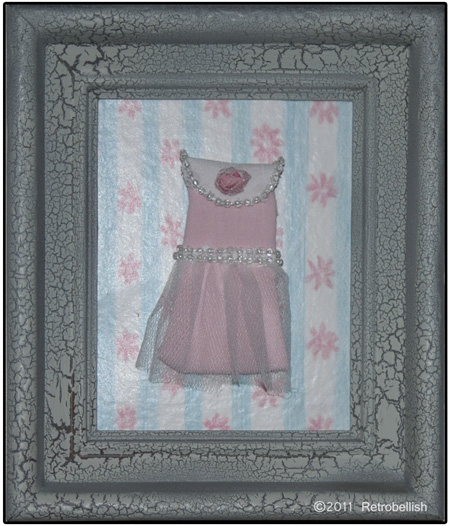
Framed Small Dress
Reclaimed Styrofoam Copper Mirror
This Reclaimed Styrofoam Mirror started out as two pieces of insulation boards used for insulating homes. The pieces were thrown away from a construction job in our neighborhood and we thought it would be a great idea to use them for one of our craft projects. The Styrofoam boards were both the same size and rectangular in shape. I painted both boards with flat black acrylic paint. I had a mirror that was chipped at the top, so I used a glass cutter to cut away the chipped area and straighten the mirror edge. I then placed the mirror against one of the Styrofoam boards, measured and centered it, then with a marker, traced the mirror onto the Styrofoam board. With a small serrated kitchen knife, I cut the Styrofoam board on the drawn line all the way through. I then took white glue and glued the cut out Styrofoam onto the other Styrofoam board.
After the glue dried, I painted the front of the Styrofoam board with a faux copper finish. After the paint dried, I put the mirror into the cutout groove of the Styrofoam boards which fit right in. I then lifted the mirror and used white glue at the corners of the mirror to adhere the mirror onto the Styrofoam board. I then used fabric paint to embellish the mirror and outline it. We also used another small piece of Styrofoam to make an embellishment for the top center of the mirror. Before putting the mirror into the Styrofoam, I put a hook in the back of the Styrofoam, but you can omit the hook and push the Styrofoam onto a small nail on the wall instead. The framed mirror looks very nice on the wall, and it’s also very light. According to how you make your mirror, you can also display it on a stand vertically or horizontally.

Reclaimed Styrofoam Mirror
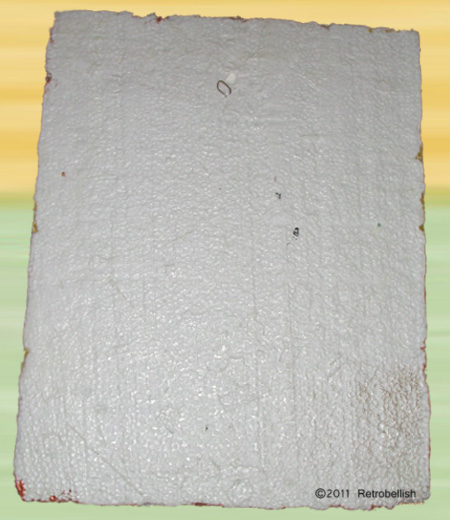
Reclaimed Styrofoam Mirror Backside
Reclaimed Fabric Paris Theme Purse
This small evening purse was made from the reclaimed fabric of a bridesmaid dress that I know I’ll never wear again. In the past, I’ve donated bridesmaid dresses, but there were only a few that I just couldn’t part with because the dress fabric was so beautiful. I saved these dresses, took my time taking them apart, saving the zippers, buttons and fabrics. As a big fan of all things Paris, I decided that I would use this beautiful pink silky fabric to make a Paris themed purse. The first thing that came to mind was the Eiffel Tower, so I decided to make an Eiffel Tower of sequins. I really didn’t know how this would turn out, but thought I’d give it a try.
The purse is only 8 inches long by 6-1/2 inches wide and I was able to use embellishments I already had. I used the pink fabric (doubled because it was very thin) that I hand sewed in a pocket style, two strips of black lacey trim that I also sewed on, small black sequins on a single strand to make the abstract Eiffel Tower, and a very light lacey black trim for the very bottom edge of the purse. For the handle I used a 22 gauge wire, two pieces of black velour (from a roll) that I sewed in a tube (then turned inside out), and pink pearls from an old necklace.
I cut two small strips of pink fabric (2 inches by a half inch) to make two very little fabric loops. I sewed one fabric loop on the left, near the top and inside of the purse, and the other fabric loop on the right side. It was through these fabric loops that I would pass the wire end and curl it to seal it with pliers leaving the other wire end free. I passed one of two velour tubes through the wire, then the pearls, then the other velour tube. I then passed the other wire end through the little fabric loop and sealed it as well.
For a closure, I used a small snap on the inside top center of the purse, but I also embellished the outside center with one large black sequin (that has a hole on the top center) and then sewed on a pearl in front of the sequin (hole). I really loved the way this little purse turned out and although the Eiffel Tower is abstract, you can also make this purse and use a store bought applique for a more realistic look.
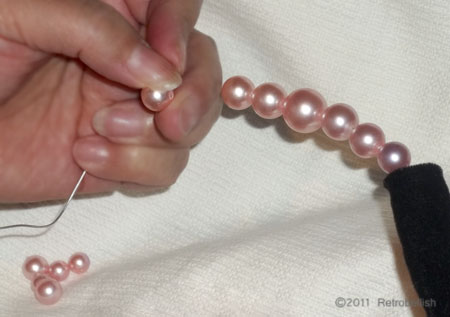
Beading The Wire Handle
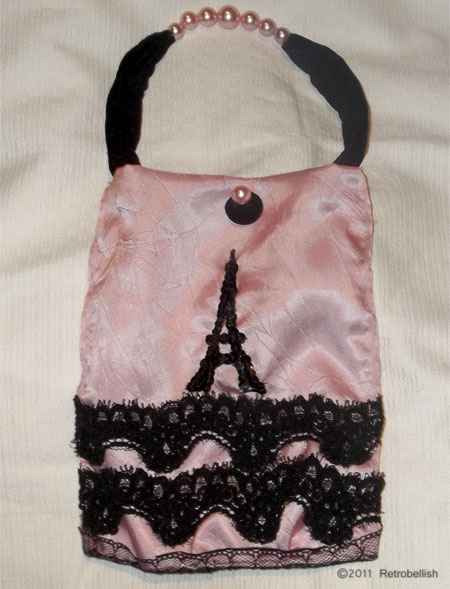
Reclaimed Fabric Paris Theme Purse