Retrobellish Fashion Accessories
These are some of our previous reclaimed fabric projects about fashion accessories. Click on the pictures to read the whole articles. Reclaimed Fabric Red & Black Choker
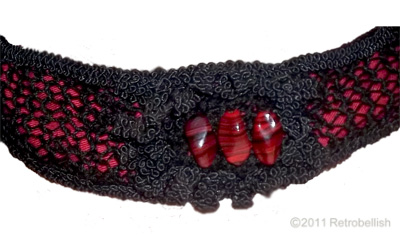
The choker was made from a leftover red fabric strip of soft thick cotton and a stretchy black netting that I knitted. I knitted the two pieces (using size 8 knitting needles and size 3 crochet thread–12 stitches wide by 36 rows). Next I hand sewed the edges of the finished knitted piece at the edges stretching it as I sewed it across the face of the red fabric to make the stitches wider and show off more of the red fabric. I then sewed on a trim all the way across on both edges.
Wearing Finished Beaded Fabric Cuff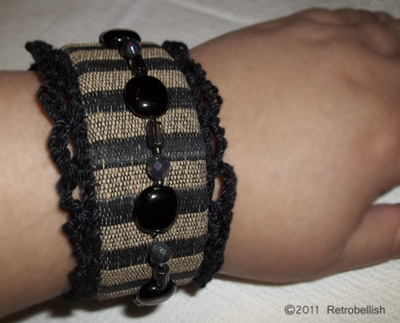
The finished cuff measured approximately 2 inches wide by 10 inches long. For fabric support, I used a 1/8 inch thick interfacing about a ¼ inch smaller than the fabric’s measurements. I wrapped the fabric around the interfacing and hand sewed the fabric with the seam in the back. I also sewed a small piece of solid black fabric over the seam in the back of the cuff to hide the seam and used a small black snap for the cuff’s closure.
Finished Denim, Lace and Pearl Pin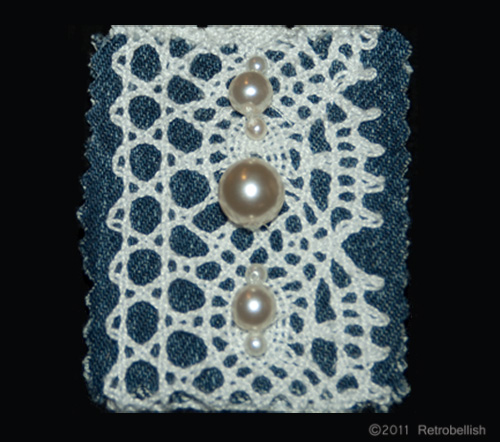
Recycling even the small scrap pieces of fabrics leftover from other projects could produce little fun pieces such as embellishments for other projects. I have a nice casual denim jacket that has an outside left breast pocket. The pocket is square in shape and I’ve always thought it would look nice with some kind of pin, but I didn’t like the look of any of the pins I have. I looked through my fabrics, trims and beads and combined a few things to see if I could make a pin for my jacket. I really liked the look of blue denim covered with a leftover piece of white lace trim. I looked through my beads and found some pretty white pearl beads of all different sizes. A few of the pearls looked nice over the white lace trim and both looked nice against the dark blue of the denim.
Reclaimed Retrobellish Purses
The following articles feature stylish purses made from reclaimed materials. These reclaimed purses were each featured blog posts in recent years. Each article describes the purse in an introductory paragraph followed by a link to the rest of the article including additional pictures.
Make Your Own Recycled Fabric Knitted PurseIt all started when I watched a craft show about knitting with fabric. The show featured a lady who sewed a simple summer dress in a smooth beautiful floral colored cotton fabric. The beautiful summer dress had an empire waistline, and although the top portion of the dress was fashioned in a tube top style, it had the most beautiful braided-like texture, and it tied at the shoulders with thin straps. The lady explained that she had created this beautiful texture by knitting it with strips created from the same floral fabric. I couldn’t believe how beautiful the dress looked. I immediately knew that I wanted to try this technique, although it would probably be on a smaller scale, and I came up with the idea of a small knitted purse.
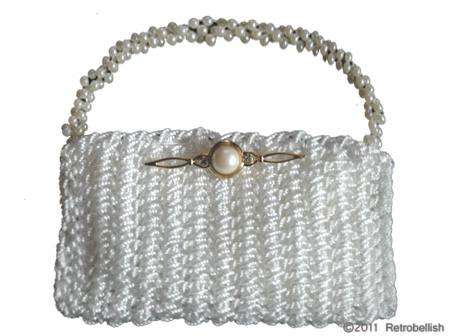
White Crocheted Pearl Purse
Just when I thought I couldn’t find any other type of fiber thread to crochet with, I found this Twisted Mason’s String Line in many colors at our local home improvement store. One of the pros I liked about this nylon string is that it’s very strong and lends itself to making very strong crochet pieces such as purses and straps. Other great qualities about this string is that it’s so soft to the touch and crocheting with it creates a great thick texture and an incredible satin sheen. It’s also waterproof.
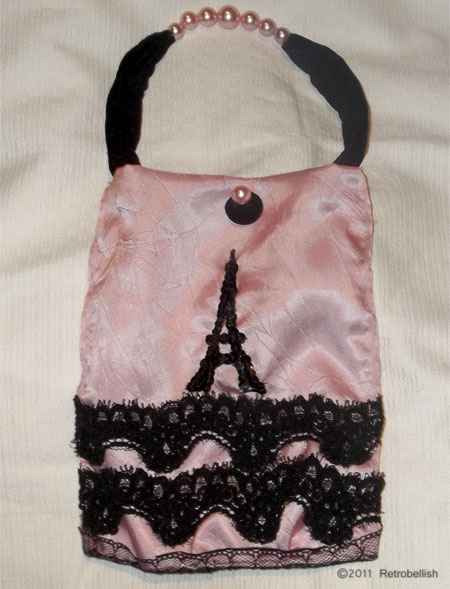
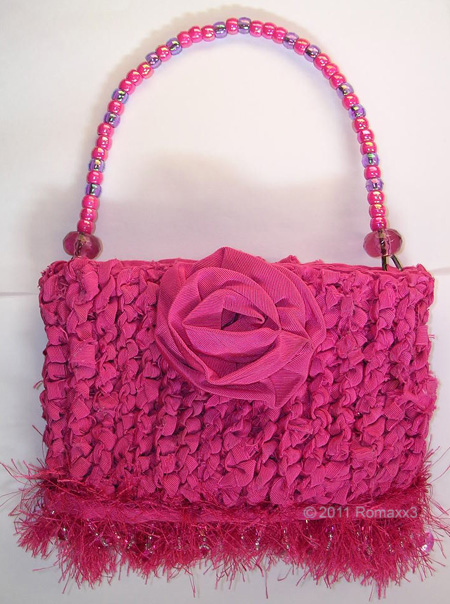
Reclaimed Fabric Paris Theme Purse
This small evening purse was made from the reclaimed fabric of a bridesmaid dress that I know I’ll never wear again. In the past, I’ve donated bridesmaid dresses, but there were only a few that I just couldn’t part with because the dress fabric was so beautiful. I saved these dresses, took my time taking them apart, saving the zippers, buttons and fabrics. As a big fan of all things Paris, I decided that I would use this beautiful pink silky fabric to make a Paris themed purse. The first thing that came to mind was the Eiffel Tower, so I decided to make an Eiffel Tower of sequins. I really didn’t know how this would turn out, but thought I’d give it a try.
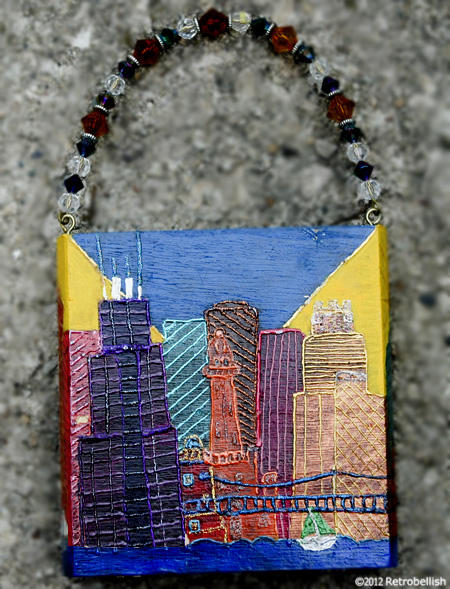
Cigar Box Folk Art Purse
Cigar box purses were once very popular and a great way to reuse these great boxes made out of wood or chipboard that could be used for a multitude of craft projects from jewelery boxes to purses. We used some of these for a lot of our folk art projects where we painted city and farm scenes on the boxes. The box featured here is an abstract rendition of our city of Chicago’s famous landmarks. And although this purse was used as folk art, some of our other pieces were functional purses lined inside with velour fabric and a small mirror.
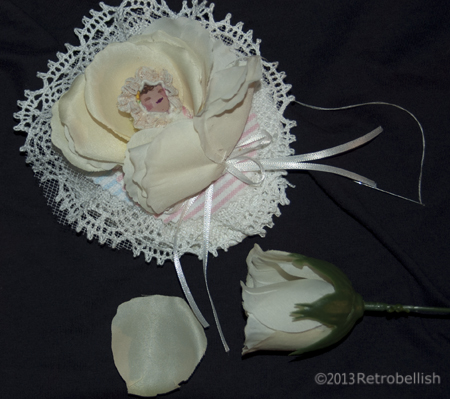
Baby Shower Corsage
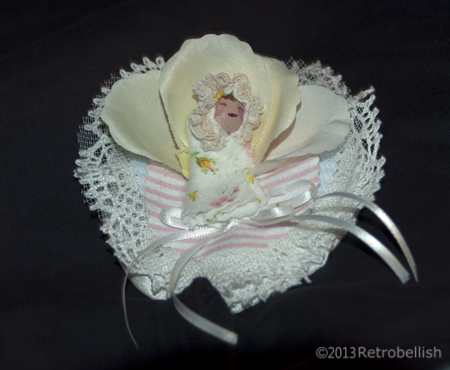
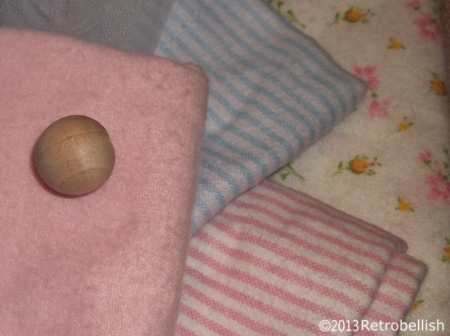
I have always enjoyed making baby shower items such as centerpieces, umbrellas and corsages using reclaimed items. I was inspired to make this baby shower corsage by looking at pictures of beautiful natural flower corsages. Since I didn’t know the baby’s gender, I decided to use neutral light colors in all the materials I chose. I looked in my craft box and found remnants I had left over from other projects. I had a cream colored silk flower, a small piece of lacey trim, a small piece of white tuling, a few swatches of soft flannel fabric, a small pierced wooden bead for the head, leftover piece of interface and a strand of white ribbon.
I started by making a base. I cut an oval shape from a sturdy piece of interface, and then cut a slightly larger oval shape from flannel fabric, then repeated and cut out a second oval shape from the remaining flannel swatch. I placed the interface piece in between the two oval flannel pieces and sewed around the edges to seal the interface inside. I then sewed the tuling and lacey trim remnant all the way around the edge of the base, which softened the look of the base. For a little more texture and color, I cut two small round pieces of flannel–one in pink and one in blue and placed these place behind the flower.
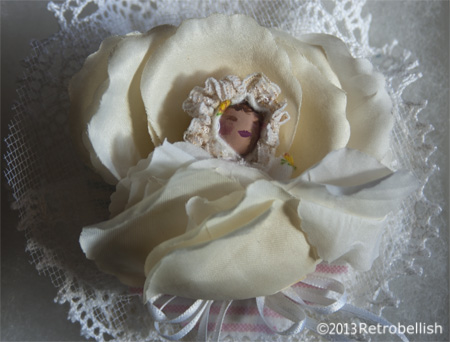
I then cut flower petals from a cream colored silk flower, cutting as close to the flower’s base as possible. I assembled the petals in piles according to their size. I placed a large flower petal in the upper center part of the base and hand sewed it onto the base. I then continued sewing the larger petals to either side of the center petal. I continued sewing the next size petals in layers until I formed a pretty floral shape.
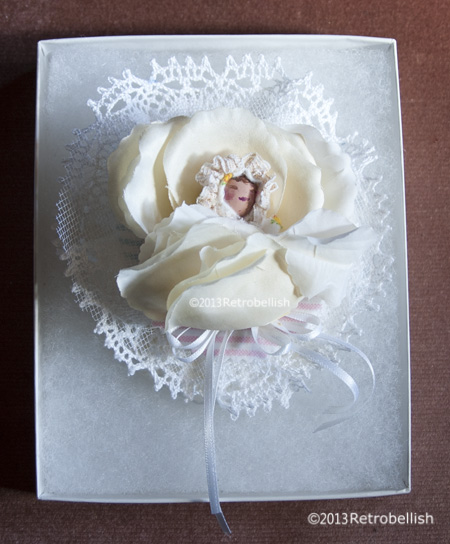
I painted a little face on the wooden bead using craft acrylic paints. While the paint dried, I wrapped a little shape of flannel fabric into a little roll and sewed the edge to seal the tiny bundle. I then took the painted wooden bead and sewed the bead into one end of the little flannel bundle. I sewed a tiny lacey remnant on the flannel around the head. Next I pulled the sewing needle through the center flower petal, through the base, and through the baby bundle several times to anchor the bundle. I then sewed the rest of the flower petals around the baby bundle until it looked like the baby bundle was enclosed inside of the flower. I then made a ribbon bow and sewed it onto the bottom of the corsage. I was very pleased with the outcome and the mother-to-be really enjoyed wearing it. Although I used leftover remnants, you can use your imagination to make your own special piece.
Reclaimed Doll Dress On Form
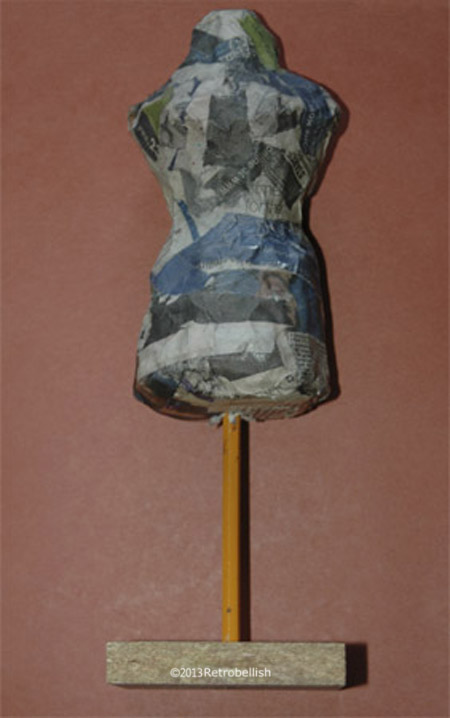
Throughout the years I have bought several interesting dolls at craft shows and garage sales. One of my doll’s had a dreary dress and for the longest time, I’ve wanted to make that doll a prettier dress. To make it easier to work on the dress, I decided to make a dress form as close as possible to the doll’s size. The form started out from a piece of reclaimed aluminum foil that I rolled up into an oblong shape. I then took old newspaper strips, made paper mache and wrapped the paper mache strips around the foil. Paper mache forms are sold at most craft stores, but are usually smaller in size. I needed this form to be approximately the same size as the doll, so making my own form was the best option and it also gave me a chance to use up some recyclable items I had lying around the house.
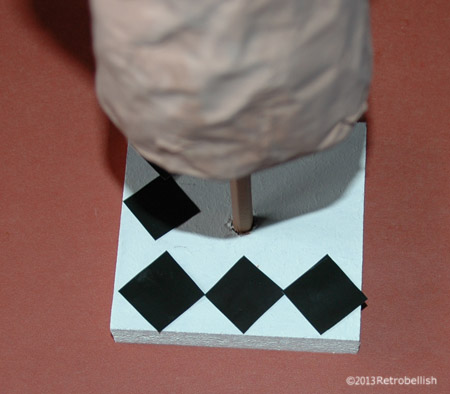
I was quite happy that the form I made was very close in size to the doll’s size. I then needed to make a stand and a base. Once the form was thoroughly dry, I drilled a small hole into the bottom center of the form and into the square wood base I had found in my garage. Using my hot glue gun, I put some hot glue onto both ends of an old pencil and stuck the pencil into the drilled hole and into the base. Once the hot glue dried, I used a light tan acrylic craft paint to paint the paper mache form.
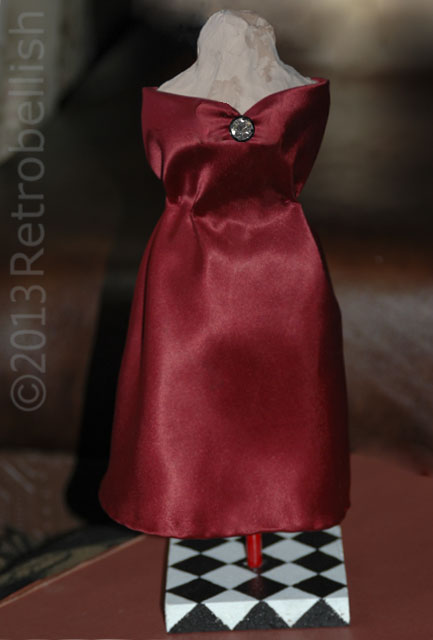
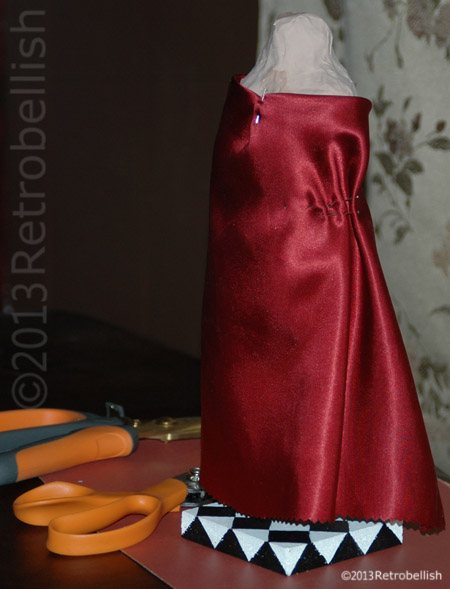
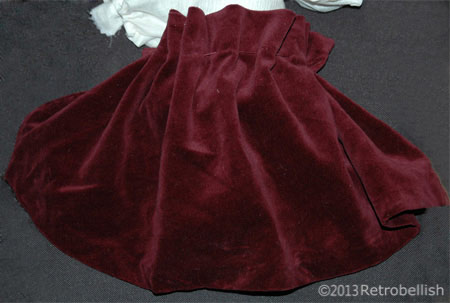
I had picked out a beautiful deep satin red fabric from my old fabric remnants to make the doll’s dress, a color that I thought looked very nice in contrast to the form’s tan color. I then decided to use acrylic craft paints to create a harlequin black and white pattern on the base. Once the base was painted in white and the paint dried, I cut out black little squares from an old calendar I was about to recycle. By trial and error, I found the right size little squares for the harlequin print on the base and used a pencil to trace the little squares. I then used black acrylic paint to paint in the little squares. Once the base was thoroughly dry, I was finally ready to make the dress.
As you may have read on some of my previous posts, I love to make miniature dresses for dolls or just as art pieces. This project started out as a form for my doll’s dress, and although the red satin fabric lent itself to a much fancier dress than I intended for my doll, I decided to keep this evening dress as an art project on this stand. I used small snaps to fasten the back of this dress, so I plan to remove the dress, make a different style dress for my doll, and place the red dress back on this stand permanently as an art piece. To add a little sparkle to the top center of the dress, I used a small earring (a partner to the one I lost), but you can use any piece of jewelry you’d like.
So although I intended to use this form to help me make my doll’s dress, I was happy that I made an art piece to place in my sewing room, yet I will still be able to make my doll’s dress, and then display the red dress on my shelf as an art piece. Even though I chose to make my paper mache form, you could buy one and make your very own piece of art. Remember, just have fun and enjoy your crafts.
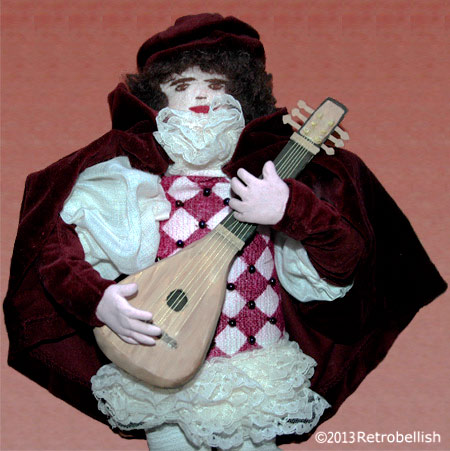
Reclaimed Fabric Jester Doll
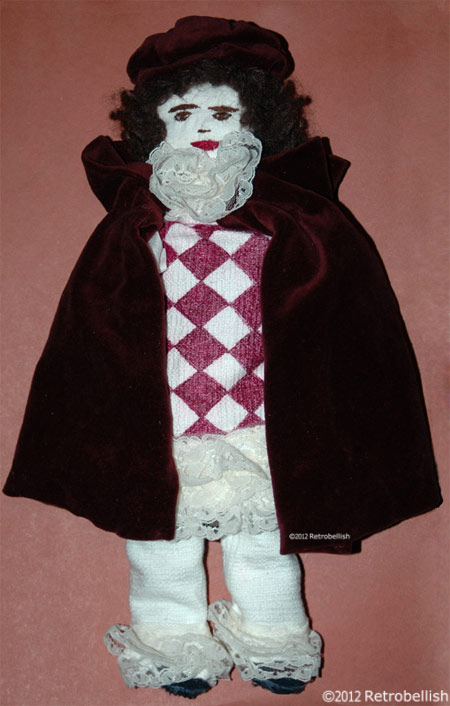
This little jester started out as an idea I had to make a medieval style doll about five years ago. I have always been inspired by the medieval style clothing from some of the great classic movies. The colors, the style and flow of the fabrics have always been a fascination of mine. A few weeks ago, while looking through my fabric remnants, I saw beautiful colors and lush textures that inspired me to make a jester doll.
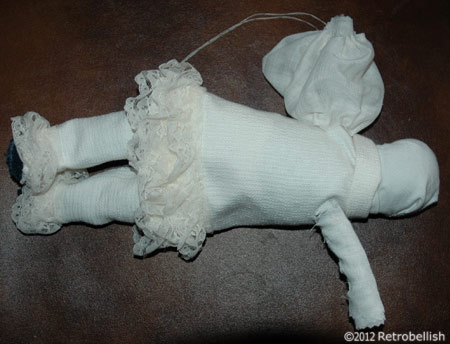
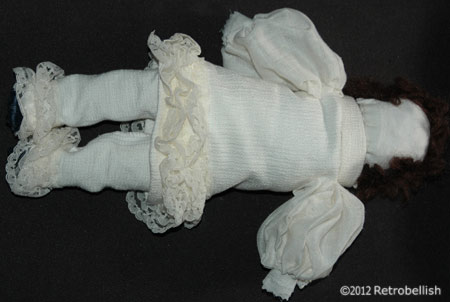
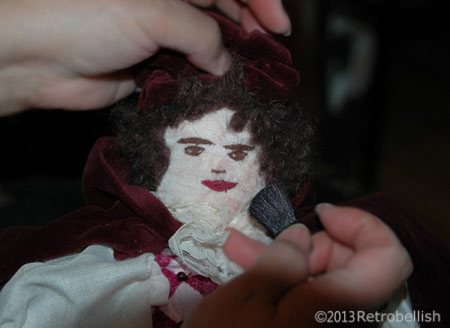
Completed Jester Body
First, I had to create the doll’s body and since this would be an abstract cloth doll, I decided to use the fabric from an old cotton sweatshirt. I cut a lengthy portion from one sweatshirt sleeve and rolled up the cut piece forming a firm makeshift torso and sewed the edges to the rolled up portion. Next I cut smaller pieces from the same sweatshirt, rolled up the piece to make an arm in the same fashion as the torso and repeated these steps to make the other arm. I then sewed each arm piece to each side near the top of the torso. I followed the same procedures to make the legs and sewed them to the bottom portion of the torso.
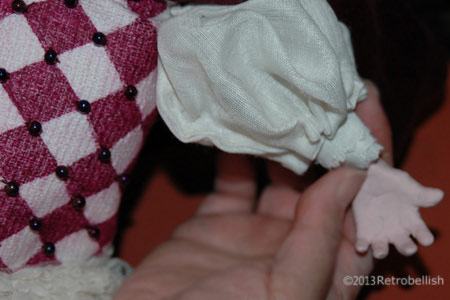
The head was challenging, but I used the same sweatshirt remnant from which I cut one lengthy piece. I rolled one long piece into a rounded ball shape and when big enough in proportion to the body, I pinned it in several spots and started sewing along all edges to secure the ball shape as much as possible. I cut apart old sheer knee high stockings and placed a piece over the round head shape, stuffed more cotton pieces at the base to make a neck and started sewing that part to the body. Next I looked through my remnant box and found a small piece of soft white cotton that was large enough to sew over the entire head. I took brown colored sewing thread to sew the jester’s eyes, eyebrows and nose. I used red sewing thread to make the lips. I then used brown curly wool trim to make the hair by sewing down the strips to the head.
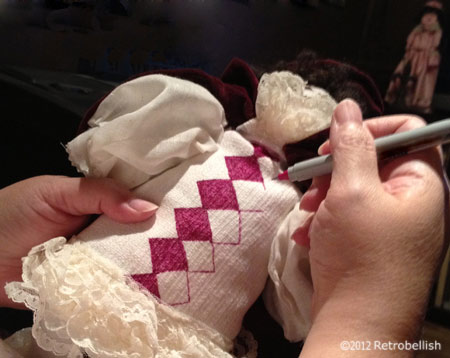
In my remnant fabric box, I found a beautiful cream colored cotton fabric, which was large enough to make the jester’s tunic, sleeves and pants. I spread the fabric out on a table and laid the doll flat over the folded fabric. By eye, I used a pencil to lightly trace around the doll creating a pattern on the fabric and (leaving a generous 1/2 inch seam allowance). I cut out the drawn pattern to sew the doll’s clothes. When I finally finished the jester’s clothes, I used a maroon colored permanent fabric marker to draw and color in a harlequin pattern onto the tunic. I had a roll of cream colored lace trim that perfectly matched the cream colored clothes. I used cream colored sheer cotton to separately make sleeves and connected them to the tunic at the shoulders and around the armholes.
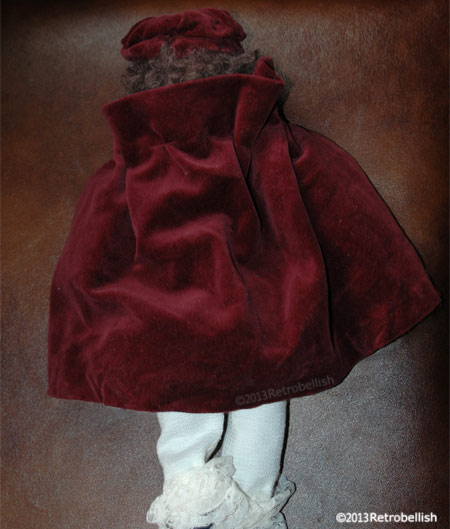
I also found a beautiful maroon colored velour fabric piece in my remnant box (cut from an old jacket of mine) and saw that it was perfect in size to make a cape for the doll. Using a matching maroon colored thread and needle, I basted long stitches about one inch from the cape’s top edge hemline. I sewed smaller single stitches down each side of the cape, placed it over the doll’s shoulders, and sewed a bottom hemline on the cape. Next, I decided to make a hat for the jester, so I took another maroon velour remnant and cut it into a trapezoid shape. I sewed together the longest edges forming a tubular shape (leaving the top and bottom ends open), and sewed the smaller opened side to the jester’s head (through the white fabric and hair), flattened down the rest of the tube while puffing out the fabric, which piled nicely forming a round puffy shape, sewed tiny stitches to hold the folds in place, and continued to form the hat as I went along. Then I sewed the center of the hat down through the center and hid those stitches under one of the folds of the last layer. I was very pleased with the results.

I adorned the harlequin pattern on the jester’s tunic by sewing on some maroon colored beads. I also made the jester’s boots from the same maroon velour fabric and sewed tight stitches to create the curled points on the boots.
Just like in some of the old movies I’d seen, I wanted the jester to be holding a mandolin. I looked up a picture of a mandolin on-line, drew it onto a piece of regular paper and figured out an appropriate size mandolin by holding it up against the jester. Once I figured out the correct size in proportion to the jester, I traced the mandolin pattern onto heavier paper and again onto corrugated cardboard. Next I measured where to make the center hole on the mandolin and used a paper punch to do so. Using acrylic craft paints, I painted the mandolin details onto the heavy paper pattern and let it dry.
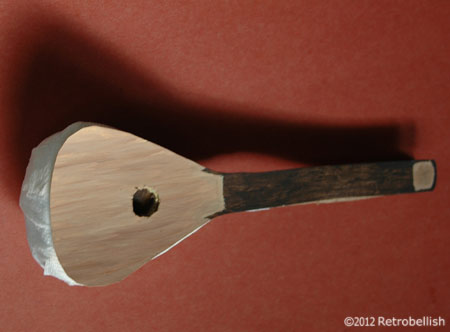

Next, I worked with the heavy corrugated cardboard mandolin and neck cutouts and glued them together. The lower back portion of the mandolin body was rounded (as if made from a hollowed out gourd). I achieved that look with paper mache (which I made from scrap paper towel strips watered down with white glue) and affixed that small round shape to the mandolin’s back by wrapping long narrow mache strips from the back and around to the front of the mandolin’s body. I then placed the mandolin on a piece of waxed paper and near the heating vent to dry. Once it dried overnight, I was able to remove the mandolin from the waxed paper without any problem. Next, I glued the painted mandolin paper veneer over the face of the heaver paper mache mandolin piece and painted the rest of the mandolin to match the already painted top veneer.
I cut small rectangular corrugated cardboard pieces to make the bridge and nut pieces on the mandolin, then used bright yellow sewing thread and fabric glue to adhere the strings onto the tiny rectangular bridge. Once the strings dried in place, I cut (with sharp scissors) the ends off of rounded toothpicks to make the tuning heads and pushed those cut pointy ends (dipped into a little glue) and into the head. Once they dried in place, I took one string at a time, dabbed glue around the tiny tuning heads and with tweezers, began wrapping each thread around its corresponding tuning head and cut off the excess. Once everything was dried, I placed the nut in place, and used glue to line up the strings evenly in place.
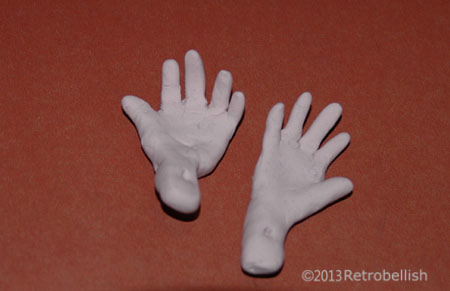
Last, but not least, I made the jester’s hands from flesh colored polymer clay. I rolled each finger and made some slightly longer or shorter matching the sizes for each hand. I made the palm part, a longer wrist part, pierced the end of the arm part with a toothpick (so that I could later sew the arm to the sweatshirt arm). I then attached the fingers onto the hand part and held them in front of me and while mimicking playing a guitar, curved the hands and shaped the fingers. I carefully placed the complete shaped pieces onto aluminum foil and baked them in the oven (carefully following the clay manufacturer’s instructions).
Although this project took me over a month to complete in my spare time, it can be done in several days with the right amount of time. And although I chose to make a jester doll, you could give it a try with any doll you’d like. So just have fun and create your own reclaimed fabric doll.