Purple Blouse To Embellished Jacket
This project started out as a blouse I picked up at a local resale shop. I really love the style and deep plum color of this blouse, especially the iridescent colors it reflects under different lighting. And as interesting as this fabric is, the iridescence made it difficult to capture the deep plum color in the photographs below, but the true plum color is visible in the silky threading of the beaded trim.
What gave me the idea to embellish this blouse, and perhaps convert it to an evening jacket, was that the fabric color was a perfect match for a great trim I had bought months ago at a clearance sale. I’m a big fan of sparkly beaded trim embellishments and this beautiful trim happened to be such a bargain. It was so amazing to have found a trim and (months later) a blouse that matched so perfectly in this shade of deep plum purple.
I measured the blouse and trim, and was glad that there was more than enough trim to not only complete this project, but to sew onto both cuffs as well. To prepare the blouse, I washed and ironed it, removed all of the buttons (but not the cuff buttons). I then pinned down the collar to the inside of the blouse leaving just a half inch of the collar showing above the collar line. I then started hand sewing the pinned down fabric flat to the neckline.
Because the trim was ten yards long, it was heavy and bulky, so I decided to first pin it onto the blouse. I pinned one trim end to the front left edge of the opening up towards the collar, around the neckline, and then back down the front right edge of the opening (over the area where the buttons used to be). Once the entire trim was pinned in place, I cut the trim away from the edge end. Then I started hand sewing the trim to the blouse (which took me three evenings).
This was a simple and inexpensive project to do. I enjoyed working on this project and am very happy with the results. It’s amazing how a pretty trim converted the look of a blouse into a jacket.
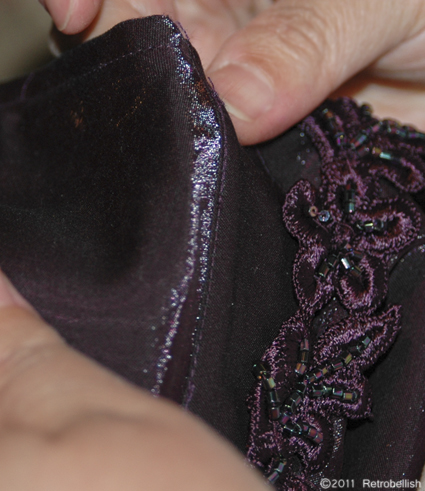
Adding Trim To Jacket
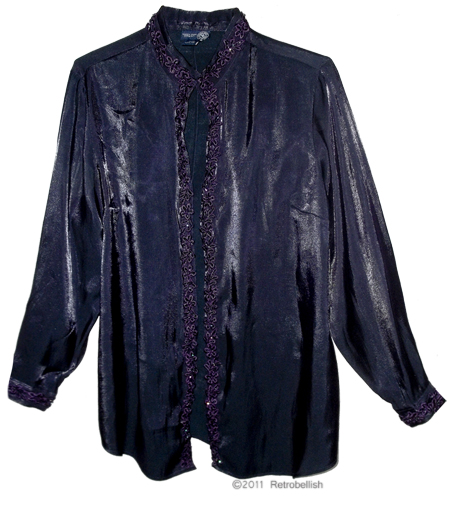
Finished Purple Jacket
Faux Zebra Fabric Hat Box
This whimsical piece started out as an old hat box that I had lying around for years. I even used it to store my craft paints at one time. About ten years ago, I got the idea to use some remnant pieces of animal print fabrics I had bought at a clearance sale at Minnesota Fabrics.
I measured this oval-shaped cardboard box and then measured the fabric. I carefully cut the fabric for the (outside) top and bottom of the box. Then I cut one long narrow strip of the fabric to cover the side for the top and a much wider strip of fabric for the side bottom part of the box. I also had some gauze-like zebra fabric that I used to line the inside of the box. This gauze-like fabric was very light and sheer yet it also had a visible zebra print that was very similar to the print on the heavier zebra fabric (that I used on the outside of the box).
I used hot glue to adhere the fabric to the box, yet I was careful to dispense very small dots of glue so as not to make it too bulky. I managed to smoothly glue the heavier fabric onto the outside of the box and the gauze-like fabric to the inside of the box. I then glued a black satin cording on the entire top edge of the box all the way around. I still love the way the box looks and I use it to store my little bottles of perfume that used to clutter my dresser.
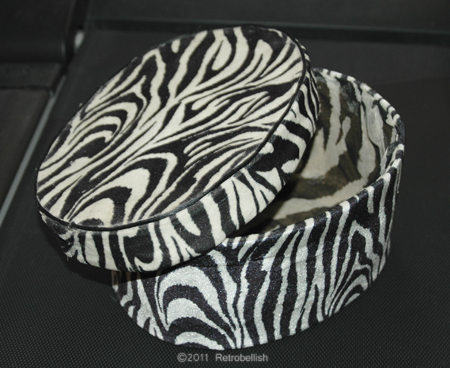
Faux Zebra Fabric Hat Box
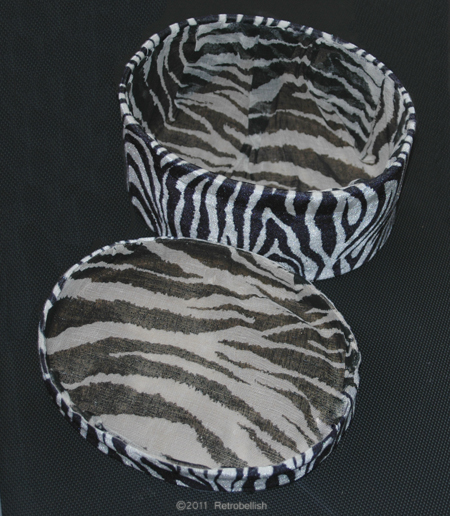
Faux Zebra Fabric Hat Box Inside Fabric
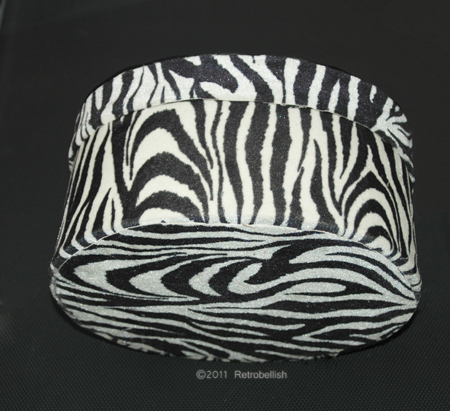
Faux Zebra Fabric Hat Box Bottom View
Embellished Purple Blouse
I really like this purple blouse and wanted to give it a new look. I realized that when I wear this purple blouse, I always wear it with black — be it a pair of black pants or a black skirt. The blouse has a nice texture so I thought it would look nice with some kind of black trim around the neckline.
Recently, I found some black trim that I thought would look very nice around the neckline. After I measured the trim and the neckline, I confirmed that I had more than enough trim to complete this project.
Once I pinned the trim onto the neckline, I started to sew it on the blouse. I loved that this was a quick and easy project to do. Including the time it took to pin the trim to the blouse, I was able to complete this entire project in one hour. I’m very happy with the results and how the trim gave my blouse a new look.
TIP: The back (top center) of the blouse has a one-button closure, which makes it easy to remove over my head. However, please keep in mind the type of trim you use to embellish articles of clothing made of stretch fabric, because when you have to pull a stretch sweater or blouse over your head to wear it, the trim should also be of an elastic type to be compatible with the fabric.

Embellished Purple Blouse
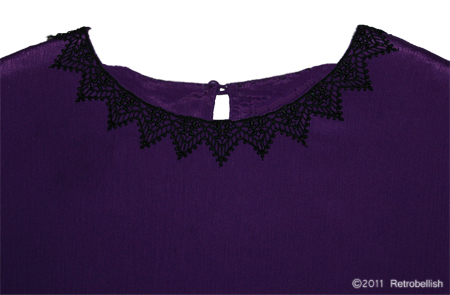
Closeup of Embellishment On Purple Blouse
Reclaimed Fabric Paris Theme Purse
This small evening purse was made from the reclaimed fabric of a bridesmaid dress that I know I’ll never wear again. In the past, I’ve donated bridesmaid dresses, but there were only a few that I just couldn’t part with because the dress fabric was so beautiful. I saved these dresses, took my time taking them apart, saving the zippers, buttons and fabrics. As a big fan of all things Paris, I decided that I would use this beautiful pink silky fabric to make a Paris themed purse. The first thing that came to mind was the Eiffel Tower, so I decided to make an Eiffel Tower of sequins. I really didn’t know how this would turn out, but thought I’d give it a try.
The purse is only 8 inches long by 6-1/2 inches wide and I was able to use embellishments I already had. I used the pink fabric (doubled because it was very thin) that I hand sewed in a pocket style, two strips of black lacey trim that I also sewed on, small black sequins on a single strand to make the abstract Eiffel Tower, and a very light lacey black trim for the very bottom edge of the purse. For the handle I used a 22 gauge wire, two pieces of black velour (from a roll) that I sewed in a tube (then turned inside out), and pink pearls from an old necklace.
I cut two small strips of pink fabric (2 inches by a half inch) to make two very little fabric loops. I sewed one fabric loop on the left, near the top and inside of the purse, and the other fabric loop on the right side. It was through these fabric loops that I would pass the wire end and curl it to seal it with pliers leaving the other wire end free. I passed one of two velour tubes through the wire, then the pearls, then the other velour tube. I then passed the other wire end through the little fabric loop and sealed it as well.
For a closure, I used a small snap on the inside top center of the purse, but I also embellished the outside center with one large black sequin (that has a hole on the top center) and then sewed on a pearl in front of the sequin (hole). I really loved the way this little purse turned out and although the Eiffel Tower is abstract, you can also make this purse and use a store bought applique for a more realistic look.
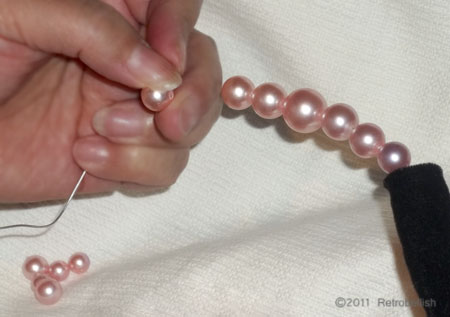
Beading The Wire Handle
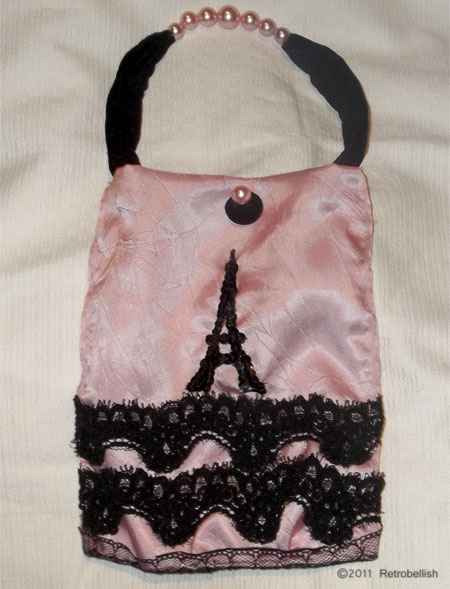
Reclaimed Fabric Paris Theme Purse
Reclaimed Fabric Red & Black Choker
The choker was made from a leftover red fabric strip of soft thick cotton and a stretchy black netting that I knitted. I knitted the two pieces (using size 8 knitting needles and size 3 crochet thread–12 stitches wide by 36 rows). Next I hand sewed the edges of the finished knitted piece at the edges stretching it as I sewed it across the face of the red fabric to make the stitches wider and show off more of the red fabric. I then sewed on a trim all the way across on both edges.
Separately, I sewed the same trim in little loops around the center so it looked like a flower. I then sewed three little red and black ceramic beads in the center of the flower. I then crocheted (using size E/4 crochet needle) two little squares as closures (using size 3 red crochet thread) and sewed a black button to one end and a little crocheted loop on the other end. I then sewed each red crocheted piece at each end of the choker.
Recently, I had made a black and gold striped cuff in a previous article and thought it would be a great idea to make a choker with other leftover fabric pieces and embellishments I already had.
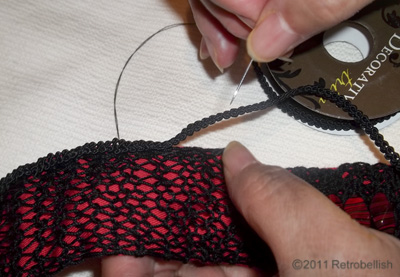
Sewing The Black Trim On the Finished Choker.
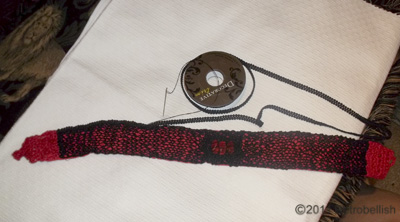
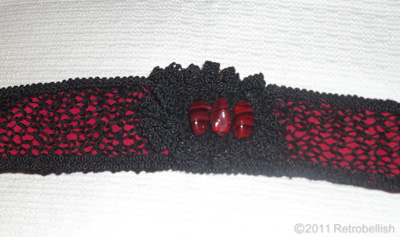
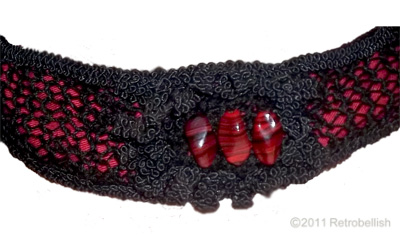
Reclaimed Fabric Red & Black Choker