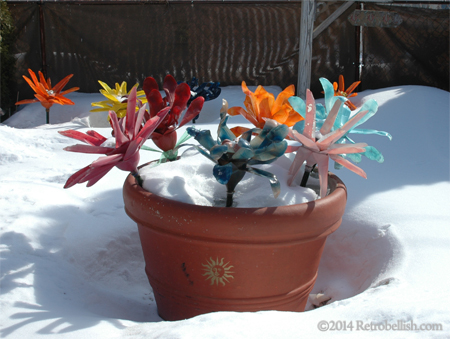
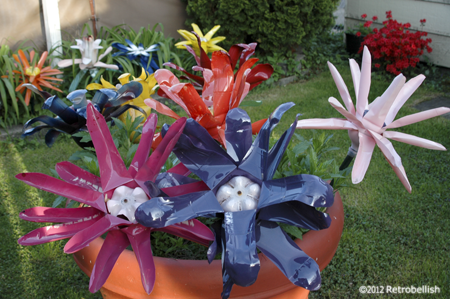
Plastic Soda Bottle Trash Art Flowers
This article “Plastic Bottle Trash Art Flowers” was previously Published April 22, 2012 By Diana Romaxx. Click Here For Article
As we described in the previous article (in link above), we left our flowers outside throughout the entire 2012 winter and because they were very sturdy and held up so well, we left them out again throughout the 2013 summer and winter. We’ve had a very long, cold and snowy winter, yet these beautiful recycled plastic bottle flowers have again provided us with a beautiful colorful garden all winter long.
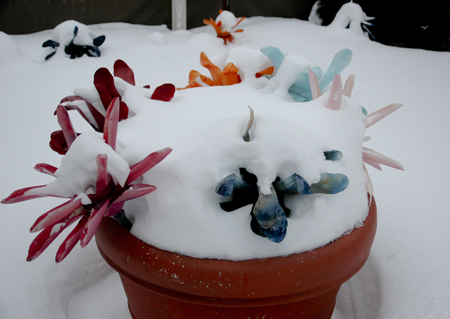
All the beautiful flowers retained their vibrant color, were beautiful to look at against the white snow all winter long. Not only is recycling great for our environment, but it is also a fun way to craft with family and friends. These were just some of the reasons that we decided to re-post this again, and also because of the warmth and cheerfulness these flowers provided us with over this long Chicago winter, which is not yet over.
Retrobellish Fashion Accessories
These are some of our previous reclaimed fabric projects about fashion accessories. Click on the pictures to read the whole articles. Reclaimed Fabric Red & Black Choker
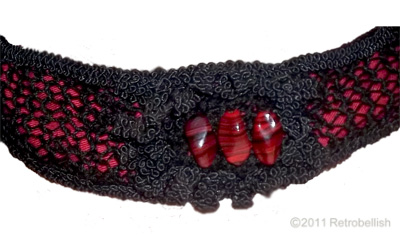
The choker was made from a leftover red fabric strip of soft thick cotton and a stretchy black netting that I knitted. I knitted the two pieces (using size 8 knitting needles and size 3 crochet thread–12 stitches wide by 36 rows). Next I hand sewed the edges of the finished knitted piece at the edges stretching it as I sewed it across the face of the red fabric to make the stitches wider and show off more of the red fabric. I then sewed on a trim all the way across on both edges.
Wearing Finished Beaded Fabric Cuff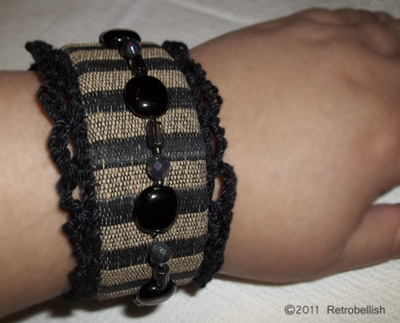
The finished cuff measured approximately 2 inches wide by 10 inches long. For fabric support, I used a 1/8 inch thick interfacing about a ¼ inch smaller than the fabric’s measurements. I wrapped the fabric around the interfacing and hand sewed the fabric with the seam in the back. I also sewed a small piece of solid black fabric over the seam in the back of the cuff to hide the seam and used a small black snap for the cuff’s closure.
Finished Denim, Lace and Pearl Pin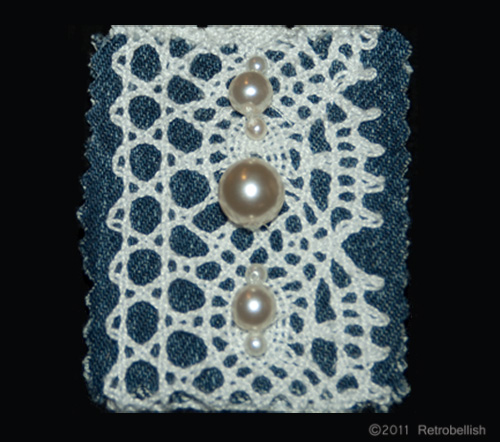
Recycling even the small scrap pieces of fabrics leftover from other projects could produce little fun pieces such as embellishments for other projects. I have a nice casual denim jacket that has an outside left breast pocket. The pocket is square in shape and I’ve always thought it would look nice with some kind of pin, but I didn’t like the look of any of the pins I have. I looked through my fabrics, trims and beads and combined a few things to see if I could make a pin for my jacket. I really liked the look of blue denim covered with a leftover piece of white lace trim. I looked through my beads and found some pretty white pearl beads of all different sizes. A few of the pearls looked nice over the white lace trim and both looked nice against the dark blue of the denim.
Reclaimed Retrobellish Purses
The following articles feature stylish purses made from reclaimed materials. These reclaimed purses were each featured blog posts in recent years. Each article describes the purse in an introductory paragraph followed by a link to the rest of the article including additional pictures.
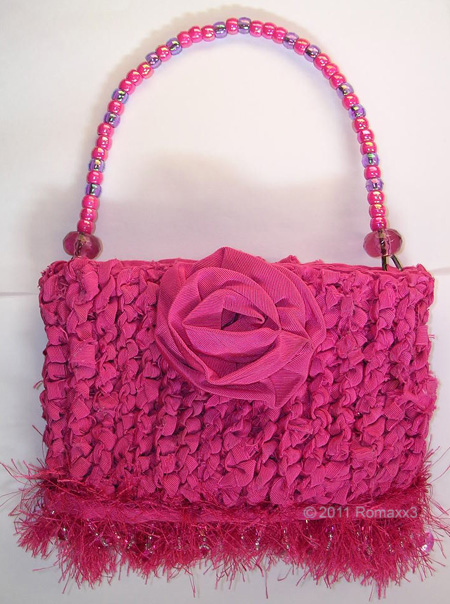
Make Your Own Recycled Fabric Knitted PurseIt all started when I watched a craft show about knitting with fabric. The show featured a lady who sewed a simple summer dress in a smooth beautiful floral colored cotton fabric. The beautiful summer dress had an empire waistline, and although the top portion of the dress was fashioned in a tube top style, it had the most beautiful braided-like texture, and it tied at the shoulders with thin straps. The lady explained that she had created this beautiful texture by knitting it with strips created from the same floral fabric. I couldn’t believe how beautiful the dress looked. I immediately knew that I wanted to try this technique, although it would probably be on a smaller scale, and I came up with the idea of a small knitted purse.
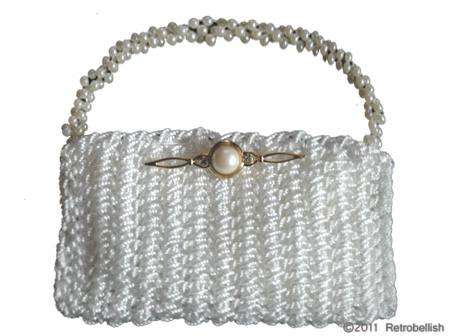
White Crocheted Pearl Purse
Just when I thought I couldn’t find any other type of fiber thread to crochet with, I found this Twisted Mason’s String Line in many colors at our local home improvement store. One of the pros I liked about this nylon string is that it’s very strong and lends itself to making very strong crochet pieces such as purses and straps. Other great qualities about this string is that it’s so soft to the touch and crocheting with it creates a great thick texture and an incredible satin sheen. It’s also waterproof.
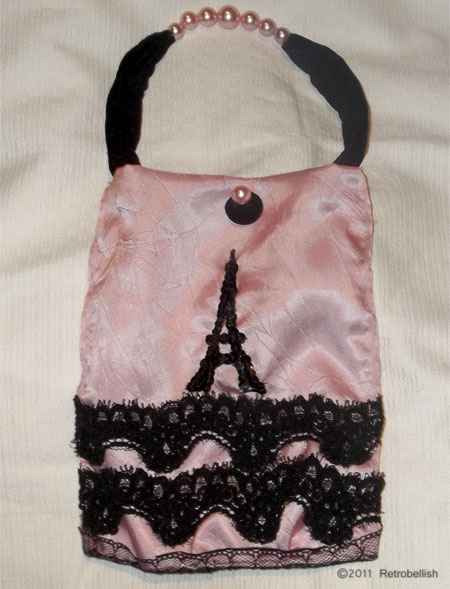
Reclaimed Fabric Paris Theme Purse
This small evening purse was made from the reclaimed fabric of a bridesmaid dress that I know I’ll never wear again. In the past, I’ve donated bridesmaid dresses, but there were only a few that I just couldn’t part with because the dress fabric was so beautiful. I saved these dresses, took my time taking them apart, saving the zippers, buttons and fabrics. As a big fan of all things Paris, I decided that I would use this beautiful pink silky fabric to make a Paris themed purse. The first thing that came to mind was the Eiffel Tower, so I decided to make an Eiffel Tower of sequins. I really didn’t know how this would turn out, but thought I’d give it a try.
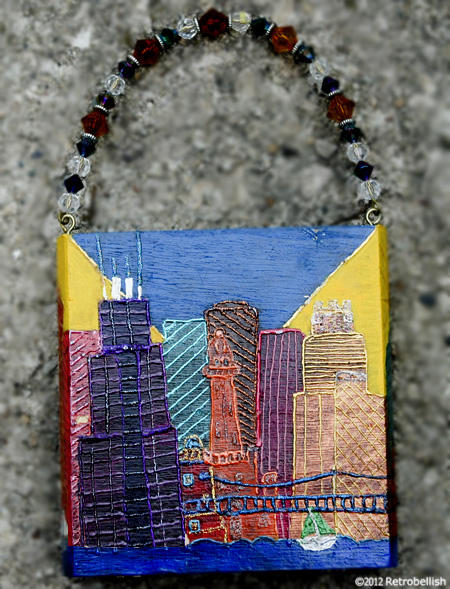
Cigar Box Folk Art Purse
Cigar box purses were once very popular and a great way to reuse these great boxes made out of wood or chipboard that could be used for a multitude of craft projects from jewelery boxes to purses. We used some of these for a lot of our folk art projects where we painted city and farm scenes on the boxes. The box featured here is an abstract rendition of our city of Chicago’s famous landmarks. And although this purse was used as folk art, some of our other pieces were functional purses lined inside with velour fabric and a small mirror.
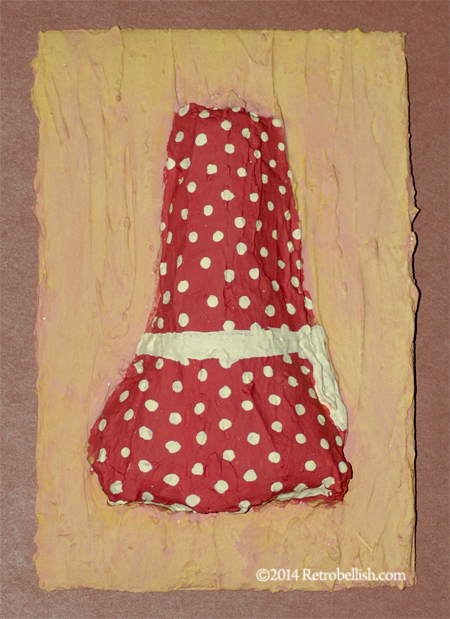
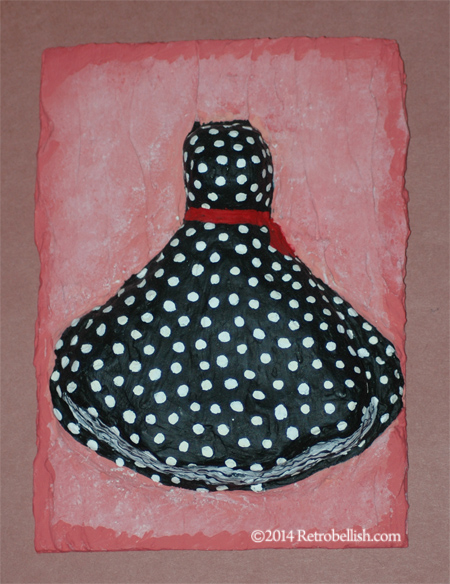
Plaster Art Dresses

These dresses are all made of reclaimed cardboard, recycled paper, and then covered with wall plaster. I start by picking out a reclaimed cardboard base and cutting it into a square or rectangular shape (approximately 4″ x 5″). I then crumple many pieces of recycled paper into small different sized shapes. Next, the paper shapes need to be glued down onto the cardboard base and it’s at this point that I try forming the dress shape by gluing the pieces onto the cardboard base. The paper shapes should not have too many gaps in between because the wall plaster is what will give the dress texture. Once the glued paper shapes are completely dry, I start spreading a thin coat of wall plaster over all of the glued paper pieces and background. I usually let the plaster coating completely dry overnight. I chose to give these pieces an abstract look (using a small plastic knife to spread the plaster), but it’s at this point that you could add as much or as little detail over the entire piece.
Because many of the steps involved in making these pieces is time consuming, I try to make many pieces at one time. Another fun part of the process that I enjoy is painting the dresses. I try to imagine the colors and details on these dresses and many times the outcome of the dress will change my mind to a different color I didn’t even think of before I started.
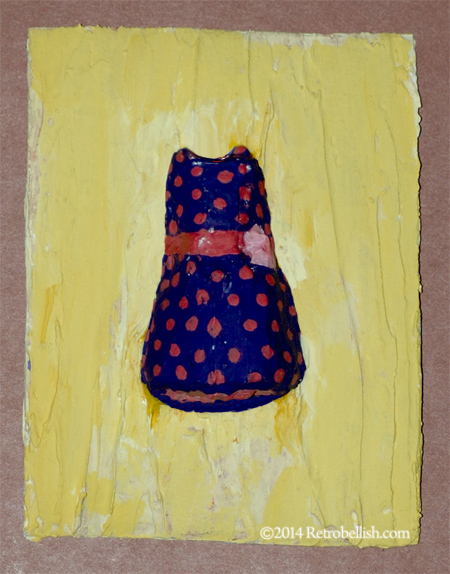
Other times, I’ll pick out colors and not know what patterns I’ll end up painting on these dresses. I enjoy the process very much and have a lot of fun. So the sky is the limit as to the themes you can make – be it flowers, animals or dresses. Just have fun creating your own designs and enjoy!
Other Examples Could also be Seen Here
Reclaimed Fabric Mini Doll Dresses
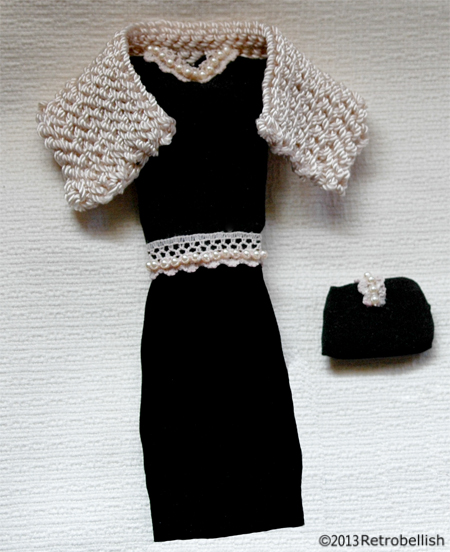
I was going through my fabric remnant box and found some very pretty small swatches that would make very pretty doll clothing. The black fabric had a nice draping quality to make a doll size little black dress. The bright pink satin fabric swatch was a bit larger so it lent itself for making a doll size fancy ball gown. Both fabric swatches were from old dresses of mine that I thought I’d one day use to make a scarf or other accessory.
I had a very pretty old doll and I thought it would be nice to make two new dresses for the doll. I held the fabric against the doll and determined that there was enough fabric to make both dresses. I used some scrap paper, traced and measured the doll’s current dress and added a 1/8″ seam allowance. I cut out the pattern, making adjustments and pinned the pattern to the fabrics. After cutting out both fabrics, I machine sewed the main segments, and preferred to hand sew the rest of the smaller pieces together.
In a small box of my remnant trims, I found a pretty cream colored pearl trim that was small enough in scale to trim the black dress. I hand sewed the pearl trim around the waist and neckline of the little black dress. I had a bit of the black fabric left over so I sewed a little black purse by folding the fabric onto itself and hand sewing the edges. I then hand sewed a tiny little piece of pearl trim in the center of the purse.
Later, I found a small skein of silky cream colored yarn that matched the shade of the trim on the dress, so I decided to crochet a little shawl for the little black dress.
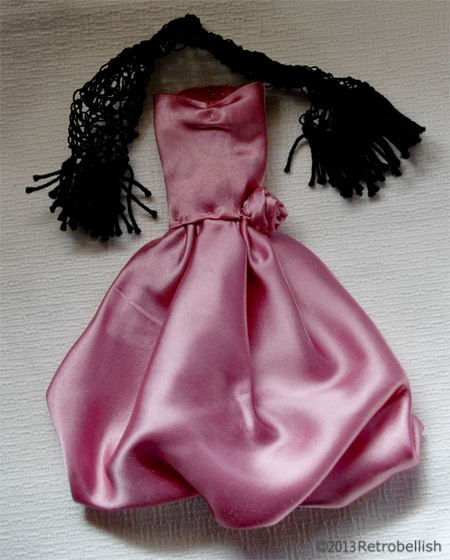
The pink dress was totally different in style but also fit the doll nicely. I also crocheted a small shawl for this dress using black embroidery floss, and although it took quite some time, I added a fringe to this tiny shawl using the same embroidery floss. So from time to time, take a look through your remnants and leftovers because they may surprise you and inspire a new creation.